

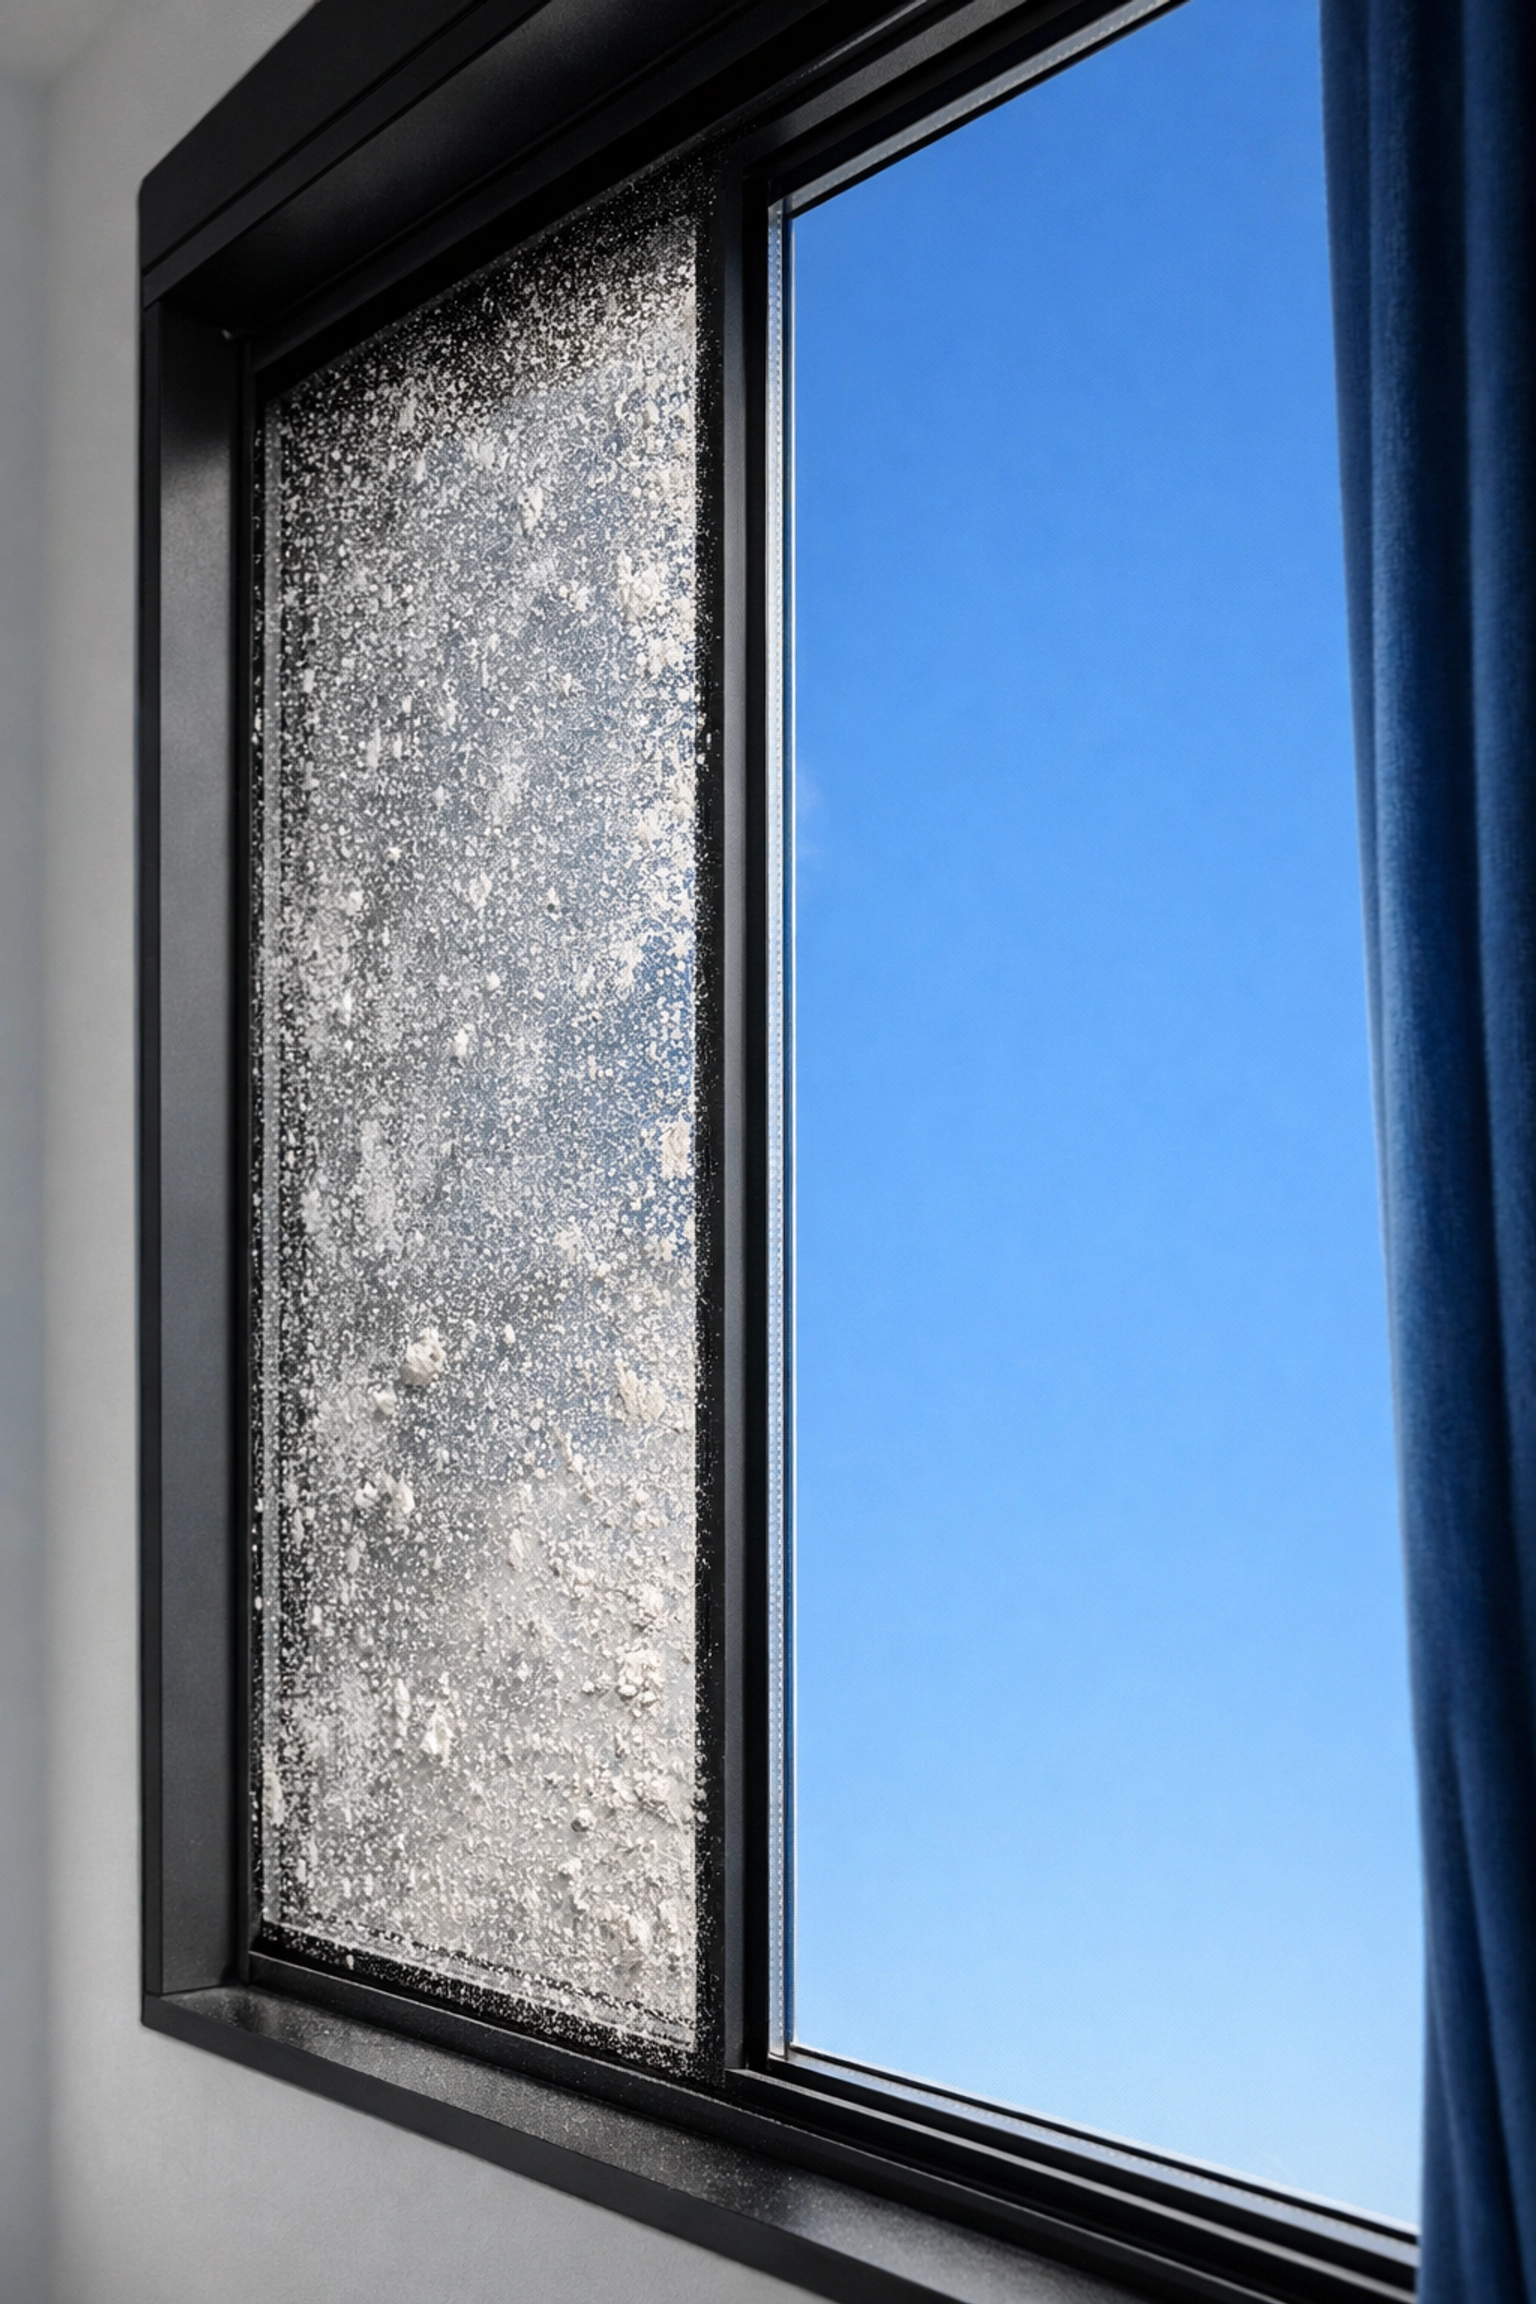
You’ve finally done it. The contractors have packed up their tools, the sawdust has (mostly) settled, and your home renovation is officially complete. It should be a moment of pure celebration, right? But then you look toward the light, and instead of a beautiful view of your backyard, you see a hazy, gritty mess covering your brand-new glass.
Post-construction windows are a completely different beast than your standard spring cleaning job. We aren't just dealing with a little bit of pollen or a few finger smudges from the kids. We are dealing with "the big three": abrasive silica dust, stubborn adhesive residue from manufacturer stickers, and the dreaded paint overspray.
At The Cleaning Ninjas Inc, we approach post-construction cleaning like a mission. It requires precision, the right tools, and a strategy that protects your investment. If you jump in with a roll of paper towels and a spray bottle of blue liquid, you’re likely going to end up with permanent scratches or a smeared mess that looks worse than when you started.
In this guide, we’re sharing our internal "ninja secrets" for getting those windows so clear they look invisible: all while keeping things eco-friendly and efficient.
Why Post-Construction Dust is Different
Before we dive into the "how," we need to talk about the "what." Construction dust isn't just dirt; it’s often made of pulverized drywall, concrete, or stone. These particles are incredibly abrasive. If you take a dry cloth and start wiping, you are essentially using sandpaper on your glass.
This is why our first ninja rule is: Never dry-rub a post-construction window.
Furthermore, new windows often come with protective films or stickers that have been baked on by the sun during the weeks of construction. Removing these without leaving a sticky, dirt-attracting film is an art form in itself.
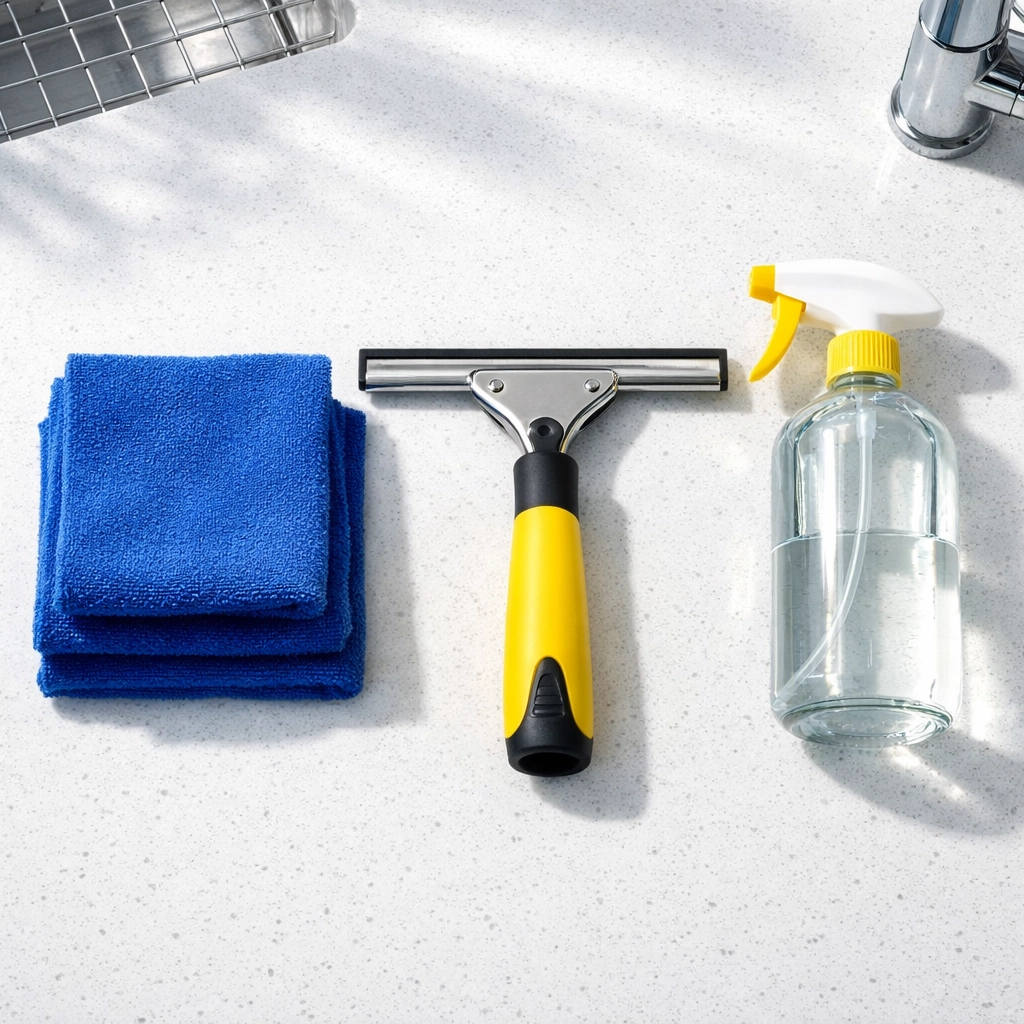
The Eco-Ninja Toolkit: What You’ll Need
To get professional results without the harsh chemical smells, we stick to a tried-and-true arsenal of eco-friendly supplies. Here is what you should have on hand:
- Distilled Water: Tap water contains minerals that leave behind those annoying white spots (limescale). Distilled water is a ninja’s best friend for a streak-free finish.
- White Vinegar: This is the ultimate natural degreaser and glass cleaner.
- Plant-Based Dish Soap: Just a single drop helps "lubricate" the glass so your tools glide smoothly.
- Microfiber Cloths: Forget paper towels. You need high-quality, high-GSM microfiber cloths that won't shed lint.
- A Professional Squeegee: If you want to move fast, you have to use a squeegee. Look for one with a replaceable rubber blade.
- Plastic Scrapers: We avoid metal blades whenever possible to prevent scratching. A stiff plastic scraper or even an old credit card can work wonders on sticker residue.
- A HEPA-Filter Vacuum: Essential for removing the heavy dust from the frames before you ever touch the glass.
Step 1: The "Dry Prep" (Crucial First Step)
Most people want to start spraying water immediately. Stop! A true cleaning ninja knows that adding water to heavy construction dust creates mud. Once that dust turns to mud, it gets trapped in the window seals and corners, making the job ten times harder.
Start by using your vacuum with a soft brush attachment. Run it along the top of the window frame, down the sides, and across the tracks. Get as much of that loose drywall dust out of the way as possible. This prevents the dust from "bleeding" back onto your clean glass later in the process.
Step 2: Conquering Sticker Residue and Paint
Once the loose dust is gone, it’s time to tackle the "sticky situations." New windows are usually covered in labels. If the stickers are still there, peel them off slowly. If they break or leave behind adhesive, don't reach for harsh chemicals.
The Ninja Tip: Use a tiny bit of vegetable oil or a dedicated eco-solvent on a cloth. Let it sit on the adhesive for about five minutes. This softens the glue, allowing you to gently slide it off with your plastic scraper.
For paint overspray, the key is moisture. If you keep the glass lubricated with your cleaning solution, small paint flecks can often be nudged off with a fingernail or a plastic edge without leaving a mark.
Step 3: The Secret Streak-Free Formula
Forget the store-bought stuff. We prefer a solution that is safe for your family, your pets, and the environment.
The Ninja Window Brew:
- 2 cups of distilled water
- 1/2 cup of white vinegar
- 1 drop of eco-friendly dish soap
Mix this in a clean spray bottle. The vinegar cuts through the film left behind by construction materials, and the single drop of soap breaks the surface tension of the water so it doesn't bead up.
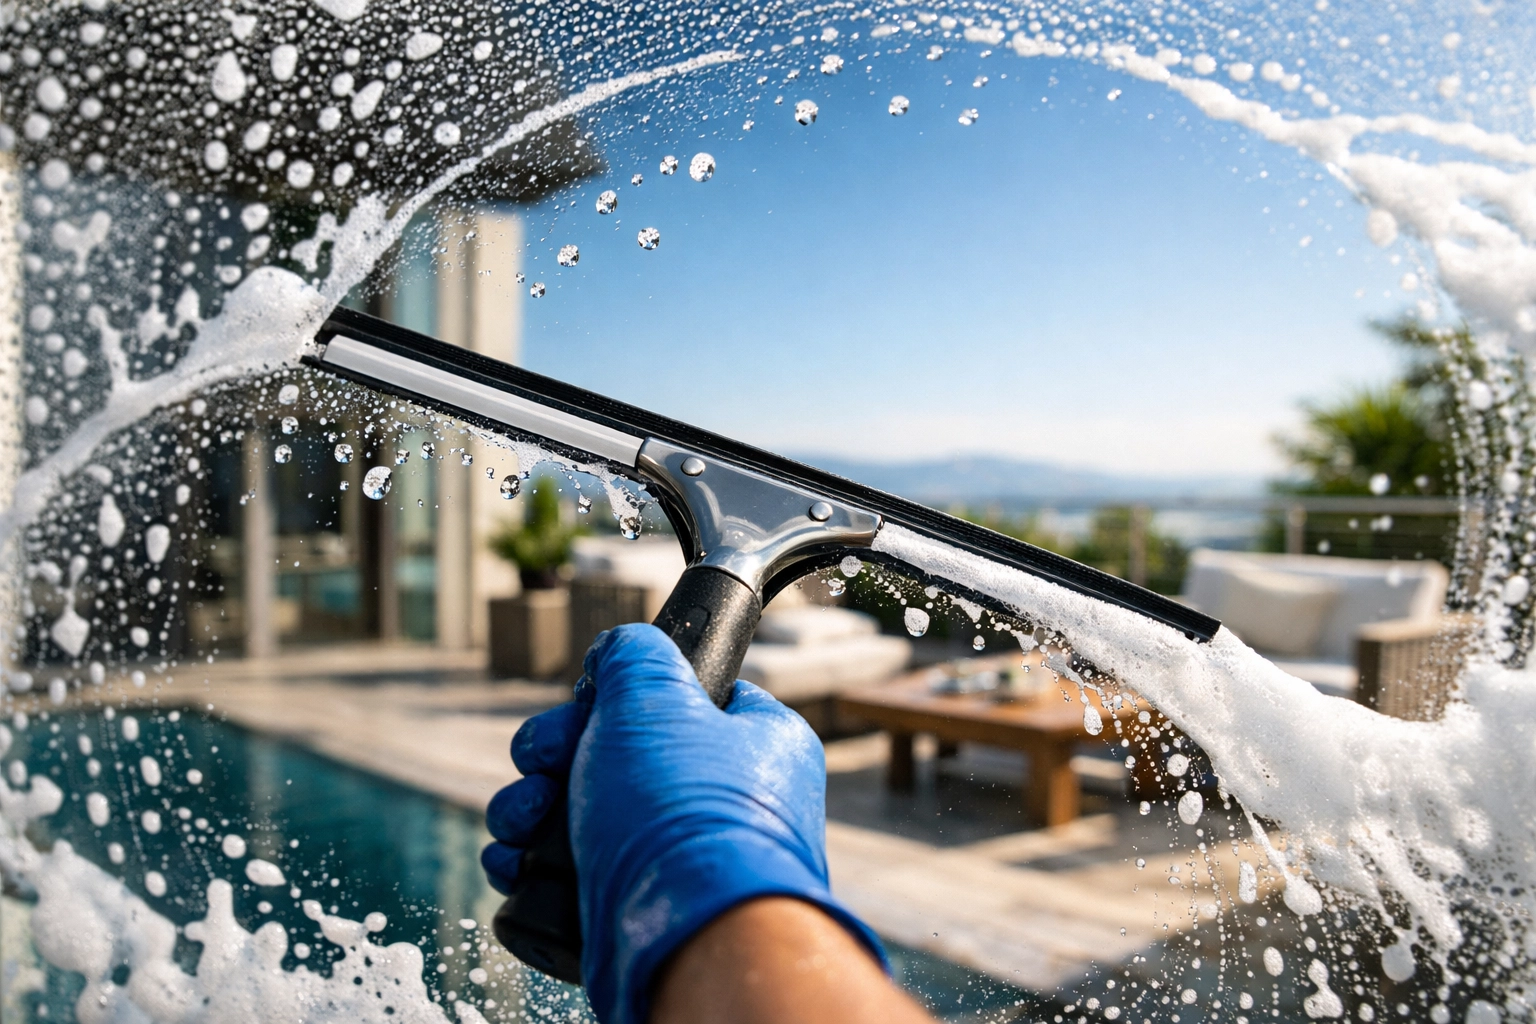
Step 4: The Ninja Wash and Squeegee Technique
Now we get to the satisfying part. Spray your solution generously onto the glass. You want the glass to be wet enough that the dirt is "floating" off the surface.
- Agitate: Use a dedicated microfiber scrubber or a clean cloth to gently work the solution into the glass in a circular motion.
- The Squeegee Move: Start at the top left corner. Pull the squeegee straight across to the right. Wipe the blade with a clean, dry cloth.
- The "S" Pattern: For larger windows, professionals use a continuous "S" motion to lead the water down the pane. If you aren't comfortable with that yet, stick to straight vertical or horizontal pulls, overlapping each stroke by about an inch.
- The Wipe: After every single stroke, wipe your squeegee blade. This is the most important part! A wet blade causes streaks.
Step 5: Detailing the Frames
Even if the glass is perfect, the window will look "off" if the frames are still dusty. Use a fresh, damp microfiber cloth to wipe down the sills and the frames.
Pro Tip: Pay special attention to the window tracks. Construction debris loves to hide in the tracks of sliding windows. If left there, it can actually damage the rollers over time. A clean track is the hallmark of a Post-Construction Cleaning job done right.
Why Speed and Efficiency Matter
When you are cleaning an entire house after a renovation, you can't afford to spend two hours on a single window. That’s why we emphasize "Ninja-like efficiency." By following a systematic approach: Vacuum, Treat Residue, Wash, Squeegee, Detail: you create a rhythm.
In our professional teams, we often work in pairs. One person handles the heavy "pre-scrub" and residue removal, while the second person follows behind with the squeegee and final polish. This division of labor ensures that the cleaning solution doesn't dry on the glass before it can be squeegeed off, which is a major cause of hazing.

Common Mistakes to Avoid
- Cleaning in Direct Sunlight: If the sun is beating down on the glass, your cleaning solution will evaporate almost instantly, leaving behind streaks and soap film. Always try to clean the windows on the shaded side of the house first.
- Using Dirty Cloths: If you see streaks appearing, your cloth is likely saturated with construction dust. Switch to a fresh one immediately. We go through dozens of cloths on a single post-construction job.
- Ignoring the Screens: If you put dusty screens back onto clean windows, the first rain will wash all that dust right back onto your beautiful glass. Give the screens a quick rinse and dry before reinstalling them.
The Cleaning Ninjas Difference
We know that after a long renovation, the last thing you want to do is spend your weekend on a ladder fighting with drywall dust. It’s exhausting work that requires a lot of "up and down," and if you don't have the right tools, it can be incredibly frustrating.
At The Cleaning Ninjas Inc, we specialize in taking that burden off your shoulders. We bring the high-end HEPA vacuums, the eco-friendly solutions, and the specialized techniques to make sure your new home shines exactly the way you imagined it when you started the project.
If you’re interested in learning more about how we can help you cross the finish line of your renovation, check out our About Us page to meet the team. We pride ourselves on being fast, thorough, and friendly: just like a ninja should be!
Final Thoughts
Streak-free windows are the "exclamation point" on a renovation project. They open up the space, bring in the light, and make everything feel truly new. By using distilled water, vinegar, and a little bit of squeegee discipline, you can achieve professional-level results on your own.
But remember: stay safe! If you have high, hard-to-reach windows, don't risk a fall. Some missions are best left to the pros.
Happy cleaning, and enjoy your beautiful, dust-free view!


