Last Updated on 03/31/2026 by thecleaningninjas.com
Let’s be honest for a second: the inside of your microwave probably looks like a Jackson Pollock painting made of spaghetti sauce and mystery leftovers. We’ve all been there. You put a bowl of chili in for "just two minutes," hear a muffled pop, and decide that cleaning it is a problem for Future You. Well, today is the day Future You finally takes a stand.
At The Cleaning Ninjas Inc, we’ve seen some things. From fossilized oatmeal to what we can only assume was once a plate of nachos, the microwave is often the most neglected appliance in the kitchen. But here’s the good news: you don’t need to spend an hour scrubbing until your arm falls off. You just need a little "Ninja Magic", otherwise known as the steam trick.
In this edition of our House Cleaning series, we’re breaking down the easiest, fastest, and most satisfying way to get your microwave back to its showroom glory using nothing but a few pantry staples.
Why Steam is Your Best Friend
Before we get into the "how," let’s talk about the "why." Why is steam so much better than spraying a bunch of harsh chemicals into the place where you heat up your food?
Most microwave messes are caused by dehydration. When food splatters, the microwave sucks the moisture out of it, essentially turning that drop of marinara into a piece of reinforced concrete. If you try to scrub it off dry, you’re going to be there for a while, and you might even scratch the interior surface of the appliance.
Steam works by reintroducing that moisture. It penetrates the hardened layers of grime, softening them from the inside out. By the time the steam is done doing its thing, that "concrete" has turned back into a soft residue that slides off with a single swipe. It’s efficient, it’s eco-friendly, and it’s deeply satisfying.

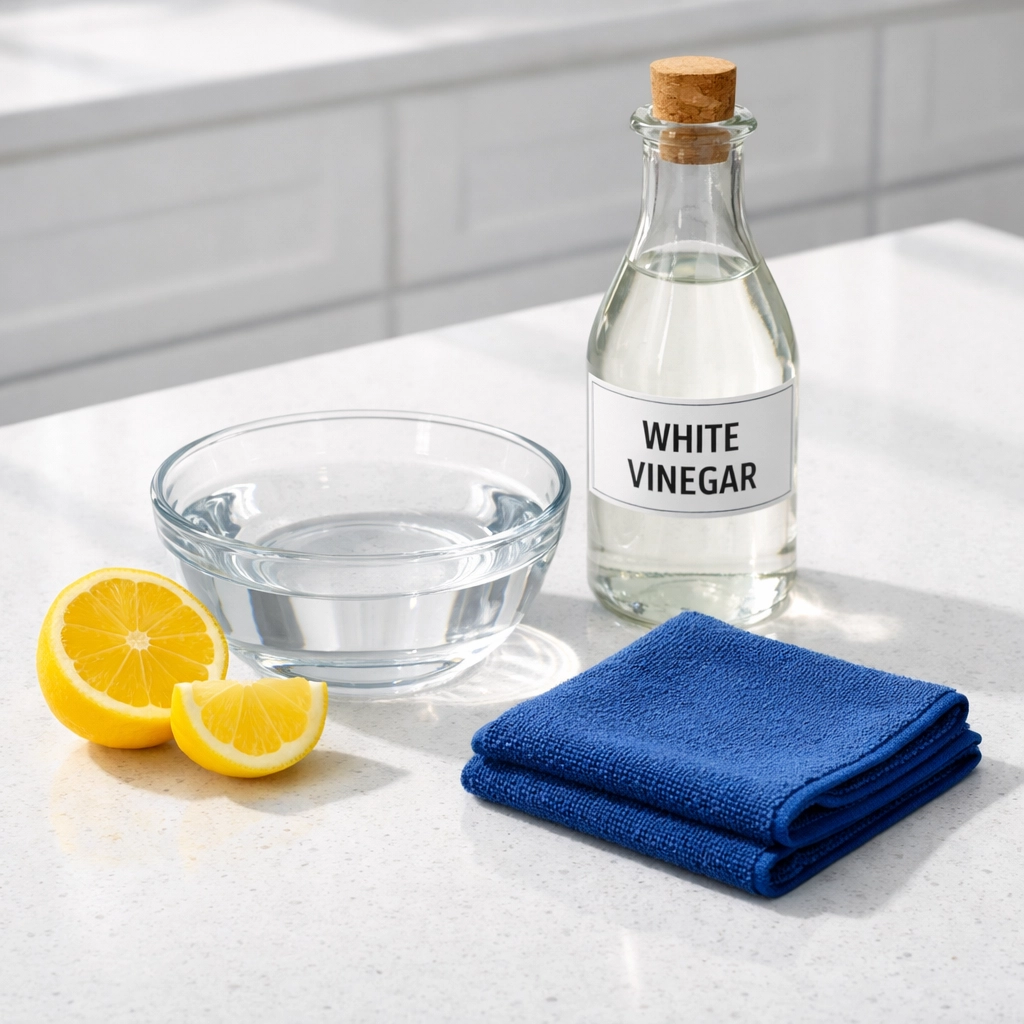
The Ninja Supply List
You don’t need a specialized kit for this. In fact, you probably have everything you need sitting in your kitchen right now.
- A Microwave-Safe Bowl: Glass or ceramic works best. Avoid anything with metal trim or thin plastic that might warp.
- Water: About 1 to 2 cups.
- White Vinegar: The MVP of natural cleaning. (Don’t worry, the smell doesn’t last!)
- A Wooden Spoon or Toothpick: This is a pro-level safety tip.
- A Lemon (Optional): For that "just cleaned" fresh scent.
- Microfiber Cloths: The preferred tool of any professional Cleaning Ninja.
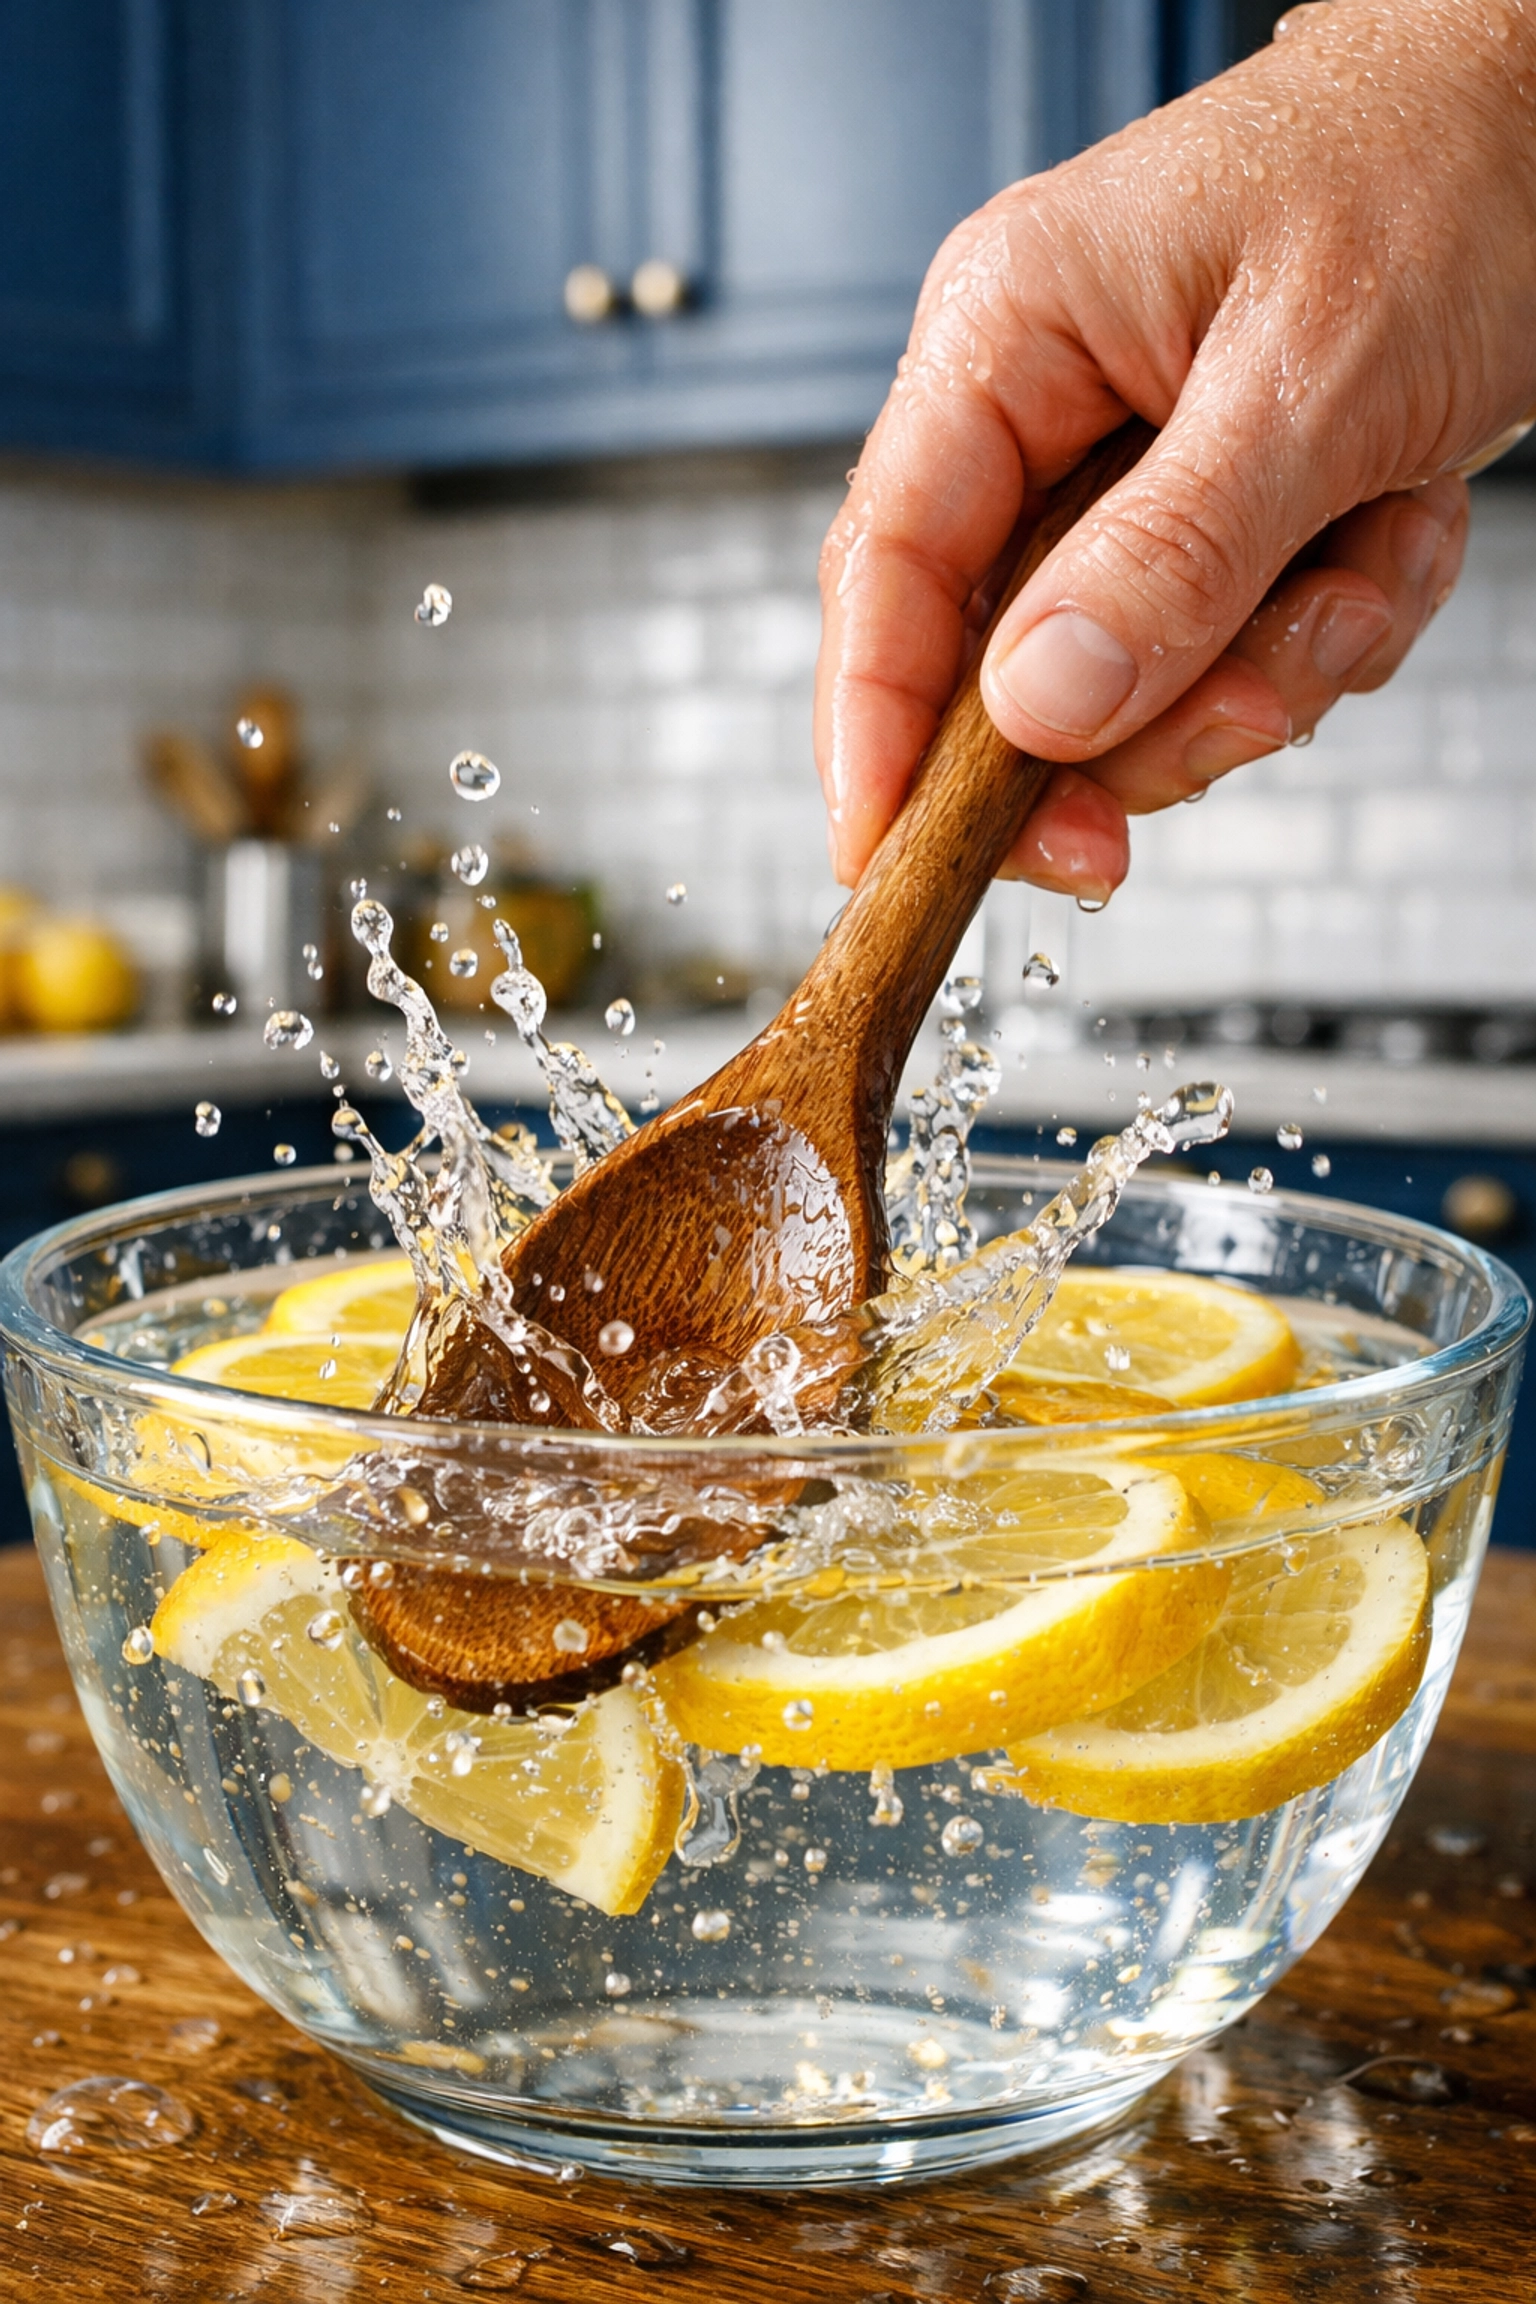
Step 1: The Secret Mixture
Start by filling your microwave-safe bowl with equal parts water and white vinegar. If your microwave is particularly offensive, we’re talking "haven’t cleaned it since the 2024 Olympics" levels of grime, you can go a bit heavier on the vinegar. Generally, one cup of each is the sweet spot.
Ninja Pro Tip: To prevent the liquid from "superheating" (where it gets past the boiling point but doesn't bubble, then suddenly explodes when you move it), drop a wooden toothpick or a wooden skewer into the bowl. The wood provides "nucleation sites" for bubbles to form, keeping the process safe and predictable.
If you aren't a fan of the smell of vinegar, slice a lemon in half and squeeze the juice into the mixture, then toss the rinds right into the bowl. Not only does the citric acid help cut through grease, but it also makes your kitchen smell like a citrus grove instead of a fish and chip shop.
Step 2: Let It Cook
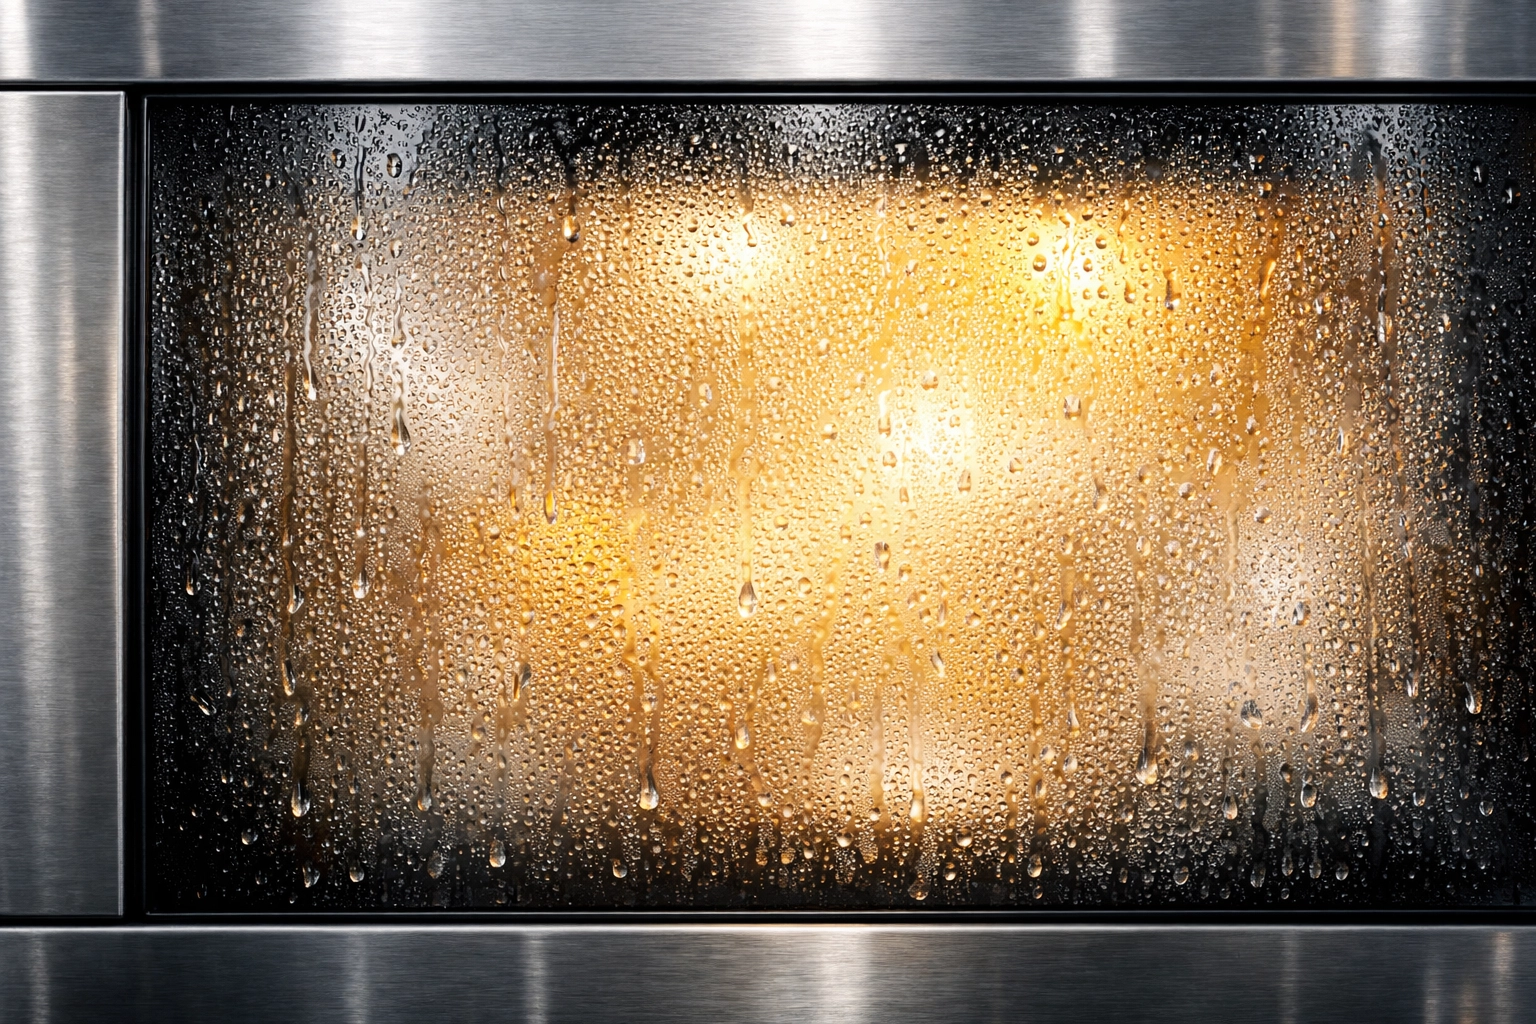
Place the bowl in the center of the turntable and shut the door. Set your microwave to high power.
How long?
- For light cleaning: 3 to 5 minutes.
- For "Whoops, I exploded a burrito" cleaning: 8 to 10 minutes.
You want to see the window get completely fogged up. That’s the steam doing the heavy lifting for you. Once the timer beeps, do not open the door. This is the most important step in the entire process.
Step 3: The "Ninja Wait"
Patience is a virtue, especially in the world of professional cleaning. Let the bowl sit inside the closed microwave for at least 5 minutes (10 is even better). This allows the steam to really settle into every nook and cranny, loosening the grip of those stubborn food particles on the ceiling and walls of the microwave.
Think of it like a spa day for your appliance. It’s relaxing, it’s steamy, and it’s doing all the work so you don’t have to.
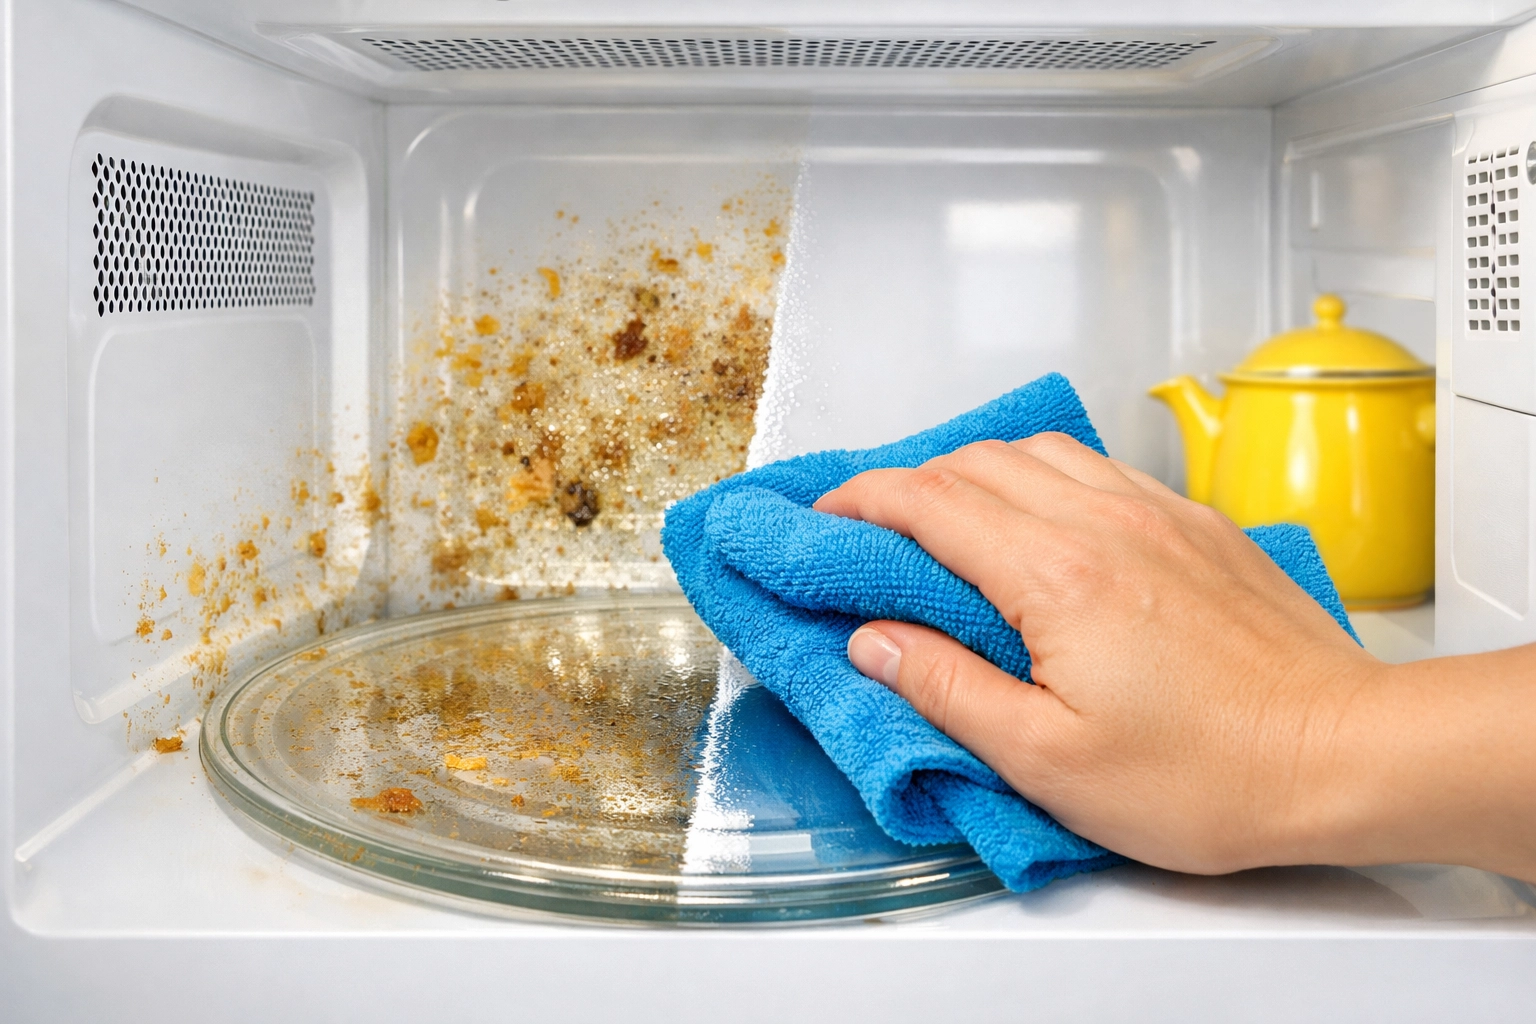
Step 4: The Great Wipe-Down
Carefully open the door. Be cautious: the bowl and the liquid inside will be extremely hot! Use oven mitts or a thick towel to remove the bowl and the turntable.
Now for the magic part. Take a damp microfiber cloth or a sponge and wipe the interior. You’ll find that even the crustiest spots should slide right off. Start with the ceiling (where the most hidden splashes live), move to the side walls, and finish with the bottom.
If you encounter a particularly stubborn spot that refuses to budge, dip the corner of your cloth directly into the hot vinegar-water solution and give it a little extra attention. For the truly impossible bits, a plastic scraper or even the edge of an old credit card can help flick them off without damaging the finish.
Step 5: Don’t Forget the Turntable and the Door
Since you’ve already removed the turntable, take it over to the sink. Wash it with warm, soapy water just like a regular dinner plate. Most are dishwasher safe, too, if you’re feeling extra lazy (we won’t tell).
Before you put everything back together, take a look at the door. The rubber seal around the edge of the microwave door often collects crumbs and grease, which can eventually prevent a proper seal. Wipe this down thoroughly.
Finally, give the exterior a quick once-over. Use a fresh cloth to wipe down the handle and the keypad. These are high-touch areas that can harbor a surprising amount of bacteria. A clean keypad makes the whole kitchen feel brighter!
Keeping it Clean: A Ninja’s Advice
Now that your microwave is sparkling, how do you keep it that way?
- The Cover-Up: Invest in a microwave plate cover. It’s a cheap plastic lid that prevents splatters from hitting the walls in the first place.
- The Immediate Wipe: If you see a splatter happen, wipe it up while it’s still wet. It takes five seconds now vs. ten minutes of steaming later.
- Regular Maintenance: Incorporate this steam trick into your weekly house cleaning routine. If you do it once a week, you’ll only need to run the steam for two minutes, and the wipe-down will take seconds.
When You Need More Than a Steam Trick
We know that life gets busy. Sometimes the microwave is the least of your worries when the rest of the house feels like it’s closing in on you. Whether you’re juggling a full-time job, kids, or just a very active social life, keeping a home "Ninja-clean" is a big task.
That’s where we come in. At The Cleaning Ninjas Inc, we specialize in taking the stress out of home maintenance. From weekly house cleaning to deep dives into every corner of your kitchen, our professional team is here to help. We don’t just clean; we give you your time back.
If you’re in Massachusetts and looking for a team that treats your home with the precision of a ninja and the friendliness of a neighbor, check out our services. Whether it’s a residential refresh or professional office cleaning, we’ve got the tools and the talent to make your space shine.
Final Thoughts
Cleaning your microwave doesn't have to be a chore you dread. With the power of steam and a little bit of vinegar, you can transform a "disaster zone" into a "sanitary zone" in under fifteen minutes. It’s a simple win that makes your kitchen feel instantly better.
So, go ahead: grab a bowl, find a lemon, and give that microwave the spa treatment it deserves. Your next bowl of popcorn will taste much better knowing it didn't have to compete with the ghost of last month's lasagna!
Stay tuned for more Ninja Tips to keep your home looking its best without breaking a sweat. Happy cleaning!