

You’ve finally done it. The contractors have packed up their tools, the new kitchen island looks stunning, and that addition to the back of the house is exactly what you dreamed of. But as the dust literally settles, you realize there is a fine, white powder covering every single surface of your home. It’s in the cabinets, on top of the door frames, and somehow even inside your dresser drawers in the next room over.
Post-construction dust is a different beast entirely. It isn't your standard household "fluff." It’s composed of drywall particles, wood shavings, concrete silica, and sawdust. It’s heavy, it’s invasive, and if you don’t tackle it with a plan, you’ll be cleaning it for the next six months.
At The Cleaning Ninjas Inc, we’ve seen it all. We know that the key to a successful post-construction cleaning isn’t just about working hard: it’s about working smart. That’s why we live by the "Top-Down" method. It’s the ultimate ninja strategy for efficiency, ensuring you aren't just moving dust from one spot to another.
Why Gravity is Your Greatest Ally (or Your Worst Enemy)
If there is one rule of physics that every cleaner needs to respect, it’s gravity. Dust falls. It seems obvious, but you’d be surprised how many people start their cleaning by mopping the floors because "they look the dirtiest."
Here is what happens when you clean the floors first: You spend an hour getting those hardwoods to shine. Then, you move to the ceiling fans. As you wipe the blades, all that fine construction dust falls directly onto your freshly mopped floor. Now you have to do the floors again. That’s not being a ninja; that’s just extra work.
The Top-Down method is exactly what it sounds like. You start at the highest point in the room: usually the ceiling or the crown molding: and work your way down to the floor. This ensures that any dust disturbed in the upper levels falls onto surfaces that haven't been cleaned yet. By the time you reach the floor, you’re performing the final "capture" of all the debris that has drifted down during the process.
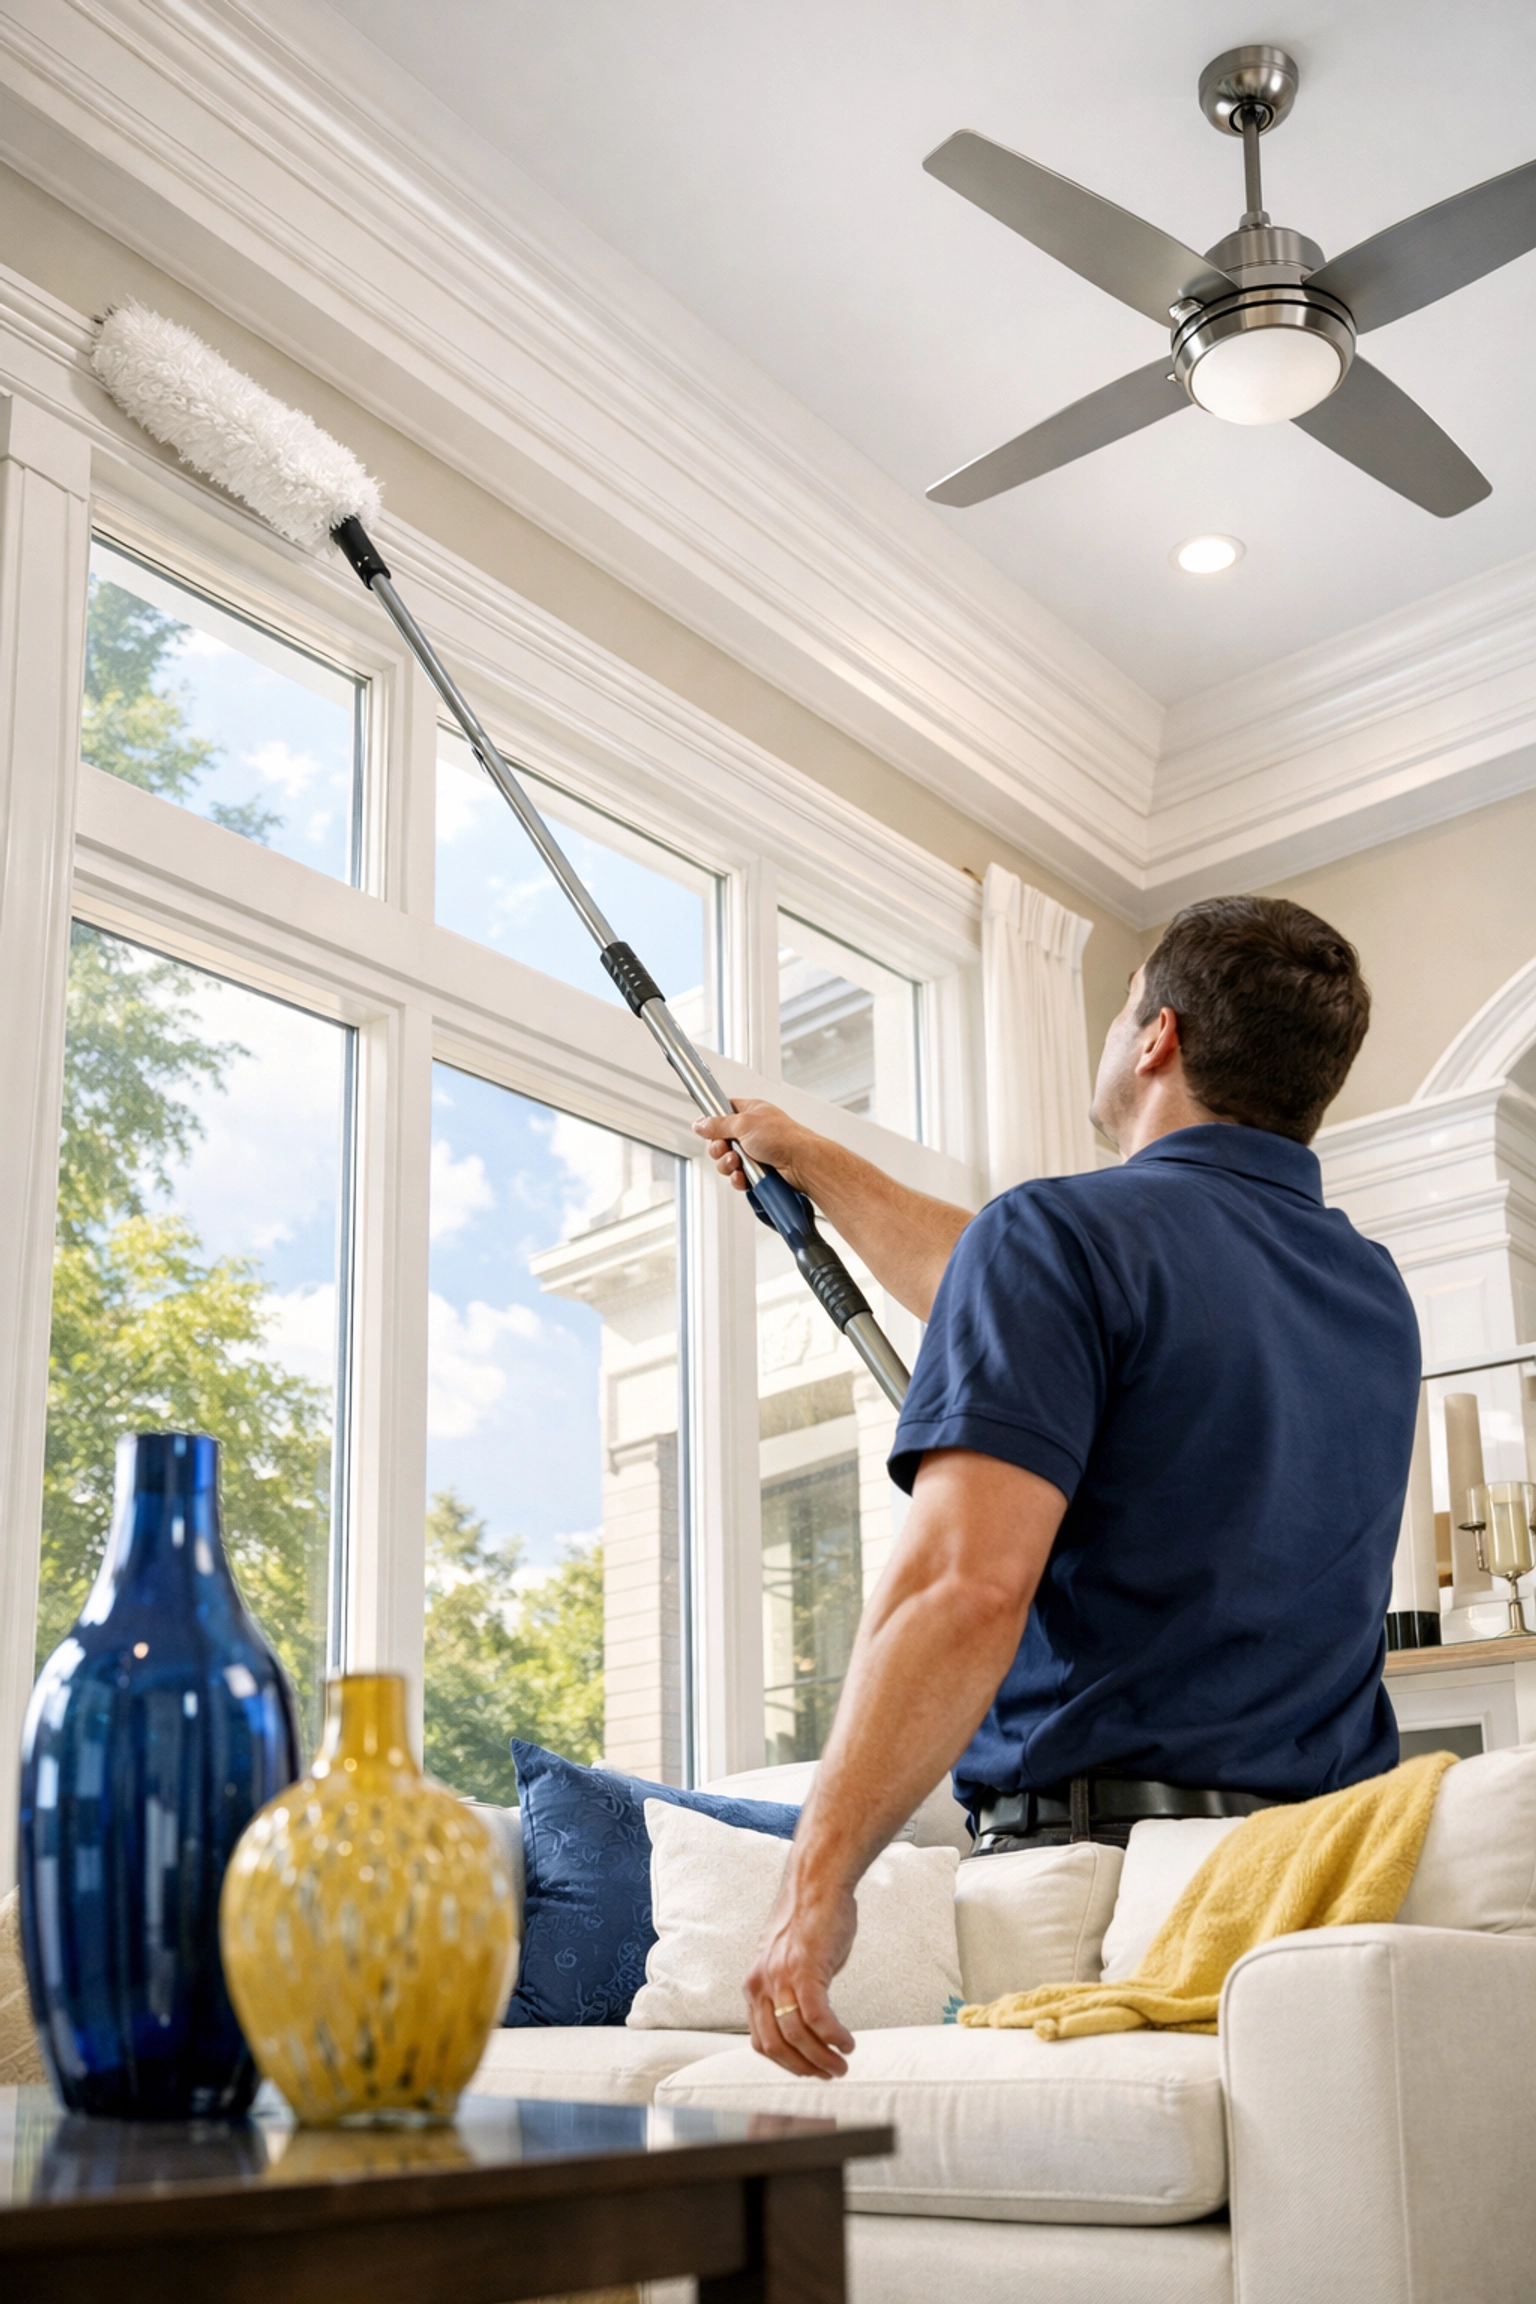
Phase 1: The High-Altitude Blitz
The first step in our ninja method is addressing the areas people often forget. In a post-construction environment, dust hangs in the air and clings to vertical and high-horizontal surfaces thanks to static and airflow.
- Ceiling Fans and Light Fixtures: These are massive dust magnets. Construction dust loves to sit on the top of fan blades. Use a microfiber cloth or an extension duster to trap the dust rather than just flicking it into the air.
- Crown Molding and Recessed Lighting: If you have decorative molding, the "ledge" is likely covered in white powder. Wipe these down thoroughly. For recessed lights, use a soft brush attachment on a vacuum to get into the crevices.
- Vents and Registers: This is a crucial step for your indoor air quality. Construction dust gets sucked into the HVAC system during the build. Wipe the exterior of the vents and, if possible, vacuum as far into the duct as you can reach. If you're interested in how this affects your home long-term, check out our post on how frequent cleaning improves indoor air quality.
- The Tops of Doors and Window Frames: This is the classic "hidden" dust spot. Run a damp microfiber cloth along the very top edge of every door and window frame in the room.
Phase 2: The Mid-Level Maneuvers
Once the "sky" of your room is clean, it’s time to move to the eye-level surfaces. This is where the bulk of the visible dust lives.
Walls are the Secret Culprit
Most people don't think they need to "wash" their walls, but after a renovation, your walls are likely covered in a fine layer of drywall dust. If you skip this, the dust will eventually slide down and settle on your baseboards and floors. We recommend using a flat microfiber mop on a long handle to "dry dust" the walls from top to bottom. It’s fast, efficient, and keeps you from having to climb a ladder.
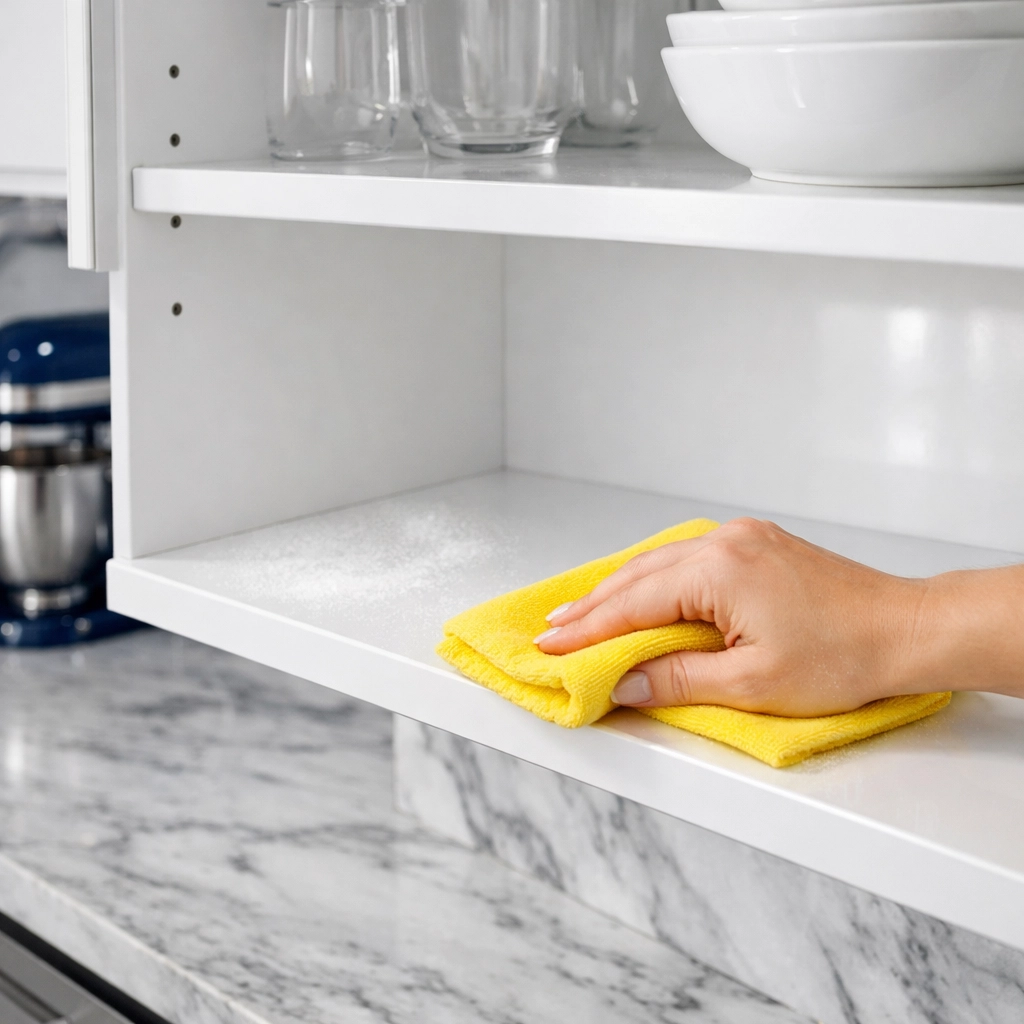
Inside the Cabinets
If you’ve had new cabinets installed, or if your old ones were exposed during the project, you need to clean inside them before putting your dishes back. Construction dust can find its way through the tiniest gaps. Vacuum the interiors first, then wipe them down with a damp cloth. This is a standard part of our professional cleaning services in Massachusetts.
Windows and Glass
Construction dust often contains grit that can scratch glass if you aren't careful. Start by vacuuming the window sills and tracks (where the heavy stuff accumulates). Then, use a wet-wipe method to remove the film before finishing with a glass cleaner for that ninja-level sparkle.
Phase 3: The Baseboards and Built-ins
Now that we’ve cleared the high and middle zones, we’re approaching the finish line. But don't grab the mop just yet. We need to handle the "landing pads" where the dust from the previous steps has settled.
- Countertops: Wipe these down using a circular motion, moving toward the floor.
- Light Switches and Outlets: These often get a "dust mustache" around the edges. Use a dry brush or a vacuum attachment to clear them out.
- Baseboards: This is the most tedious part of post-construction cleaning, but it makes the biggest difference. The "lip" of the baseboard catches everything. Use a damp cloth to wipe them down. If the dust is really thick, you might need to change your water frequently to avoid just spreading a muddy film.
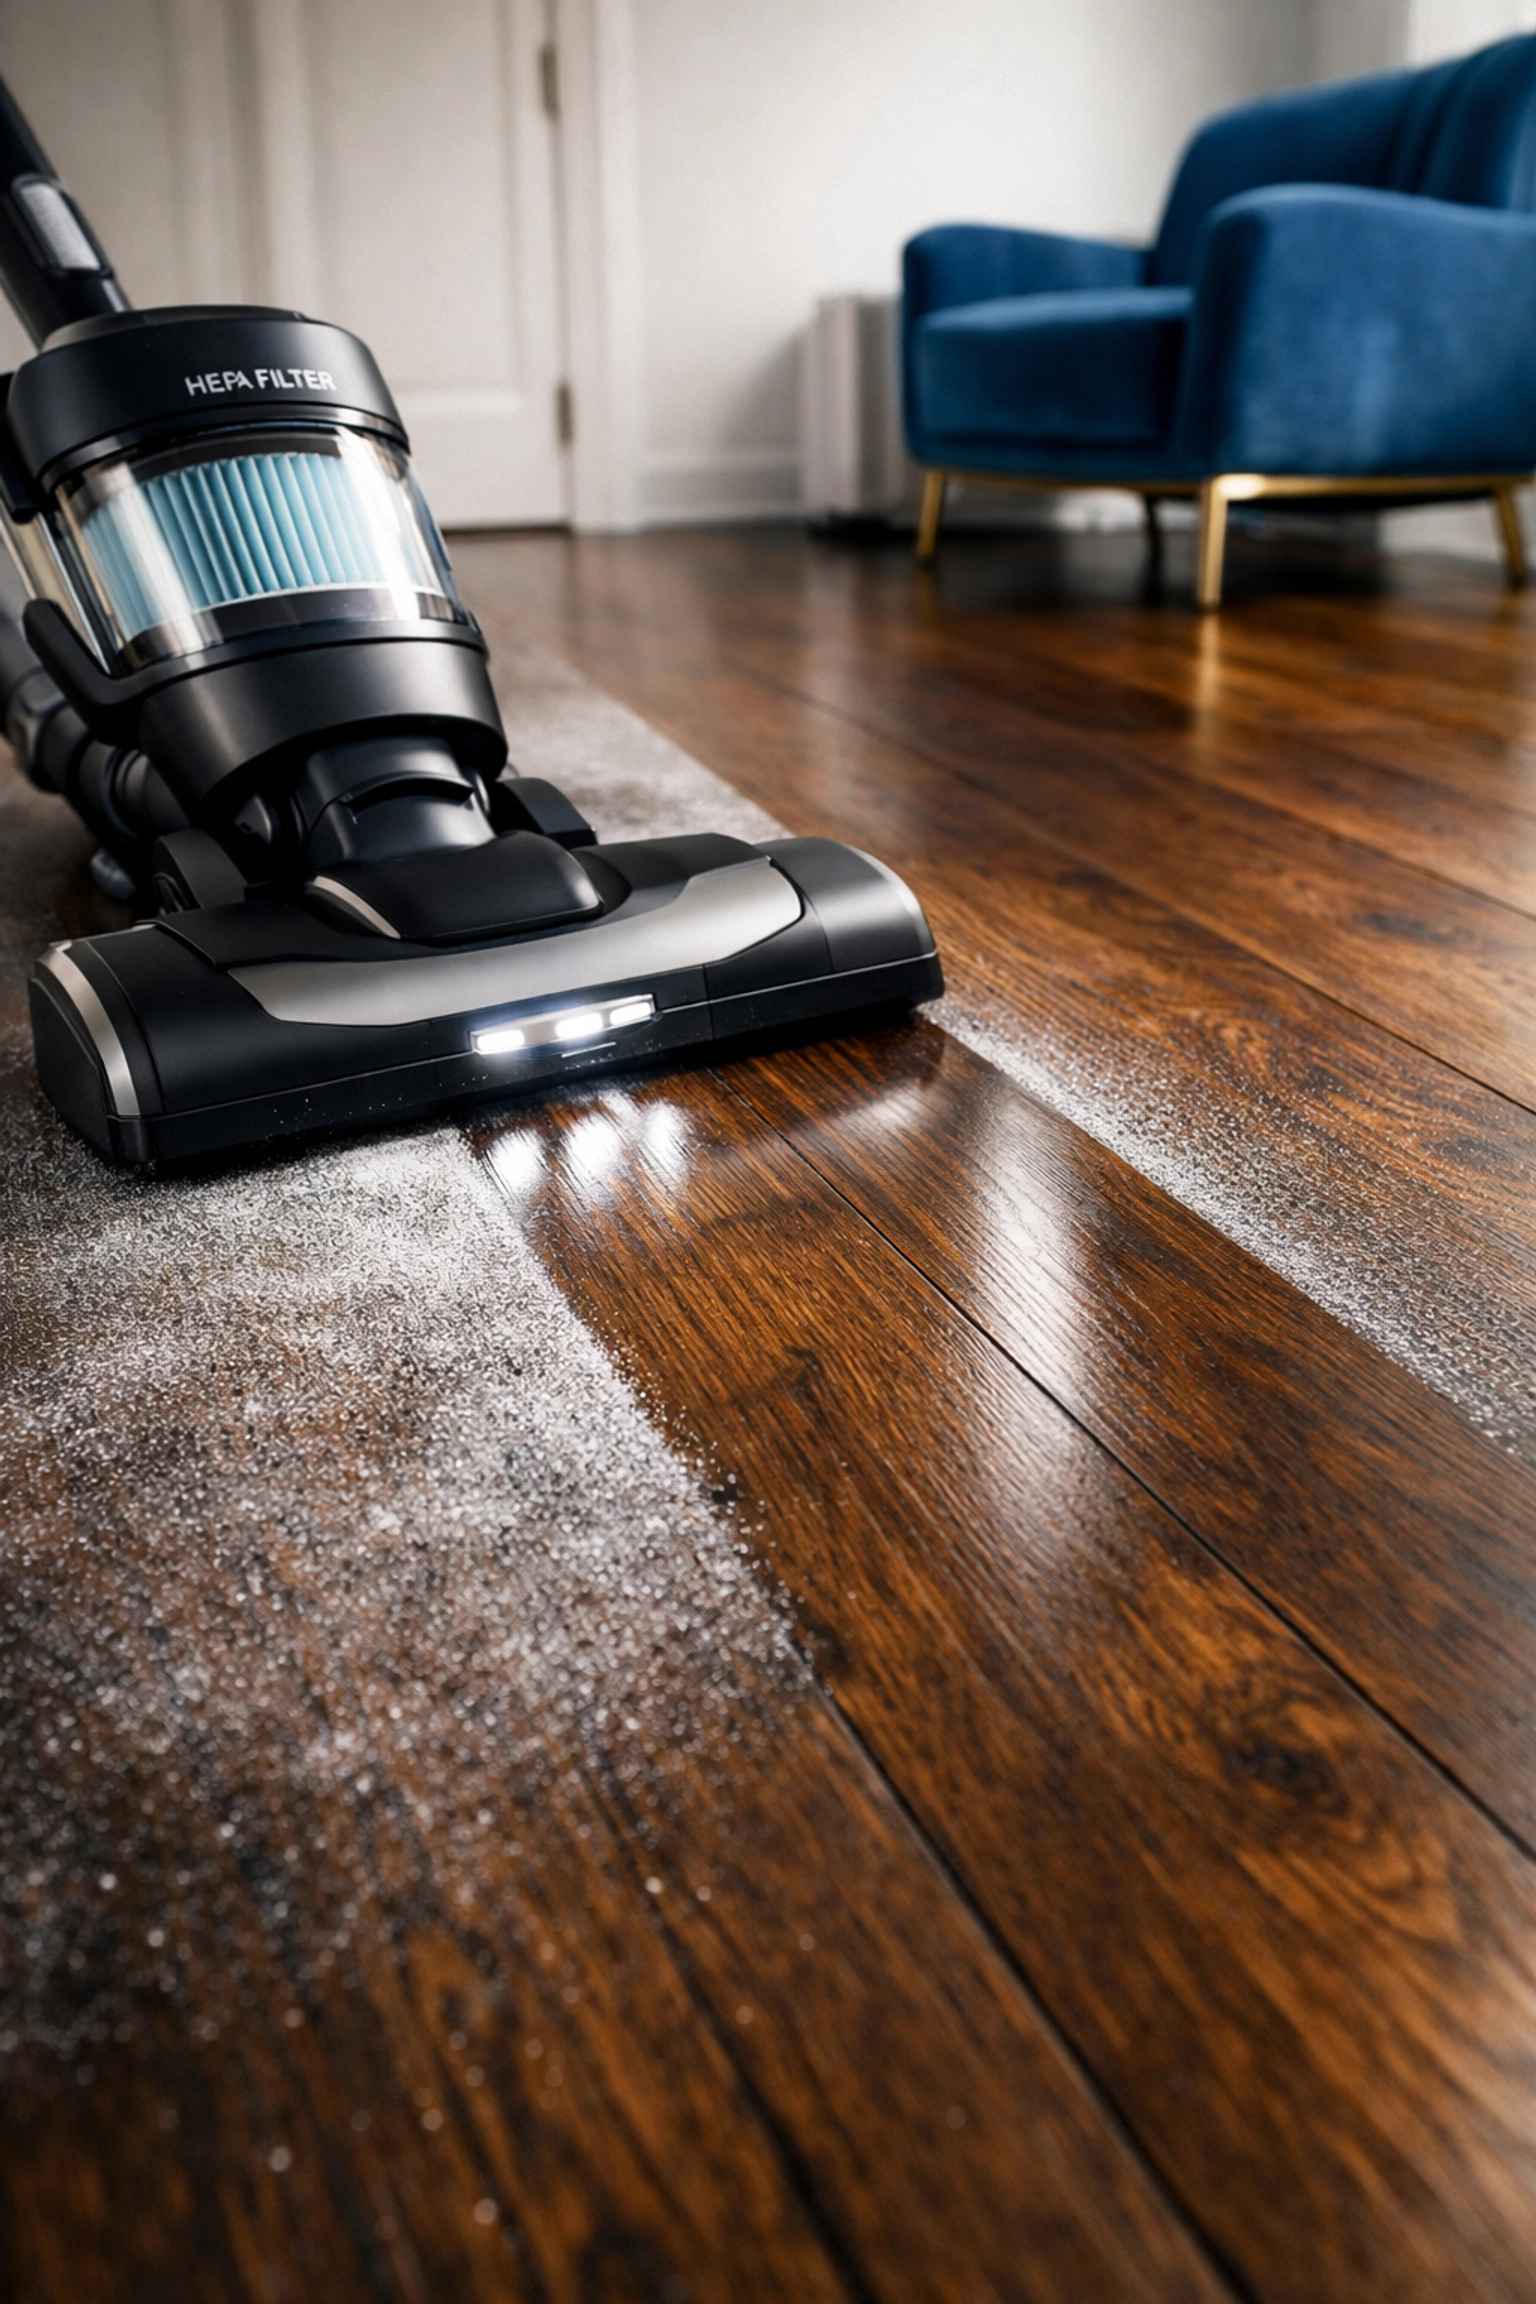
Phase 4: The Final Floor Capture (The Ground Game)
Finally, we’ve reached the floor. If you followed the Top-Down method, the floor is currently a graveyard for all the dust from the rest of the room. This is exactly where we want it.
The HEPA Difference
In post-construction cleaning, your equipment matters. A standard household vacuum might not be enough. Drywall dust is so fine that it can pass right through a basic filter and blow back out the exhaust, effectively redistributing the mess you just cleaned.
At The Cleaning Ninjas Inc, we use HEPA-filtered vacuums. These are designed to trap 99.97% of particles as small as 0.3 microns. It’s the only way to ensure the dust stays inside the machine. If you’re doing this yourself, look for HEPA bags or filters for your shop vac.
The Multi-Pass Strategy
For floors, one pass is never enough after construction.
- Dry Vacuum/Sweep: Get the big stuff and the loose powder.
- Damp Mop: Use a microfiber mop head. The goal here isn't to soak the floor, but to "grab" the remaining film.
- The Second Mop: Change your water! If the water in your bucket looks like milk, you’re just painting the floor with dust. Keep going until the water stays clear.
Essential Tools for the Construction Ninja
To execute the Top-Down method properly, you need the right kit. You don't need a hundred different chemicals, but you do need the right applicators.
- Microfiber Everything: Microfiber cloths are designed to trap dust in their fibers rather than just pushing it around. They are the MVP of construction cleaning.
- Extension Poles: These allow you to reach the ceiling and the tops of walls without constantly moving a ladder, which saves time and energy.
- HEPA Vacuum: As mentioned, this is non-negotiable for fine dust.
- White Vinegar or Ph-Neutral Cleaner: Many new surfaces (like stone counters or hardwood floors) are sensitive. A simple, gentle cleaner is usually better than harsh chemicals.
When to Call in the Ninjas
We get it: renovations are exhausting. By the time the builders leave, the last thing you want to do is spend three days on your hands and knees scrubbing baseboards. Sometimes, the best "cleaning tip" is knowing when to delegate.
Whether you need a one-time deep clean to get your home back to a livable state or you're looking for a weekly vs. bi-weekly schedule to keep things fresh, we’re here to help. Our team is trained in these exact methods to ensure your home isn't just "clean-ish," but truly Ninja-clean.

Final Thoughts
The Top-Down method isn't just a suggestion; it's a logical framework that saves you hours of frustration. By respecting gravity and working systematically, you ensure that every minute you spend cleaning is effective.
Construction is a messy process, but the result should be a home you can finally breathe in and enjoy. If the dust feels overwhelming, just remember: start high, work low, and always use a HEPA filter.
Want to learn more about how we handle the tough stuff? Check out our about us page to see our philosophy in action, or dive into more cleaning tips on our blog. Happy cleaning!


