

You’ve finally finished that big renovation. The paint is dry, the new floors are shining, and the smell of fresh wood is in the air. It’s that magical moment where you can finally sit back and enjoy the space you’ve worked so hard on. But then, you go to step out onto the patio to catch the sunset, and: crunch.
The sliding door doesn’t glide like it used to. It hitches, it groans, and it feels like you’re dragging a boulder across a gravel pit. If you look down, you’ll see the culprit: the tracks are filled with a nasty cocktail of drywall dust, sawdust, metal shavings, and maybe even a stray screw or two.
At The Cleaning Ninjas Inc, we see this all the time. Post-construction cleanup is about more than just wiping down counters; it’s about the hidden spots that most people miss. Sliding door tracks are high on that list. They are total magnets for construction debris, and if you don't handle them with ninja-like precision, you risk damaging the rollers or scratching the tracks permanently.
In this guide, we’re going to walk you through our secret techniques for reclaiming your sliding doors from the clutches of construction dust.
Why Construction Debris is a Sliding Door’s Worst Nightmare
Construction dust isn't like your average household "bunny." It’s abrasive. Drywall dust, in particular, is extremely fine and can act like sandpaper when trapped between the moving parts of a door. When you force a door open over a pile of grit, you’re literally grinding down the metal or plastic rollers.
If left uncleaned, this debris can lead to:
- Worn-out rollers: These are expensive and annoying to replace.
- Track misalignment: Too much buildup can actually lift the door off its track.
- Permanent scratching: Gritty particles can ruin the finish of your high-end sliding doors.
Our mission is to help you clear the path with speed and efficiency. Let’s get into the "Ninja Method" for track restoration.
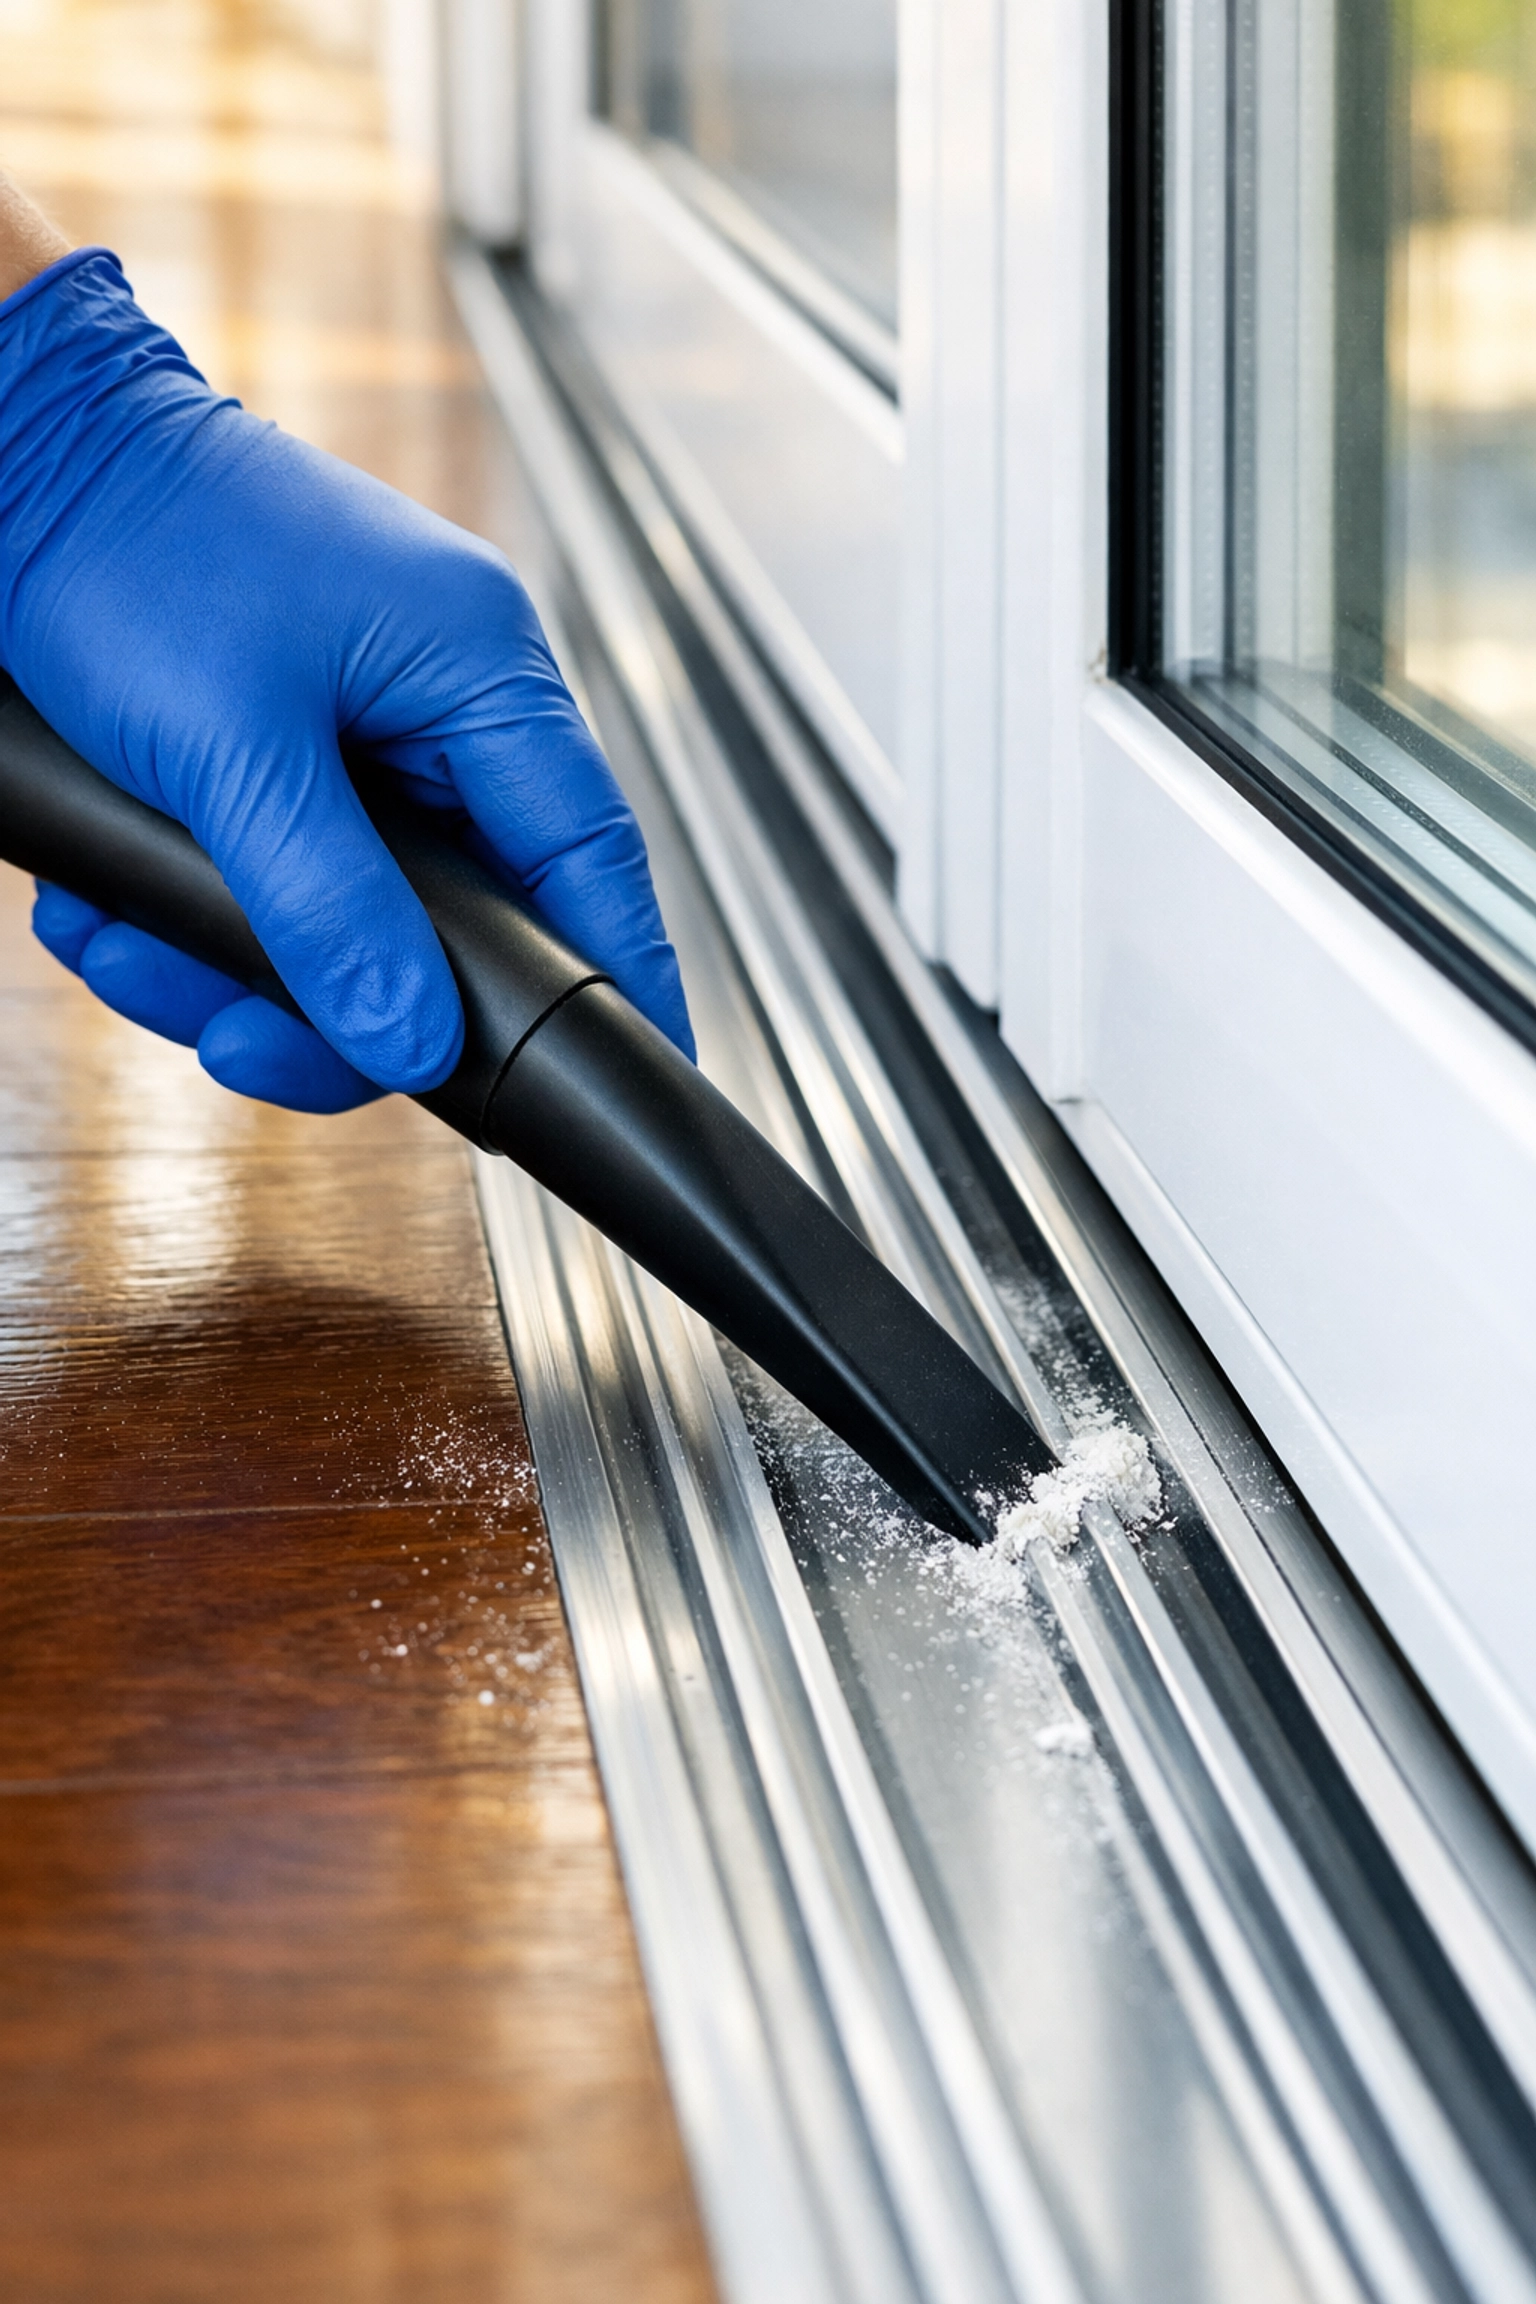
Step 1: The Initial Reconnaissance (Vacuuming)
Before you ever touch a wet cloth, you need to get rid of the loose stuff. If you add liquid to drywall dust immediately, you create a thick, sticky paste that is ten times harder to remove.
Grab a high-powered vacuum. A shop-vac is usually the best choice for post-construction work because it can handle larger chunks of debris without clogging.
The Ninja Move: Don't just use the wide floor attachment. You need the crevice tool: that long, skinny nozzle that looks like it was designed for a ninja to reach into tight spots.
- Open the door fully.
- Run the crevice tool along the entire length of the track.
- Use a stiff-bristled brush (like a dedicated track brush or an old toothbrush) to agitate the dust in the corners while the vacuum is running. This "hit and suck" method ensures the fine dust doesn't just settle back down.
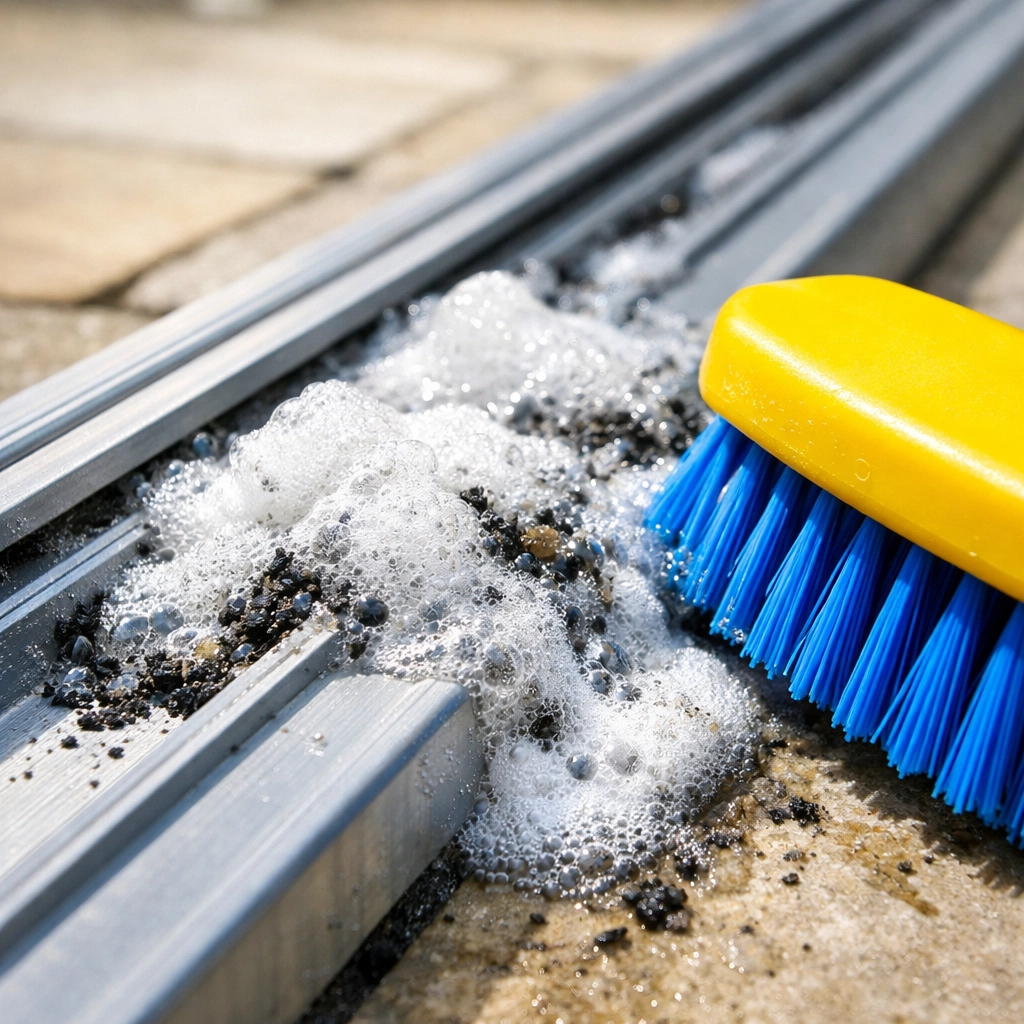
Step 2: The Agitation Phase (Scrubbing)
Once the loose debris is gone, you’ll likely see a layer of "caked-on" grime. This is usually the result of construction humidity mixing with fine dust. This is where we apply some elbow grease.
You don't need fancy industrial chemicals for this. A simple solution of warm water and a few drops of mild dish soap will do the trick.
Pro Tip: Use a small, stiff brush. We love using a wire brush for heavy-duty metal tracks (if they aren't painted) or a heavy-duty nylon brush for everything else. Scrub in short, back-and-forth motions. Pay special attention to the very ends of the tracks where the door sits when closed: that’s usually where the most buildup occurs.
Step 3: The Secret Weapon (Baking Soda and Vinegar)
Sometimes, the construction gunk is really stuck in there. Maybe someone spilled some adhesive, or the drywall mud has fully hardened into the grooves. When the brush isn't enough, we bring out the heavy hitters.
Sprinkle a generous amount of baking soda into the track. Then, lightly spray it with a mixture of white vinegar and water (50/50 ratio). You’ll see it start to fizz: that’s the chemical reaction breaking down the bond between the debris and the track.
Let it sit for about 5 to 10 minutes. This "stealthy" waiting period allows the solution to do the hard work for you. Afterward, scrub again with your brush. The grime should lift right up like magic.
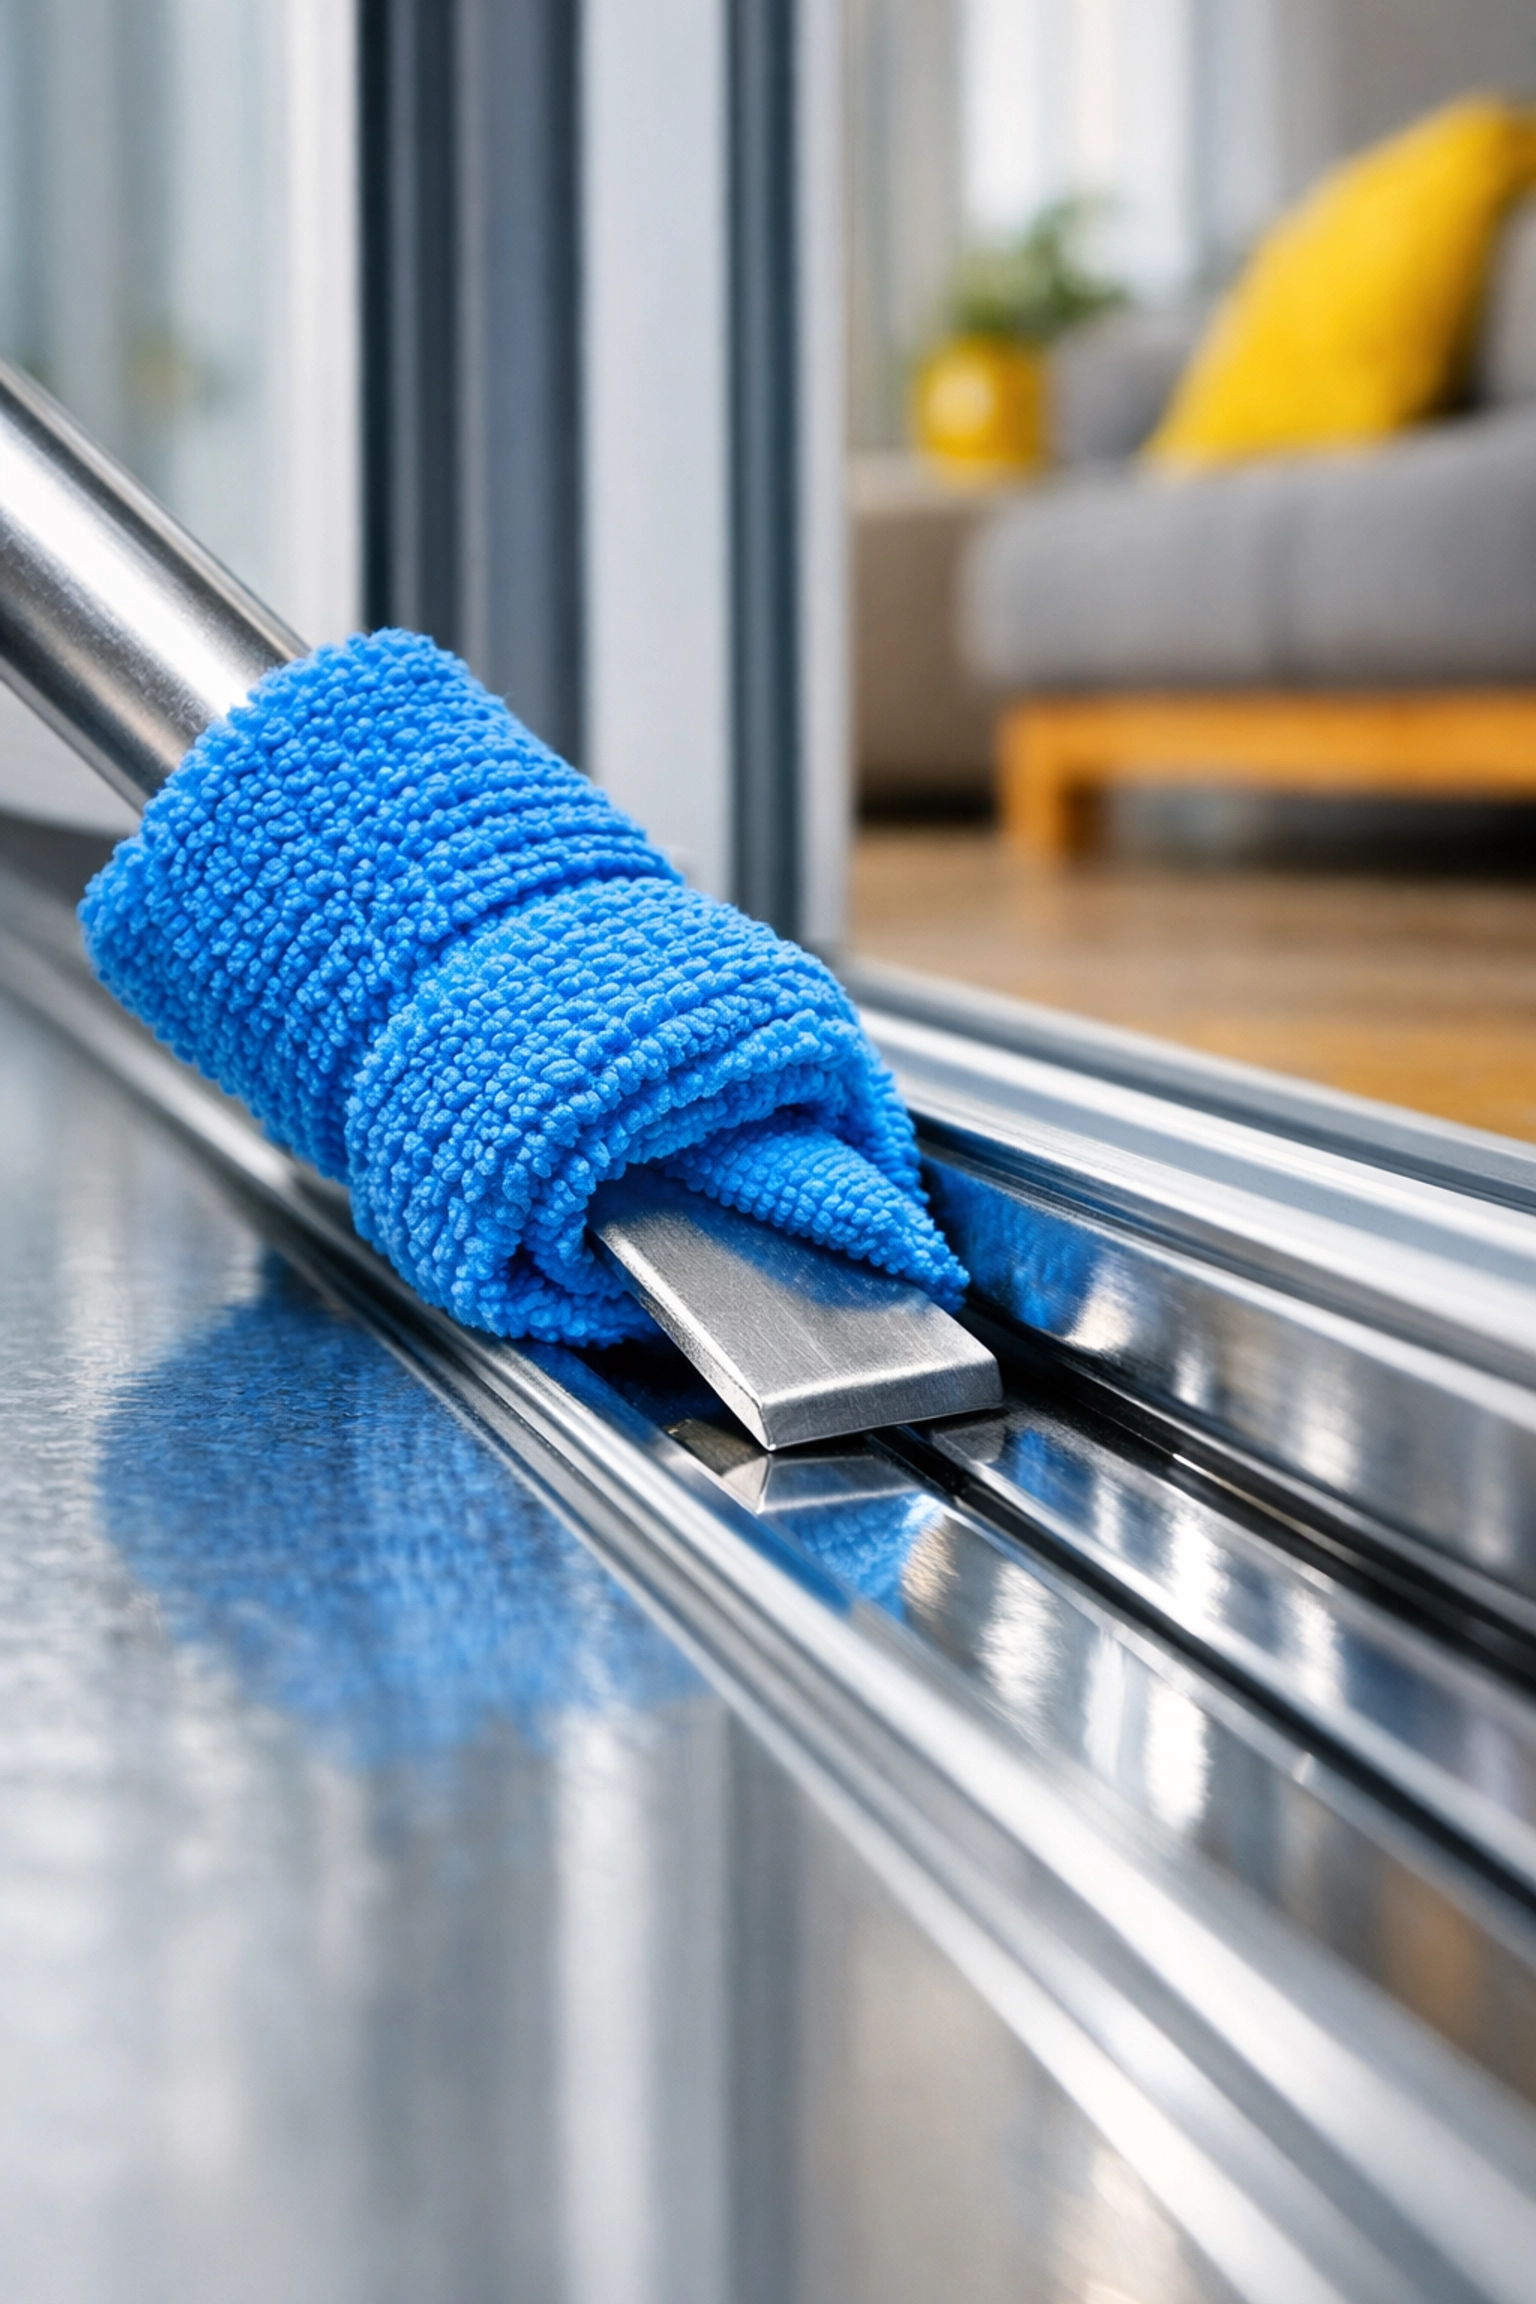
Step 4: The Deep Extraction
Now that the gunk is loose, you need to get it out. If you just wipe it with a rag, you might just push the mud into the corners.
The Ninja Hack: Take a paper towel or a thin microfiber cloth and wrap it around the tip of a flat-head screwdriver. Use this "tool" to slide along the narrow grooves of the track. This allows you to get deep into the crevices where a finger or a standard rag can't reach.
Repeat this process until the cloth comes back clean. It’s all about that attention to detail: the hallmark of a true Cleaning Ninja.
Step 5: Drying and Final Inspection
Moisture is the enemy of a smooth-sliding door. If the tracks stay damp, they will immediately start collecting new dust. Use a clean, dry microfiber rag to wipe everything down one last time.
Check the "weep holes" as well. These are the tiny little slots on the outside of the track designed to let rainwater drain out. Construction debris often clogs these up, which can lead to water backing up into your house during the next storm. Use a toothpick or a small wire to make sure they are clear.
Step 6: The Finishing Touch (Lubrication)
A clean track is great, but a lubricated track is ninja-level. However, be careful! Many people reach for WD-40, but that can actually be a mistake. Traditional WD-40 is a degreaser, not a long-term lubricant, and it can actually attract more dust over time.
Instead, use a Silicone Lubricant Spray.
- Spray a small amount onto a clean rag.
- Wipe the rag along the track.
- Slide the door back and forth several times to distribute the lubricant onto the rollers.
This creates a slick surface that repels dust rather than inviting it back in.
When to Call in the Ninjas
Managing sliding door tracks is just one small part of a successful post-construction cleanup. When you’ve had a whole house renovated, the sheer volume of dust can be overwhelming. It gets into the HVAC vents, behind the outlet covers, and on top of the ceiling fan blades.
If you’re feeling overwhelmed by the aftermath of your home project, that’s where we come in. Our team at The Cleaning Ninjas Inc specializes in the meticulous, high-detail work that makes a house feel like a home again. We don't just "clean": we eliminate the evidence that a construction crew was ever there.
You can learn more about our specialized approach on our About Us page, or check out the full range of what we do over at Our Services.

Summary Checklist for a Ninja-Clean Track:
- Vacuum first: Use a crevice tool to remove all loose grit.
- Agitate: Use a stiff brush to break up the "caked" layers.
- The Fizz: Use baking soda and vinegar for stubborn spots.
- The Detail: Use a screwdriver and cloth to reach the deep grooves.
- Clear the Weeps: Ensure drainage holes are free of debris.
- Lubricate: Use silicone spray to keep things gliding smoothly.
Your home is an investment, and your sliding doors are a big part of that. Don't let a little construction dust stand in the way of your view. With a little bit of patience and the right techniques, you can keep those tracks moving as smooth as a ninja in the night.
Happy cleaning! And remember, if the dust is winning the war, the Ninjas are always ready to deploy. Check out more cleaning tips on our blog to keep your home in tip-top shape!


