

You’ve finally crossed the finish line of a home renovation or a much-needed room refresh. The walls are a stunning new shade, the painters have packed up their ladders, and the scent of fresh latex is in the air. It’s that "new house" feeling all over again. But as you peel back the blue painter's tape and move the furniture back into place, you notice it: a fine, chalky film covering your baseboards. Or worse, a few stubborn splatters of ceiling white that managed to find their way onto your dark wood trim.
At The Cleaning Ninjas Inc, we see this all the time. Post-construction cleaning is its own beast, and baseboards are often the biggest victims of "painter’s fallout." While the walls look pristine, the baseboards often look dusty, dull, and neglected. To get that truly professional finish, you need to go beyond a quick swipe with a damp rag.
Here is our ninja-approved guide to deep cleaning your baseboards after the painters leave, ensuring every inch of your home sparkles with precision.
Why Post-Construction Dust is Different
Before you grab your bucket, it’s important to understand what you’re dealing with. Post-construction dust isn't like the regular "skin cells and pet dander" dust that settles on your shelves every week. This is often a mixture of drywall sand, sawdust, and dried paint particulates.
If you just hit this with a wet sponge immediately, you’re likely to create a muddy paste that gets trapped in the wood grain or the crevices of your trim. Our Cleaning tips always emphasize the "Dry Before Wet" rule for a reason.
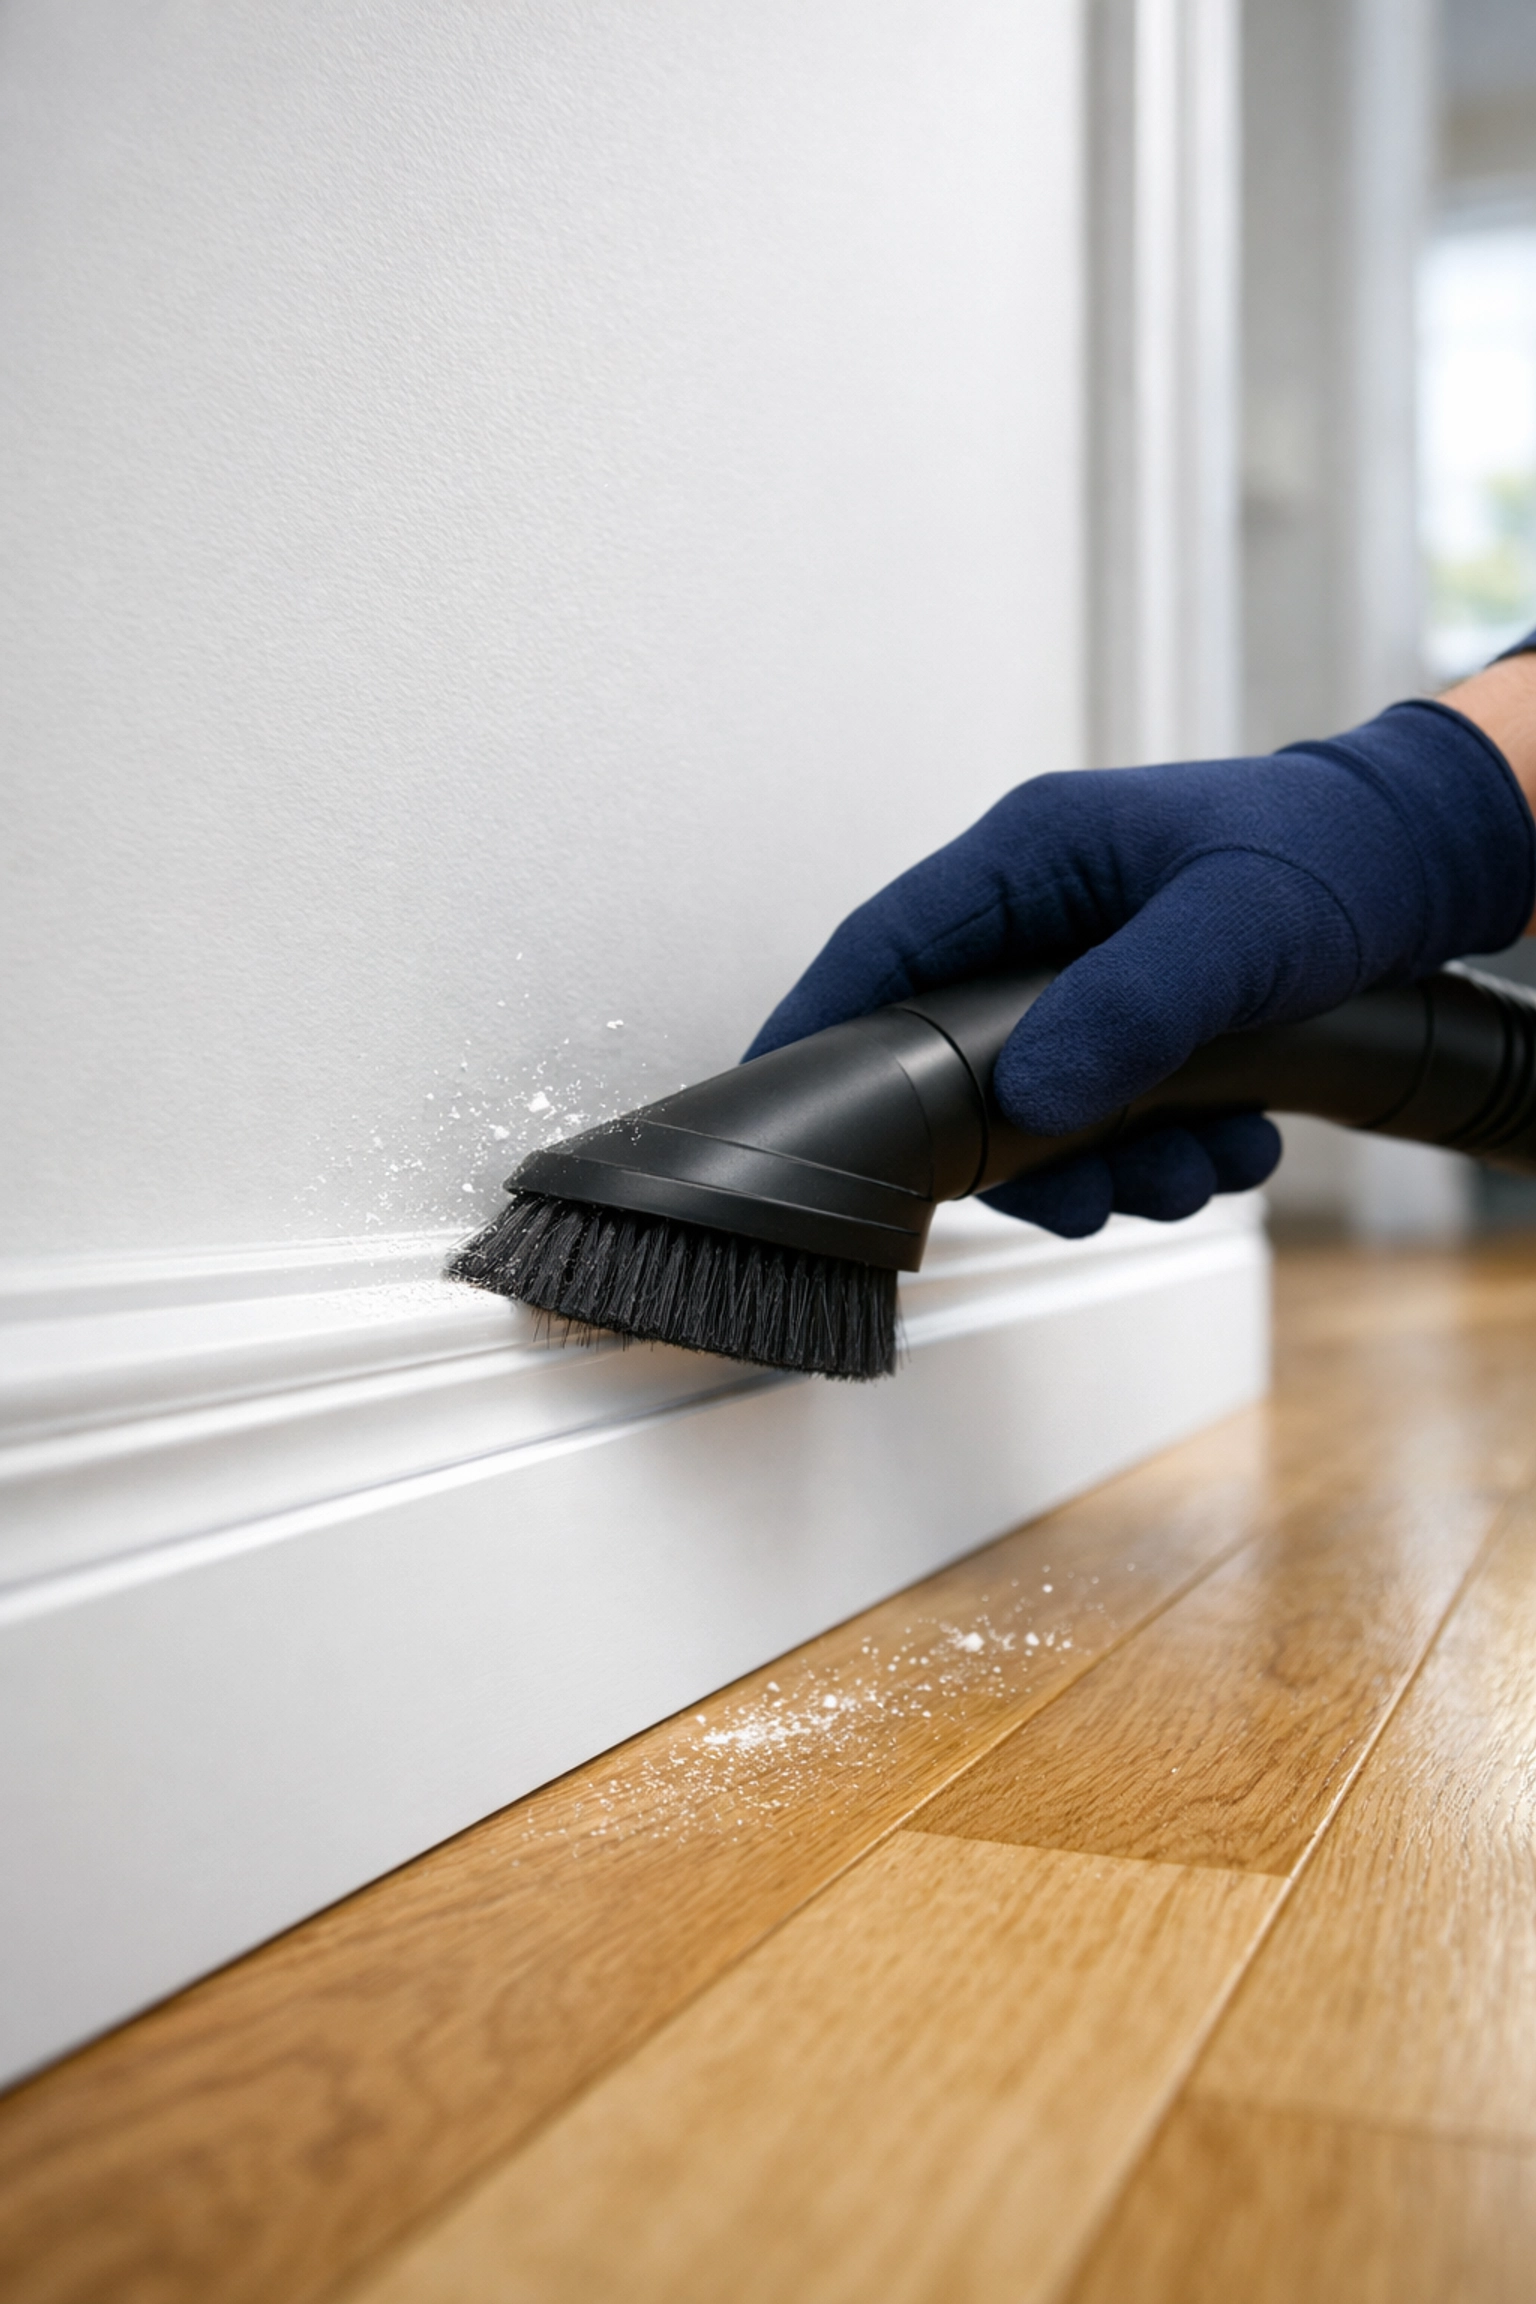
Step 1: The Ninja Dry-Dust Phase
The first secret to a deep-cleaned baseboard is removing the loose debris without scratching the new paint on the walls above them.
- Vacuum with a Brush Attachment: Use a vacuum with a soft-bristled brush attachment. Run it along the top ledge of the baseboard where it meets the wall, and then along the bottom where it meets the floor. This sucks up the heavy drywall dust before it can become airborne.
- The Microfiber Sweep: After vacuuming, take a dry microfiber cloth and run it over the entire surface. Microfiber is designed to trap tiny particles rather than just pushing them around.
Step 2: Choosing Your Solution
Once the loose dust is gone, you’re ready for the wet clean. You don't need harsh chemicals to get a great result. In fact, heavy degreasers or bleach-based cleaners can actually dull the finish of your newly painted trim or damage the sealer on your hardwood floors.
We recommend a simple, gentle mix:
- A gallon of warm water.
- A few drops of mild dish soap (like Dawn).
- Optional: A splash of white vinegar if you’re dealing with particularly grimy or "sticky" post-construction residue.
Step 3: The Detailed Wipe-Down
This is where the "ninja" part of our name comes in: it’s all about the details.
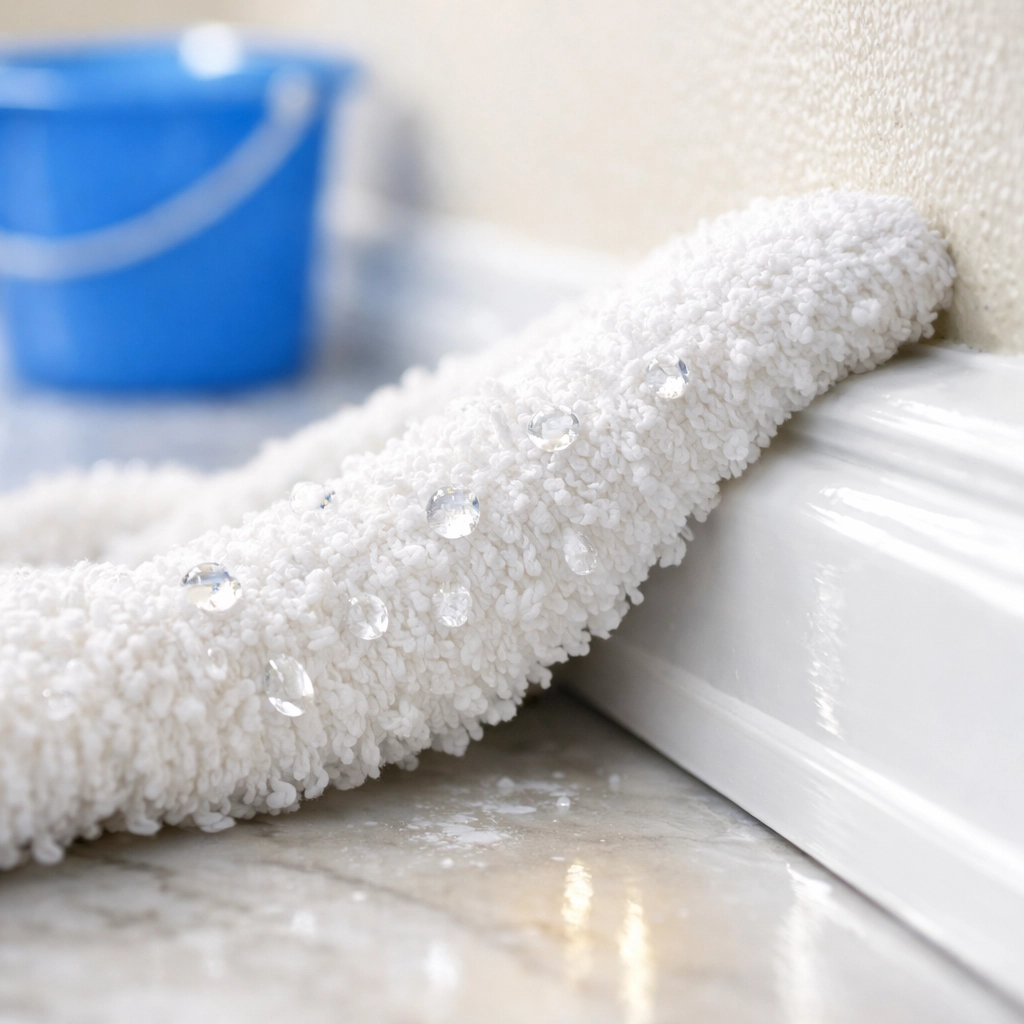
Use a Terry Cloth Rag: While microfiber is great for dusting, a thin terry cloth rag is better for scrubbing away the film that construction leaves behind. The texture of the loops helps lift the film off the paint.
Wring it Out: Your rag should be damp, not dripping. Excess water can seep behind the baseboards or under your flooring, leading to warping or mold issues over time.
The Technique: Start at one corner of the room and work your way around. Wipe the top ledge first, then the flat face, and finally the bottom cove. If you see "water tracks" left behind, follow up immediately with a dry cloth to buff the surface to a shine.
Step 4: Dealing with Paint Drips and Scuffs
Even the best professional painters occasionally have a drip or two. Or, in the process of moving ladders and equipment, your baseboards might have suffered some black scuff marks from work boots.
- For Fresh Paint Drips: If the paint is relatively fresh (less than a few days old), you can often pop a drip off with your fingernail or a plastic putty knife. Be extremely gentle: you don't want to gouge the wood or the base coat of paint.
- The Magic Eraser Trick: For stubborn scuffs or dried paint film, a melamine sponge (like a Magic Eraser) is your best friend. However, use it with a light touch! These sponges are micro-abrasive. If you scrub too hard, you’ll take the sheen right off your baseboard paint, leaving a dull spot.
- The Q-Tip Maneuver: For the tiny corners and the "inner" parts of decorative molding where a rag won't reach, dip a cotton swab in your cleaning solution. It’s the only way to ensure the dust doesn’t hide in the crevices.
Step 5: Protecting the Finish
Once your baseboards are clean and dry, you want to keep them that way. Construction projects have a way of leaving dust in the air for weeks as it settles out of the HVAC system.
One "pro tip" we love to share is using a dryer sheet. After the baseboards are perfectly clean and dry, rub a new dryer sheet along the length of the board. The anti-static properties of the sheet will help repel dust, keeping your baseboards cleaner for much longer. Plus, it makes the room smell great!
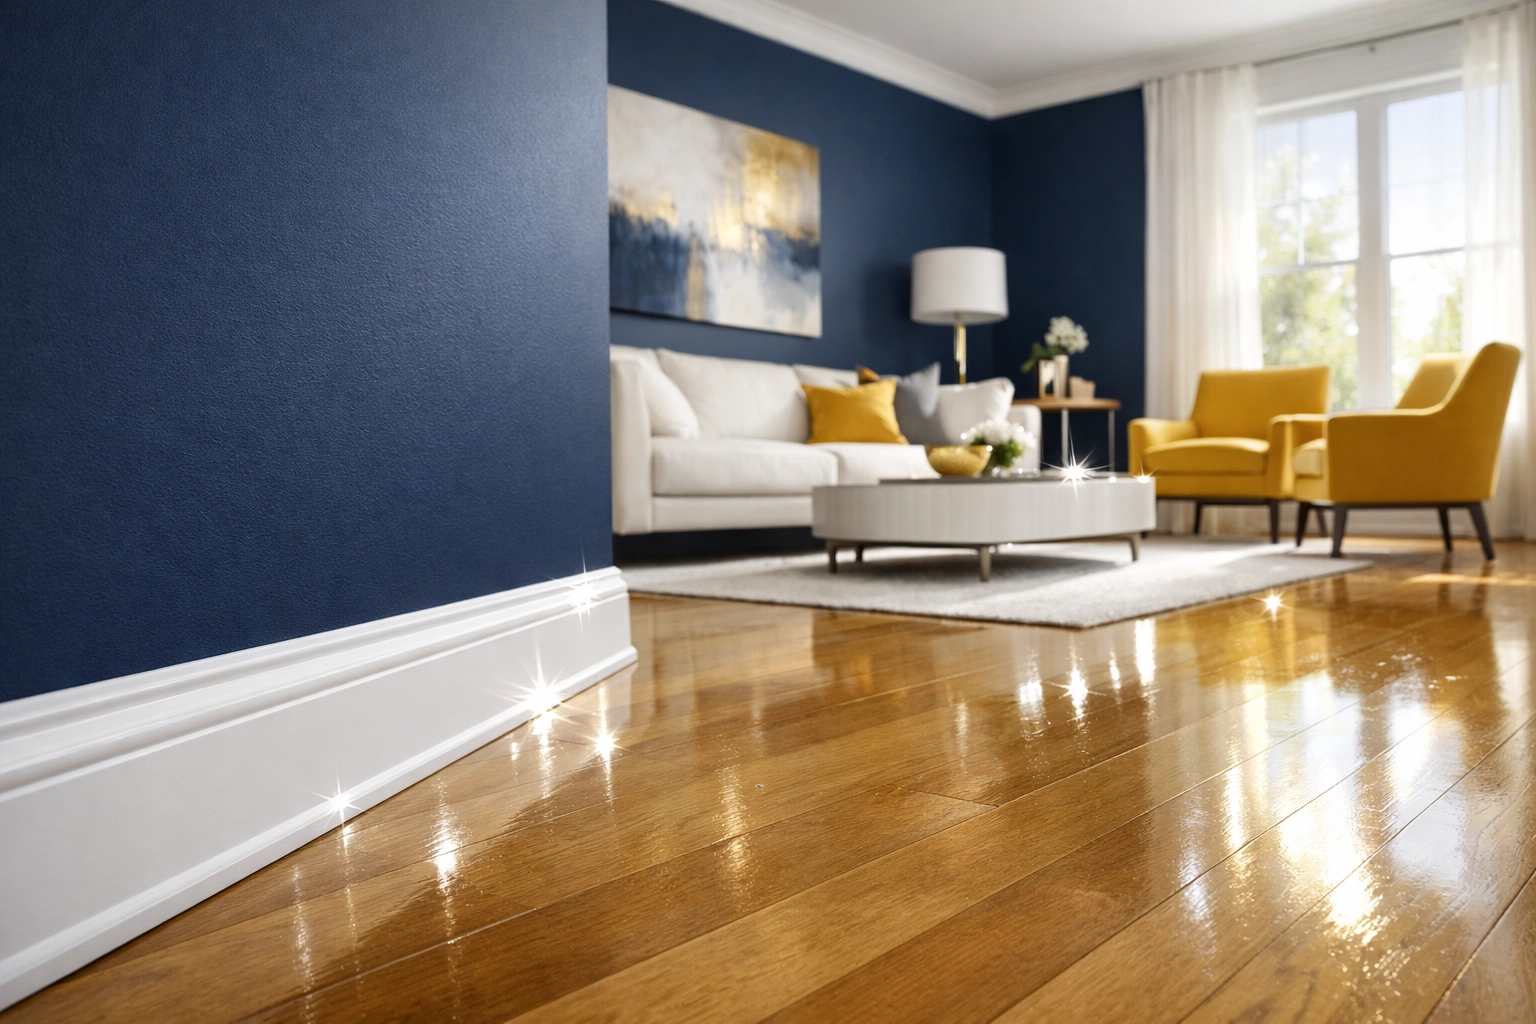
Why Precision Matters
At The Cleaning Ninjas Inc, our philosophy is that a home isn't clean until the "hidden" areas are addressed. Baseboards act as a magnet for everything from pet hair to renovation debris. When they are neglected, they can make a $10,000 paint job look cheap. When they are sparkling, they make the entire home feel high-end and meticulously maintained.
If you’ve recently finished a renovation and the thought of scrubbing every inch of trim in your house feels overwhelming, that’s exactly what we’re here for. Our post-construction cleaning teams specialize in the "ninja details" that most people miss. You can learn more about our specific approach on our About Us page.
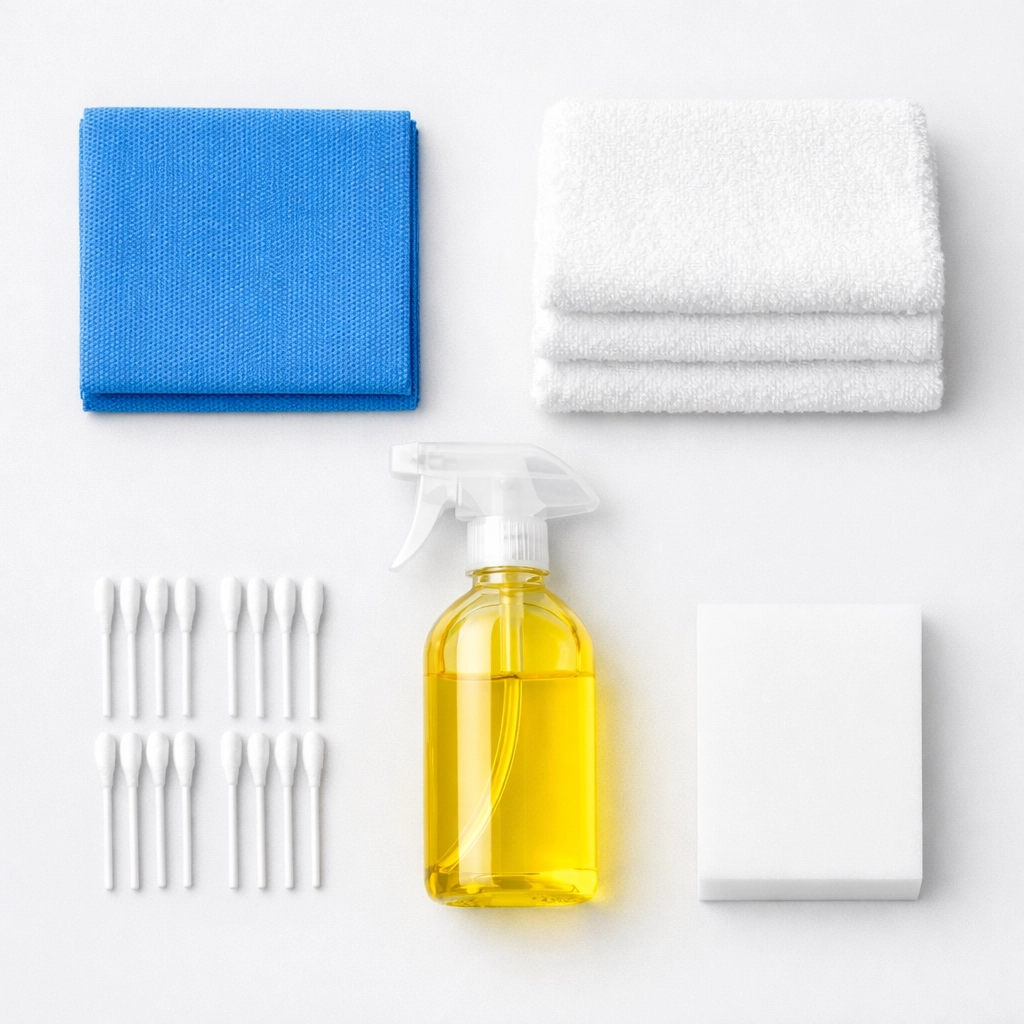
The Tools You’ll Need for Success
To do this right, assemble your kit before you start:
- Vacuum with a soft brush attachment.
- At least 4-5 microfiber cloths (they get dirty fast!).
- A bucket of warm, soapy water.
- A handful of cotton swabs.
- A melamine sponge.
- A dry towel for buffing.
Common Mistakes to Avoid
- Using a Broom First: Brooms tend to kick the fine construction dust back into the air, where it will simply settle back onto your baseboards an hour later. Stick to the vacuum.
- Soaking the Wood: Especially with MDF (medium-density fiberboard) baseboards, which are common in newer homes, excess moisture can cause the material to swell and "bubble." Always wring your cloth out thoroughly.
- Ignoring the Top Edge: Most people clean the "face" of the baseboard but forget the 1/4 inch ledge at the top. This is where 90% of the dust lives.
- Cleaning Before the Paint is Cured: If the painters just left an hour ago, wait! Depending on the humidity and the type of paint used, it can take 24 to 48 hours for paint to "firm up" enough to withstand a wipe-down. If you touch it too soon, you might smudge the finish.
Final Thoughts
Cleaning after a renovation is the final step in turning a construction site back into a home. It’s the bridge between the chaos of contractors and the peace of your living space. While baseboards might seem like a small detail, the difference they make is massive.
If you’re looking for a team that treats your home with the stealth and precision of a ninja, check out our services. Whether it’s a one-time post-construction deep clean or regular maintenance to keep those baseboards white year-round, we’ve got your back.
Happy cleaning, and enjoy your beautiful new space!


