

You’ve finally reached the finish line. The renovation is over, the contractors have packed up their saws, and your home is looking like something straight out of a magazine. You’re ready to kick back and enjoy the new space: until you open the door to the garage.
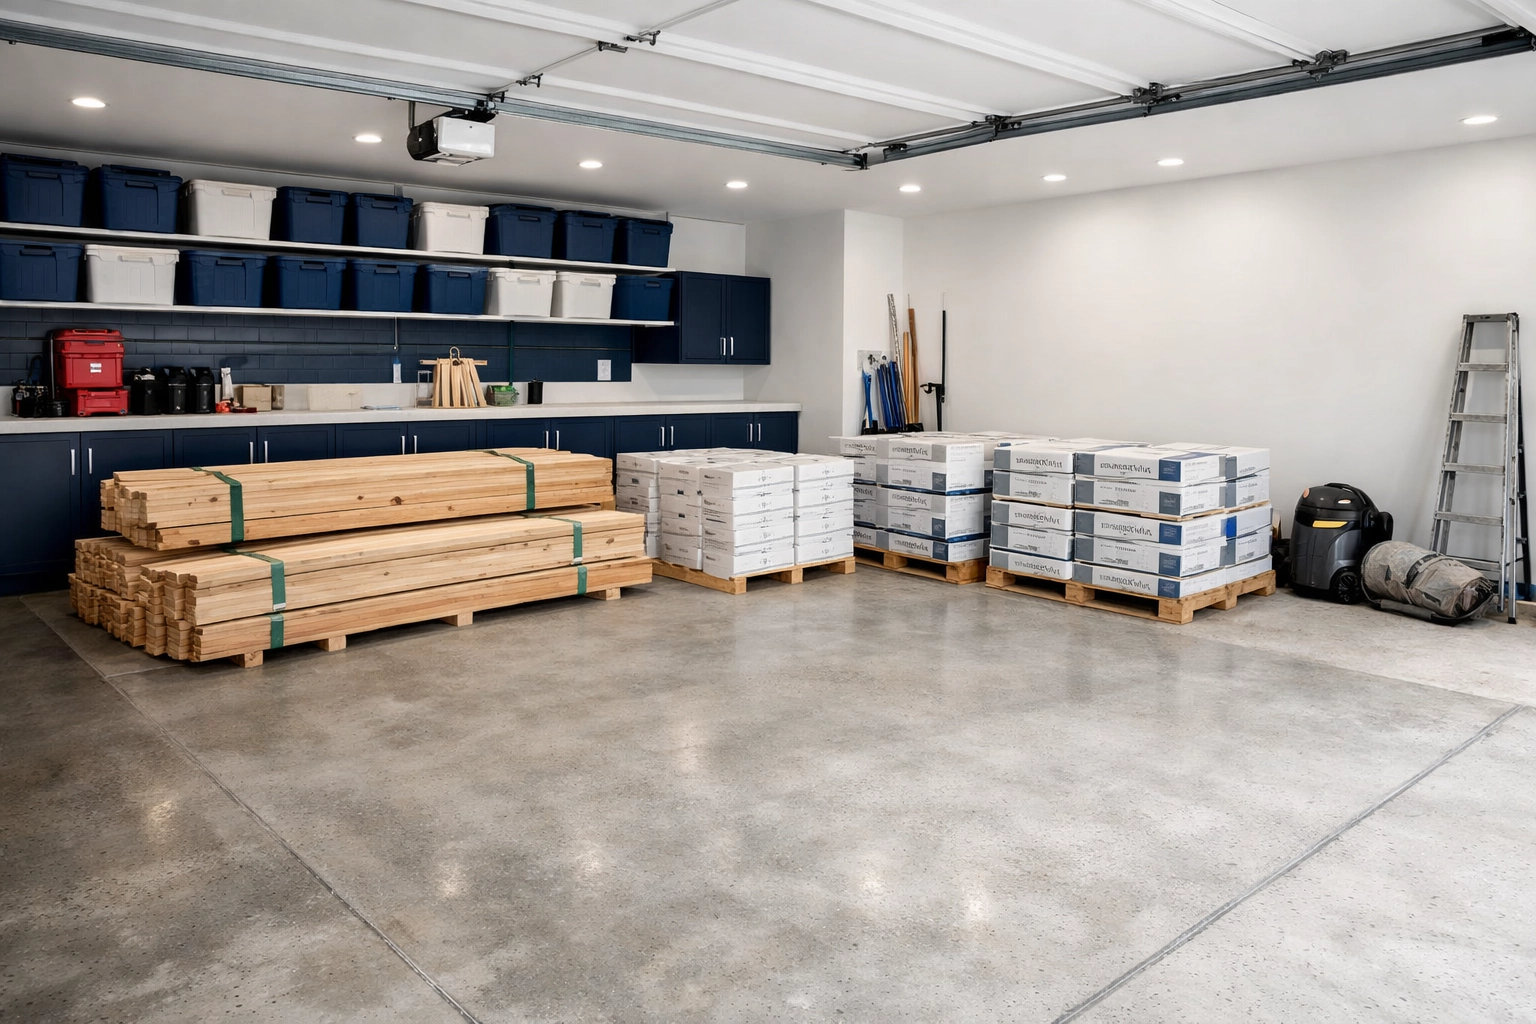
During construction, the garage usually plays the role of the "unsung hero." It’s the staging area, the storage unit for bags of cement, stacks of lumber, and boxes of tile. It’s where the heavy machinery gets parked and where the sawdust goes to hang out. Now that the materials are gone, you’re left with a space that looks like a dust storm hit it, followed by a minor oil spill.
Cleaning a garage after it’s been used for material storage isn't quite like your standard Saturday morning sweep. It requires a tactical approach to get rid of fine construction dust and stubborn residue. At The Cleaning Ninjas Inc, we call this the "Post-Construction Recovery," and today we’re sharing our ninja-approved secrets for getting your garage back to its former glory.
The Construction Storage Aftermath: What Are We Dealing With?
When a garage is used for material storage, the mess is different from your typical "leaf and spiderweb" situation. You’re likely dealing with:
- Fine Particulate Dust: Drywall dust, sawdust, and concrete powder are microscopic. They don't just sit on the floor; they hang out on every rafter, light fixture, and ledge.
- Chemical Residue: If you had paint cans, sealants, or adhesives stored there, there’s a good chance some dripped or left a sticky film.
- Heavy Grime: Boots walking back and forth from the construction site into the garage bring in mud and grit that get ground into the concrete.
- Oil and Grease: If any equipment was stored or maintained in the space, you might find fresh oil spots that need immediate attention.
Phase 1: The Tactical Emptying
You can't clean a garage if it's still full of "leftover" materials. The first step is to clear the deck. Sort through what’s left. If there are extra tiles or a gallon of paint for touch-ups, move them to a temporary spot outside or in a corner you've already cleared.
The goal is to have as much of the concrete floor visible as possible. This isn't just about the floor; it’s about making sure you aren't just moving dust from one pile of stuff to another.
Phase 2: Top-Down Dusting (The Ninja Way)
One of the biggest mistakes people make when cleaning a garage is starting with the floor. If you sweep first and then clean the shelves, you’re just going to have to sweep again.
Grab a long-handled duster or a shop-vac with a brush attachment. Start at the very top. Run it along:
- Exposed rafters or ceiling joists.
- The tops of the garage door tracks.
- Light fixtures (make sure they are off!).
- High shelves and cabinets.
Construction dust is "clingy." If you use a regular broom on the walls, you’ll likely just smear the dust. A vacuum with a HEPA filter is your best friend here. It sucks the dust out of the air and off the surfaces rather than just kicking it back into the room. If you’re looking for more cleaning tips, remember that in post-construction work, suction is always better than sweeping for high surfaces.
Phase 3: The Heavy-Duty Sweep
Once the high-altitude dust has settled on the floor, it’s time to bring out the big guns. But wait! Before you start swinging a broom and creating a massive dust cloud that you’ll eventually breathe in, try this ninja move: The Mist Technique.
Take a spray bottle filled with water and lightly mist the air and the floor. You don't want puddles; you just want enough moisture to "weight down" the dust particles. Alternatively, you can use a sweeping compound: those bags of gritty, moist material you spread on the floor. As you sweep, the compound grabs the dust and keeps it on the ground.
Sweep the entire floor, starting from the back corners and working your way toward the garage door. Be sure to get into the "dead zones": the corners where the walls meet the floor: as this is where construction debris loves to hide.
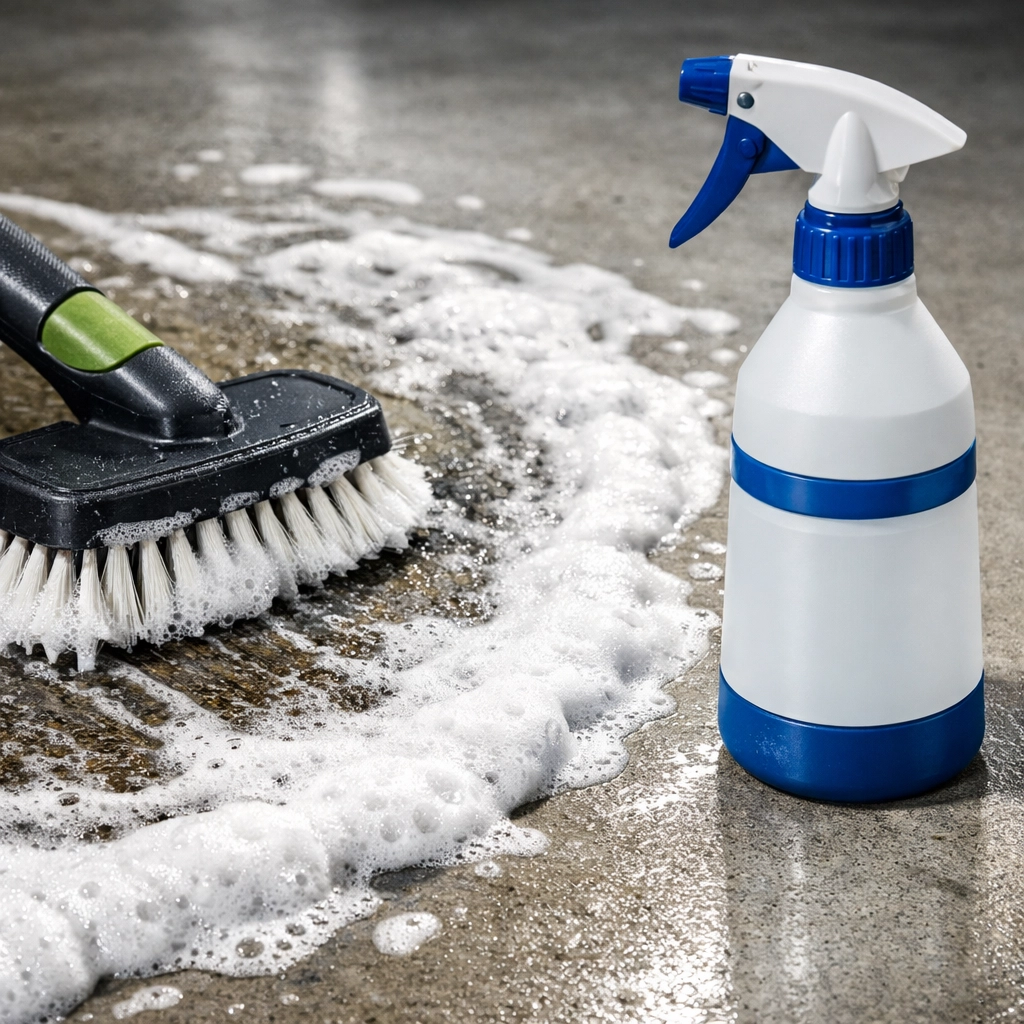
Phase 4: Degreasing with a Green Conscience
Now that the loose grit is gone, you’ll probably see the "scars" of material storage. Maybe a leaky hydraulic lift left a mark, or a spilled container of wood stain created a blemish.
Most people reach for harsh, stinky chemicals to clean garage floors, but at The Cleaning Ninjas Inc, we prefer a more eco-friendly approach. You don’t need to melt your shoes to get a clean floor.
The Green Ninja Degreaser Recipe:
- Warm Water: The base of any good cleaning solution.
- Baking Soda: Great for absorbing fresh oil and providing a gentle abrasive.
- Eco-Friendly Dish Soap: Specifically the kind that targets grease.
- White Vinegar: Perfect for breaking down mineral deposits from concrete or drywall mud.
For tough oil spots, sprinkle a generous amount of baking soda over the stain. Let it sit for 15-20 minutes to soak up any liquid. Then, scrub it with a stiff-bristled brush and a mixture of warm water and dish soap.
If you have a large area to cover, a mop and bucket with a vinegar-and-water solution will help neutralize the alkaline nature of concrete dust and leave the floor looking crisp. If you’re feeling overwhelmed by the sheer scale of the mess, check out our professional cleaning services to see how we handle large-scale post-construction projects.
Phase 5: Scrubbing the Walls and Surfaces
Concrete walls or drywall in a garage often get "scuff marks" from boxes being slid around or lumber leaning against them.
Take a microfiber cloth and a bucket of warm, soapy water. Wipe down the walls at eye level and below. For scuffs on finished garage walls, a "magic eraser" sponge works wonders without needing harsh solvents.
Don't forget the "Ninja Details":
- The Garage Door Sensor: These little "eyes" near the floor get covered in dust, which can prevent your door from closing. Wipe them gently with a dry cloth.
- The Threshold: The metal strip where the door meets the driveway. This often collects a thick layer of grime that prevents a good seal. Scrub it until it shines.
- The Door Handle/Opener Button: These are high-touch areas that likely have dusty fingerprints all over them.
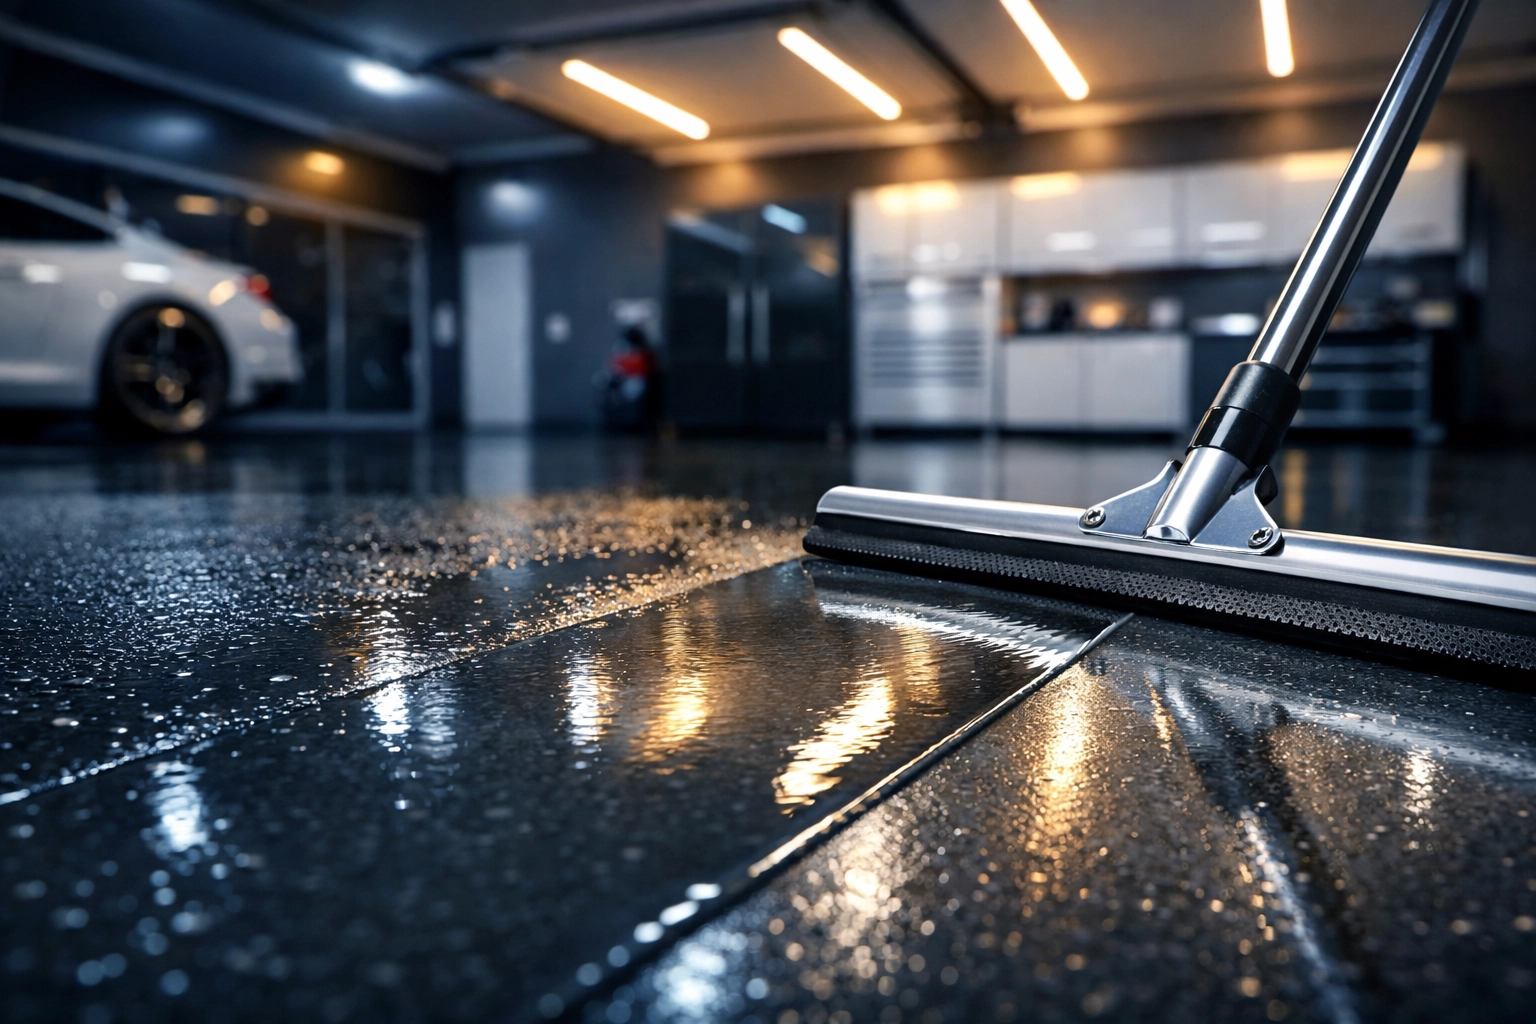
Phase 6: The Final Rinse and Dry
If your garage has a proper drain or a slope leading to the driveway, a final rinse is the most satisfying part. Use a garden hose with a spray nozzle to push the remaining soapy residue out of the garage.
Pro Tip: Use a squeegee to push the water out. If you let the water air-dry on the concrete, the minerals in the water (and any leftover dust) might leave white streaks. A quick squeegee job ensures a streak-free finish.
Why Post-Construction Cleaning is Different
You might be thinking, "It’s just a garage, why the extra effort?"
The truth is, construction dust is abrasive. If left on the floor, it acts like sandpaper every time you drive your car in or walk across it. Over time, this wears down the sealant on your garage floor and can even damage the finish on your car. Furthermore, drywall dust contains fine particles that aren't great for your respiratory system.
By performing a deep scrub after material storage, you aren't just making it look "pretty": you’re protecting your home’s air quality and the longevity of your surfaces. This is why our post-construction cleaning is one of our most requested services. We have the industrial vacuums and specialized tools to ensure that "construction smell" and "construction dust" are gone for good.
Setting Up for Success
Once the garage is sparkling clean, it’s the perfect time to rethink how you store things. Before you move those leftover tiles and paint cans back in:
- Use Pallets: Keep items off the direct concrete to prevent moisture buildup.
- Clear Totes: Store leftover materials in clear, airtight bins so you can see what’s inside and keep the dust out.
- Label Everything: Label your leftover construction supplies by the room they belong to (e.g., "Kitchen Backsplash Tiles").
When to Call the Professionals
Let’s be real: cleaning a garage after months of construction storage is an exhausting, multi-hour job. If you’ve just survived a home renovation, the last thing you want to do is spend your weekend in a mask, scrubbing concrete.
That’s where we come in. At The Cleaning Ninjas Inc, we thrive in the chaos. We take the "ninja" part of our name seriously: we’re fast, efficient, and we leave no trace behind. Whether it’s a garage that was used as a workshop or a whole house that needs a post-reno glow-up, we’ve got the skills to handle it.
If you’re ready to stop looking at the dust and start enjoying your home, reach out to us. We’d love to help you cross that final item off your renovation checklist. You can learn more about our team and our mission on our About Us page.
Enjoy your new, clean space( you’ve earned it!)


