

When you walk into a home that has just been through a renovation or a new build, the first things you notice are the big changes. You see the gleaming new countertops, the fresh coat of eggshell white on the walls, and those gorgeous hardwood floors. It feels like a fresh start. But here at The Cleaning Ninjas Inc, we know a secret: construction doesn’t just happen in the middle of the room. It happens in the air, too.
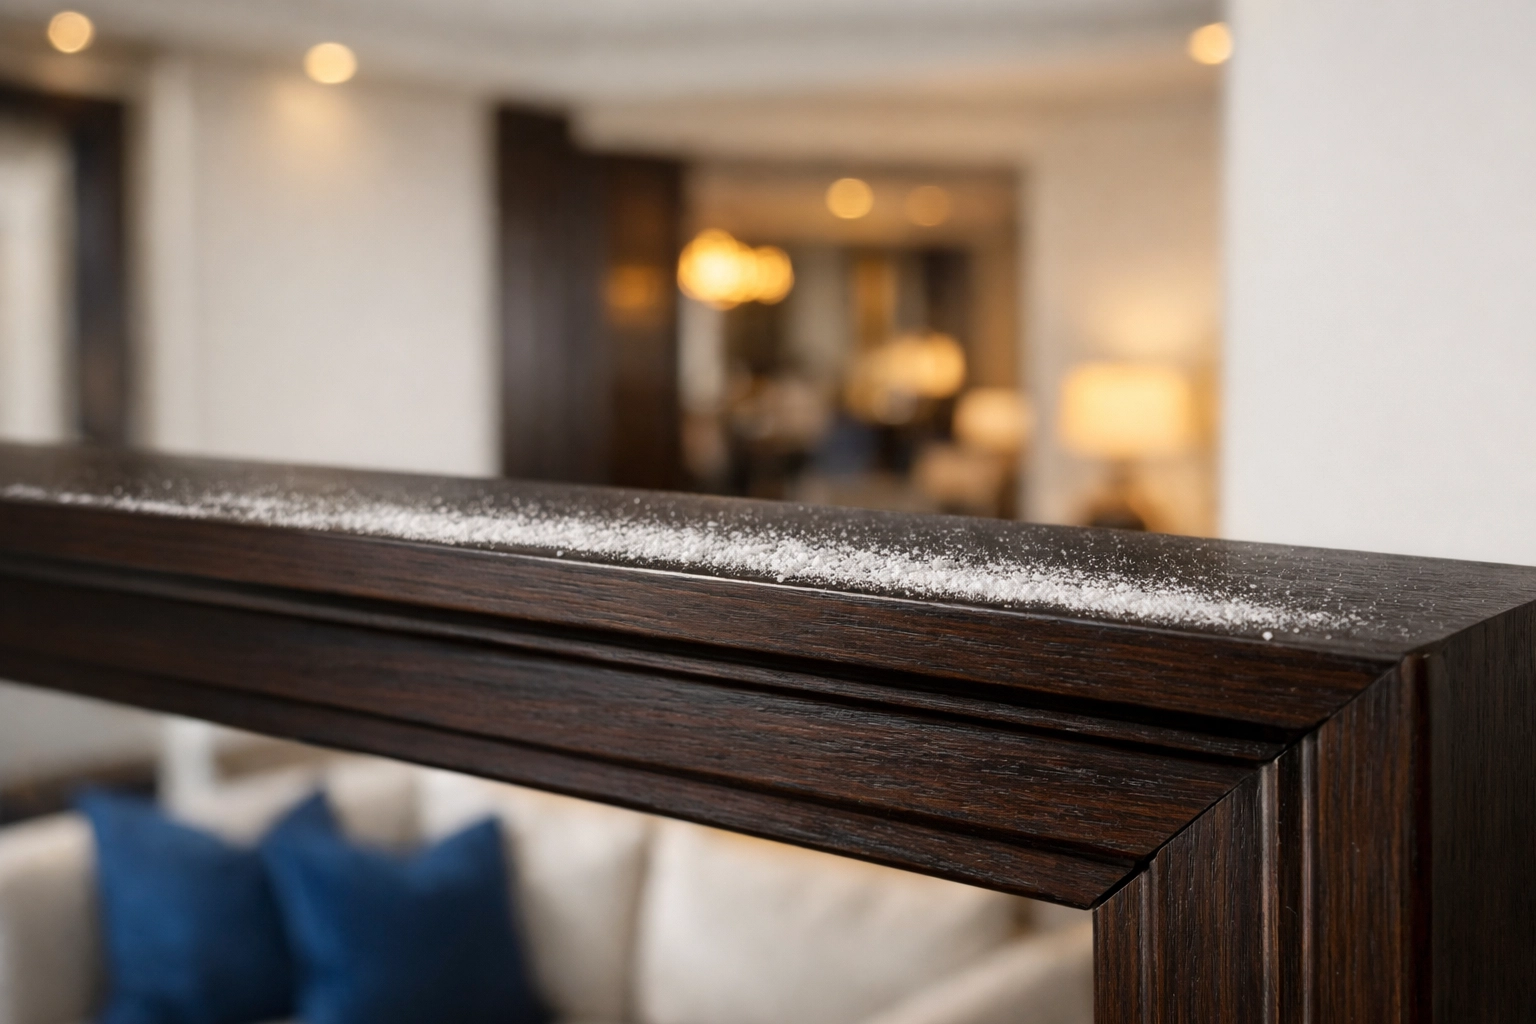
Post-construction dust is a different beast entirely. It’s fine, it’s persistent, and it has a magical ability to find its way onto surfaces you never even think to look at. One of the biggest culprits? The very tops of your door frames.
In this guide, we’re going to dive into why these hidden spots matter, the "Ninja" way to clean them, and why attention to detail is the difference between a house that looks clean and a house that is clean.
The Invisible Dust Trap: Why Door Frames Matter
If you’re like most people, your cleaning routine probably hits the "eye-level" zones. You wipe the counters, you scrub the sink, and you definitely hit the floors. But unless you’re seven feet tall, you probably aren’t looking at the top edge of your door frames every day.
During a construction project, whether it’s a full kitchen remodel or just a quick bathroom update, the air is filled with particulates. Sawdust, drywall dust, and stone particles stay suspended in the air for hours or even days. Eventually, gravity wins. These particles settle on any horizontal surface they can find.
Because the top of a door frame is a flat, horizontal ledge that sits high above our usual line of sight, it becomes a massive collector for this "settle-down" dust. If left untouched, this dust doesn’t just sit there. Every time you slam a door or even just walk through it quickly, you create a tiny breeze that knocks some of that dust back into the air. This can irritate your allergies and settle on your freshly cleaned furniture. This is why weekly house cleaning matters for maintaining indoor air quality, you have to get the dust out of the "hiding spots."
The Ninja Toolkit: What You’ll Need
Before you start climbing up on chairs (please don’t do that!), you need the right gear. A Ninja is only as good as their tools, and for high-level dusting, we recommend the following:
- A Sturdy Step Ladder: Safety first! Make sure you have a stable platform so you can actually see what you’re doing.
- Vacuum with a Brush Attachment: This is your first line of defense. A vacuum with a HEPA filter is even better for construction dust.
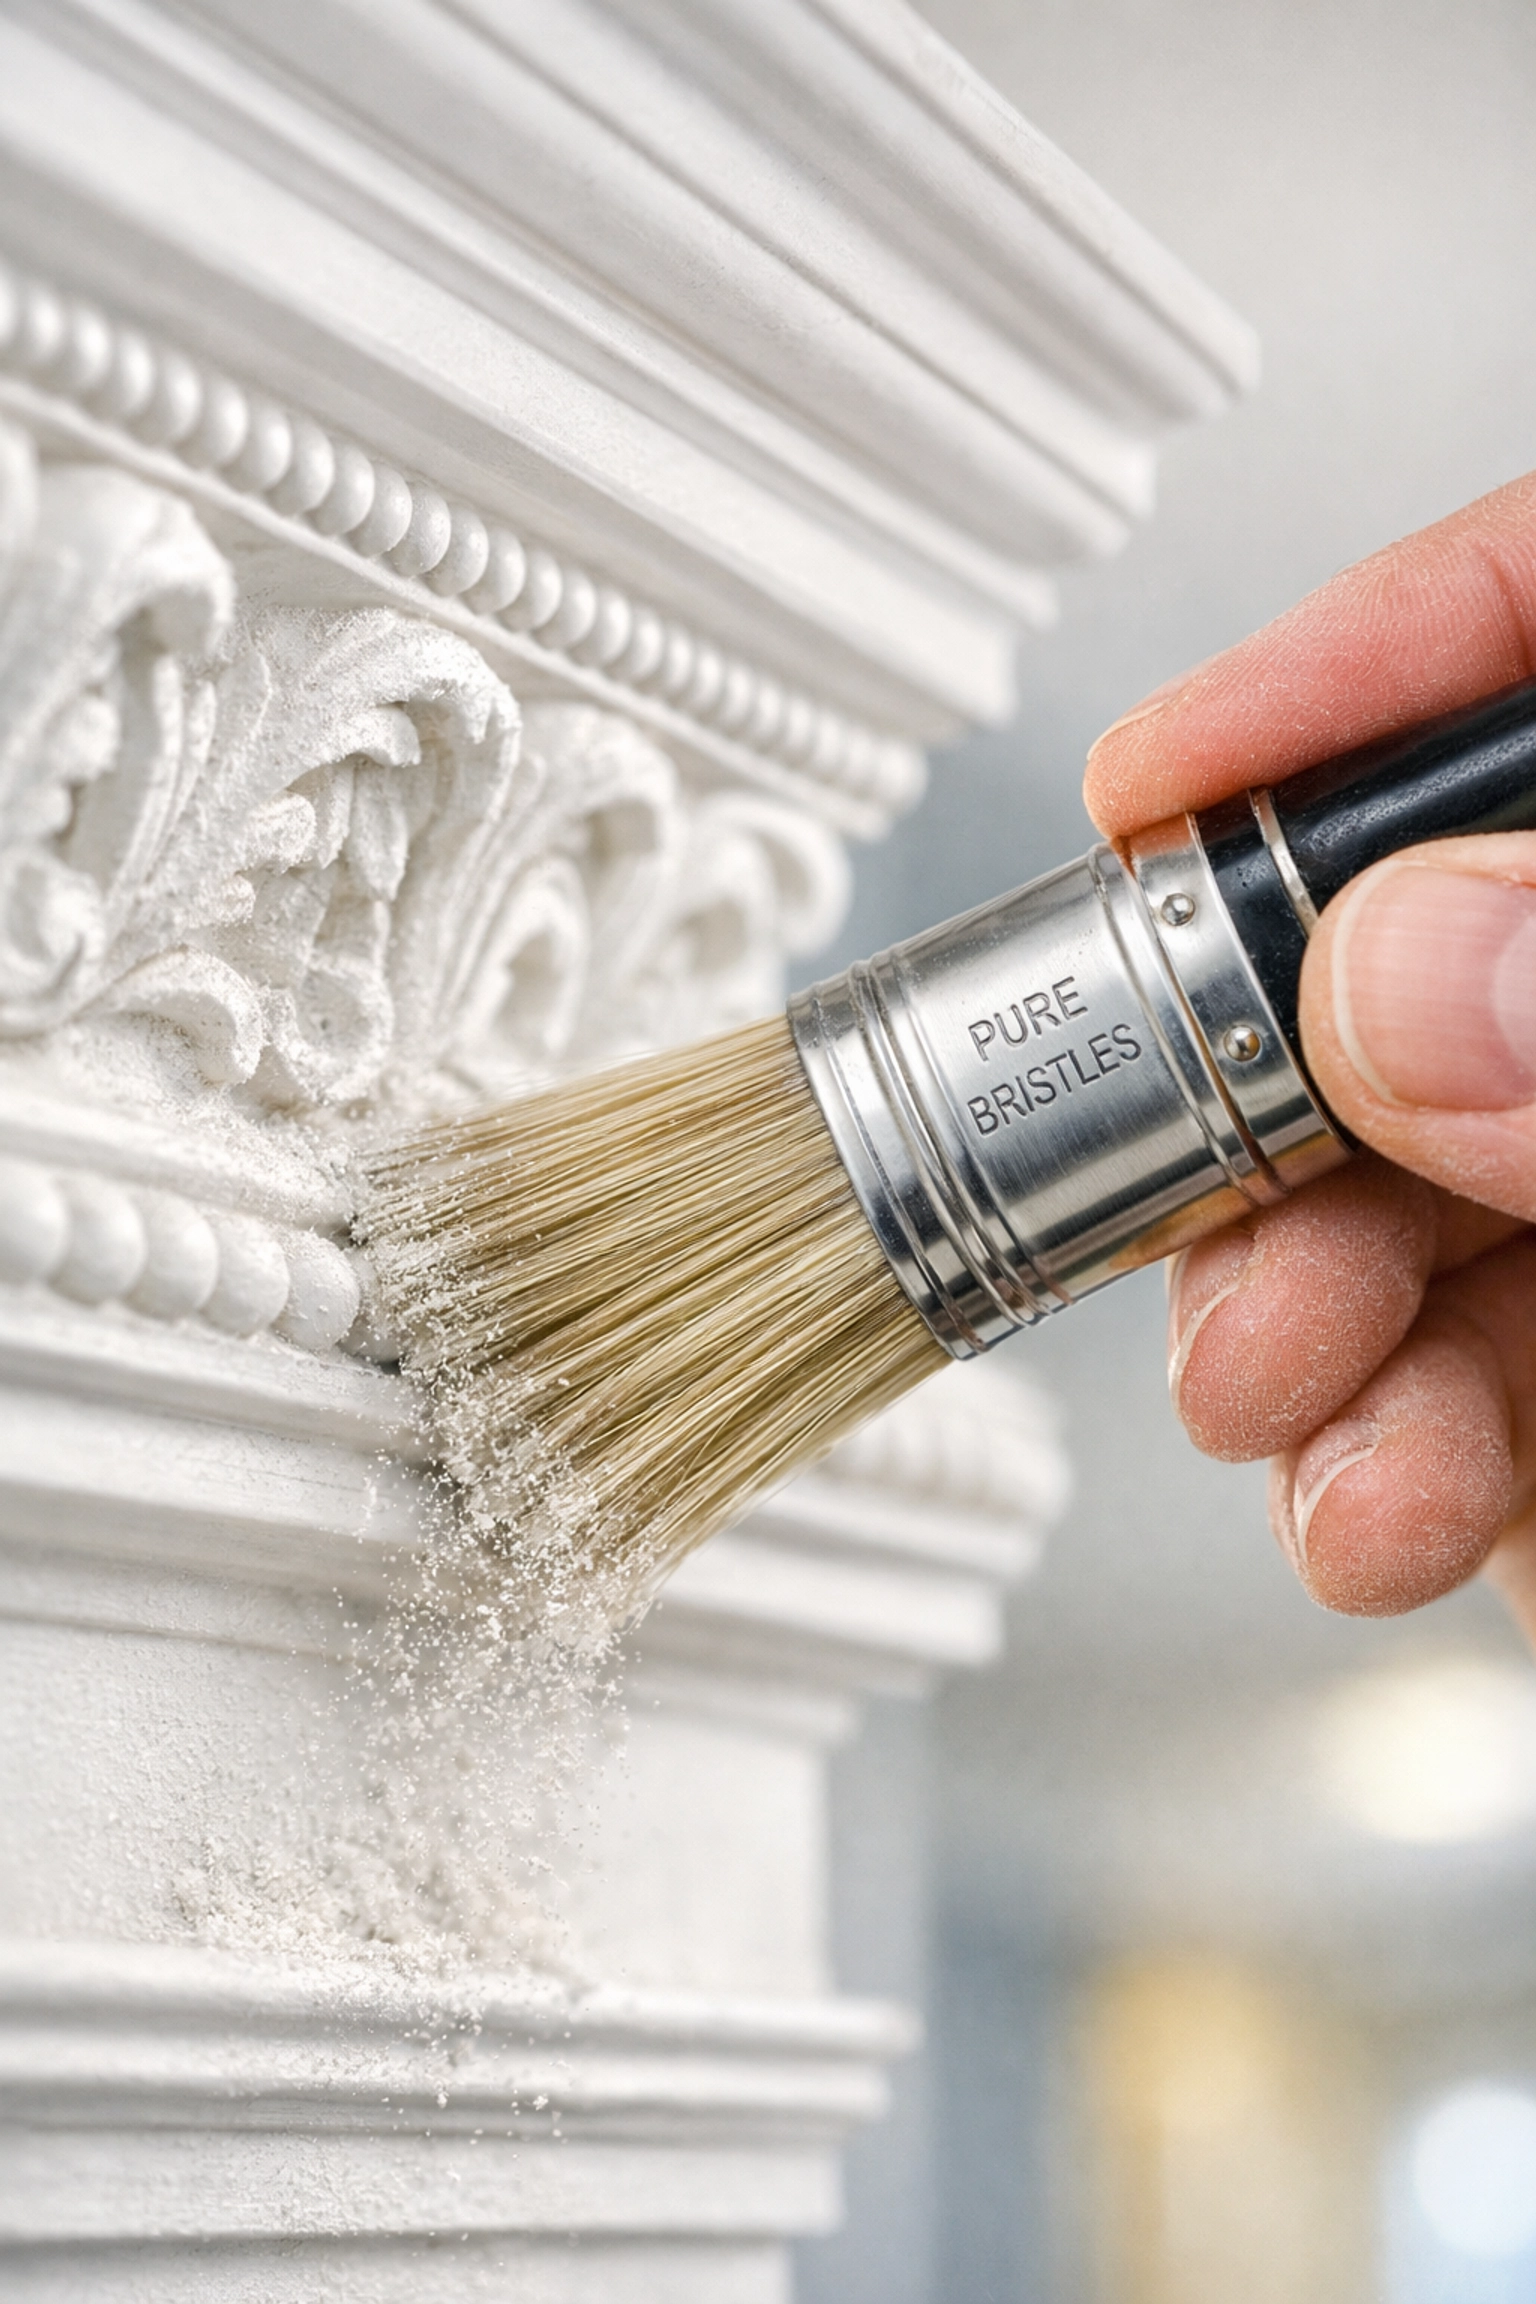
- A Clean Paintbrush or Soft-Bristled Brush: This is the pro secret for getting into those tiny decorative grooves in the molding.
- Microfiber Cloths: You’ll want several of these, some for damp wiping and some for drying.
- Mild Cleaning Solution: A simple mix of water and a drop of dish soap usually does the trick.
- A High-Reach Duster (Optional): If you have very high ceilings, a telescoping duster can help for the initial pass.
Step 1: The Dry Pass (Never Start with Water!)
One of the biggest mistakes people make when cleaning post-construction dust is going straight in with a wet cloth. We see it all the time! When you mix fine construction dust with water immediately, you essentially create a thin layer of mud. You’ll find yourself just pushing grey streaks around the frame, making the job ten times harder.
Instead, start with your vacuum. Use the soft brush or crevice tool to gently lift the loose dust from the top rail of the door frame. Work slowly. If you move too fast, you’ll just knock the dust off the ledge and onto your head.
Ninja Tip: Use a clean, dry paintbrush to flick dust out of the corners where the frame meets the wall. Have the vacuum nozzle right next to the brush to catch the particles as they fly out.
Step 2: The Detail Work
Door frames aren’t always just flat boards. Many homes have beautiful, ornate molding with ridges and "lips" that love to hold onto debris. This is where the paintbrush really shines. Run the bristles through the grooves to loosen any packed-in drywall dust.
Step 3: The Damp Wipe
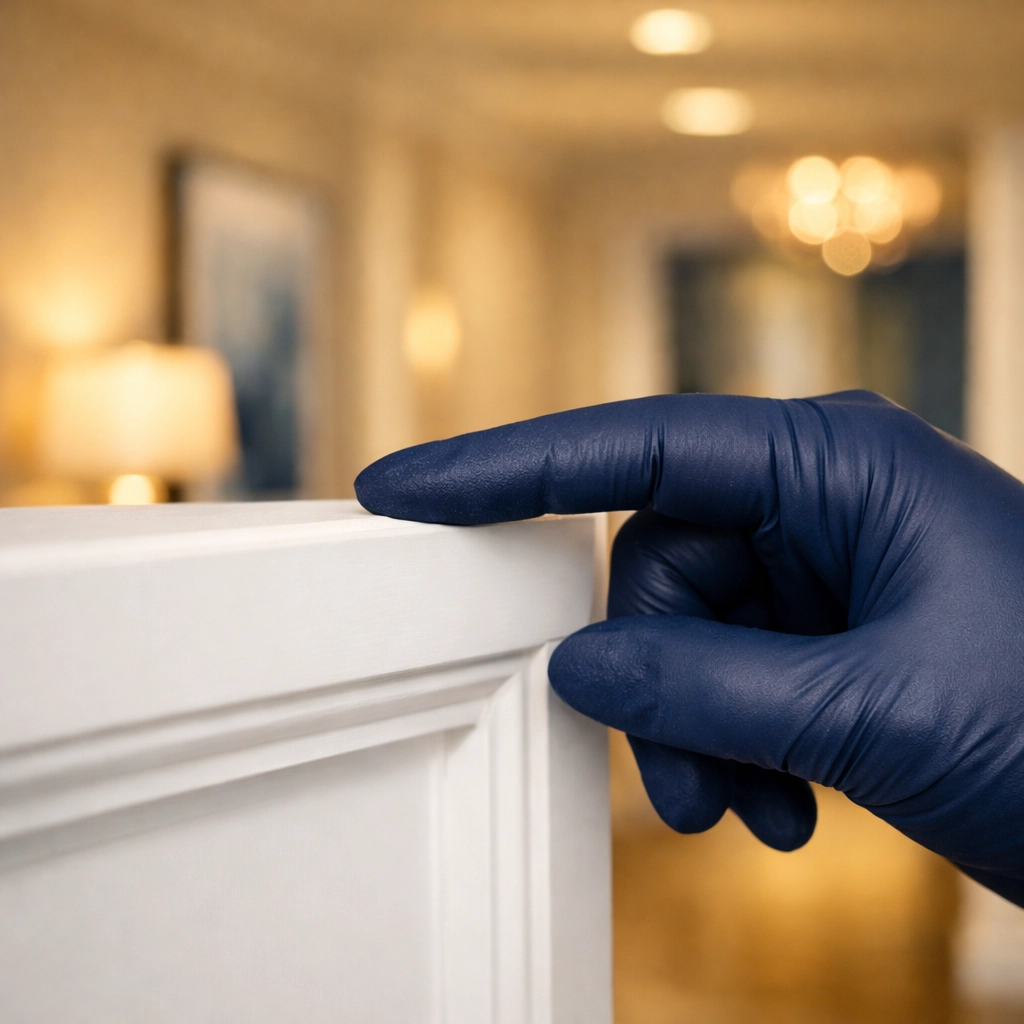
Once you’ve removed 95% of the dry dust, it’s time to get that "squeaky clean" finish. Lightly dampen a microfiber cloth with your cleaning solution. You don’t want it dripping wet, just damp.
Wipe along the top of the frame in one continuous motion if possible. This prevents you from leaving "stop marks" of dirt. If the cloth comes away grey or brown, rinse it out or switch to a fresh side. At The Cleaning Ninjas Inc, we believe in the "white glove" standard, which means we keep wiping until the cloth comes back perfectly clean.
Step 4: Dry It Down Immediately
Wood and MDF (which many modern door frames are made of) don't like moisture sitting on them. After your damp wipe, follow up immediately with a dry microfiber cloth. This prevents water spots and ensures that any remaining microscopic dust particles are lifted away rather than drying back onto the surface.
Beyond the Doors: Other Hidden High Spots
While you’ve got the ladder out, don’t stop at the door frames! Construction dust is an equal-opportunity hider. Here are a few other spots we always hit during our post-construction cleaning services:
- Window Castings: Just like door frames, the top edge of window molding is a dust magnet.
- High Ledges and Plant Shelves: If your home has decorative alcoves or high ledges, these are likely covered in a thick layer of "renovation snow."
- The Tops of Kitchen Cabinets: If your cabinets don’t go all the way to the ceiling, the "roof" of your cabinets is probably the dirtiest place in the house.
- Light Fixtures and Ceiling Fans: Dust loves to sit on the top side of fan blades and the interior of bowl-shaped light fixtures.

Why Is Construction Dust So Hard to Manage?
You might be wondering why you can't just do a quick "once-over" and be done with it. The reason lies in the composition of the dust itself.
Construction dust often contains materials like silica (from drywall and concrete) and fine wood fibers. These particles are much smaller and "sharper" than regular household dust. They can be abrasive to your finishes if you scrub too hard, and they are incredibly lightweight, meaning they can stay airborne for a long time.
This is why we often recommend a two-stage cleaning process. The first stage gets the bulk of the mess out, and the second stage, usually a few days later, catches everything that has finally settled out of the air. If you're struggling to keep up with the mess after a big project, you might find that a professional cleaning service is the best way to finally get your home back to a livable state.
The Ninja Attention to Detail
At The Cleaning Ninjas Inc, we pride ourselves on being "detail-obsessed." To us, a clean home isn't just about what you see when you walk in the front door; it's about the peace of mind that comes from knowing every nook and cranny has been handled.
When we perform a post-construction clean, we don't just "dust." We hunt for the spots that others miss. We look at the hinges of the doors, the tops of the baseboards, and yes, those pesky hidden tops of the door frames.
It’s that extra 10% of effort that makes a home feel truly refreshed. If you’re interested in learning more about how we handle these tough jobs, check out our About Us page to see our philosophy in action.
When Should You Call in the Pros?
Sometimes, a renovation is just too big for a handheld vacuum and a step ladder. If you’ve done a major overhaul, the amount of dust can be overwhelming. It can get into your HVAC system, your closets, and even inside your drawers.
If you find yourself cleaning the same spot three times and still seeing a film of dust the next morning, it’s time for a deep clean. Our team at The Cleaning Ninjas Inc has the industrial-grade vacuums and the specialized techniques to trap that dust once and for all. Whether you need a one-time post-construction scrub or you’re looking for a weekly vs bi-weekly service to keep things fresh, we’re here to help.
Final Thoughts: Look Up!
The next time you’re doing your weekend chores, take a moment to look up. Grab a chair (carefully!) and run a finger along the top of your bedroom door frame. If it comes back grey, don’t panic: it’s just a sign that your home needs a little Ninja love.
Cleaning the hidden spots might take a few extra minutes, but the payoff is a healthier home and a much deeper level of clean. And remember, if the task feels too tall, the Ninjas are always ready to swoop in and save the day!
For more tips on keeping your home in tip-top shape, head over to our cleaning tips blog. Happy cleaning!

