

There is nothing quite like the feeling of walking into a room that has just been professionally painted. The colors are crisp, the walls look flawless, and the whole space feels reborn. But then you look down. Between the drywall dust, the stray paint drips, and the footprints from the crew, your baseboards: the literal foundation of your wall’s aesthetic: are looking a little less than stellar.
Cleaning up after a renovation or a fresh paint job is a specific kind of challenge. At The Cleaning Ninjas Inc, we see this all the time. You want the place to be spotless, but you also don't want to ruin that expensive new paint job you just paid for. Whether you've just finished a DIY project or had the pros in for a professional transformation, knowing how to handle your trim and baseboards post-construction is key to making your home truly shine.
Here is our "Ninja" guide to deep cleaning your baseboards after the painters have packed up their ladders.
1. The Golden Rule: Patience is a Virtue (Wait for the Cure!)
Before you even think about touching those baseboards with a damp cloth, you need to understand the difference between "dry" and "cured."
Paint usually feels dry to the touch within an hour or two, but it takes much longer to cure. Curing is the chemical process where the paint reaches its maximum hardness and durability. If you start scrubbing fresh paint that hasn't cured, you risk peeling it off or creating "burnish" marks (shiny spots on a matte finish).
- Wait at least 24 to 48 hours before doing any light dusting.
- Wait at least 2 to 4 weeks before doing a heavy wet-scrub with soap and water, depending on the humidity and the type of paint used.
If you have a massive post-construction mess and can't wait a month, be incredibly gentle and stick to the "green" methods we outline below.
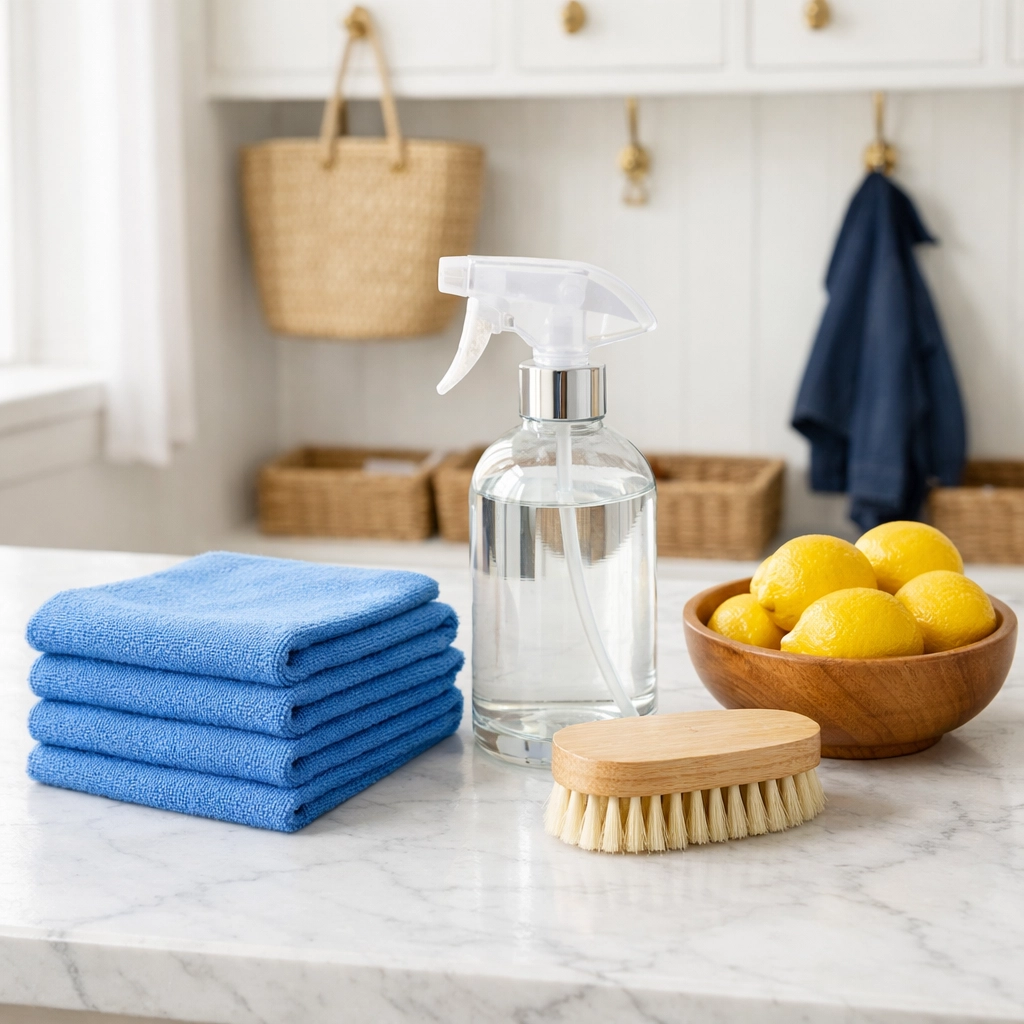
2. Assemble Your Eco-Friendly Ninja Kit
We are big fans of green cleaning. Not only is it better for the environment, but it’s also much safer for the delicate finishes on your new trim. Harsh chemicals can strip the gloss or discolor the pigment in fresh paint.
What you’ll need:
- A vacuum with a brush attachment (this is non-negotiable!).
- Distilled white vinegar or a mild, plant-based dish soap (like Sal Suds or Ecover).
- Microfiber cloths (the "Ninja" standard for lint-free cleaning).
- A soft-bristled toothbrush for the nooks and crannies.
- Warm water.
- A melamine sponge (Magic Eraser), but use this with extreme caution.
3. Step One: The Great Dust-Off
The biggest enemy of a post-construction home is fine dust. If you apply water directly to a dusty baseboard, you aren't cleaning; you’re making mud. This mud can get trapped in the texture of the paint or the crevices of the trim molding.
Start by using your vacuum’s soft brush attachment. Run it along the top edge of the baseboard where the most dust settles, and then along the face. If you don’t have a vacuum handy, a dry microfiber cloth or even an old, clean paintbrush can work to whisk away the loose particles.
Don't forget the "quarter round" or "shoe molding": that tiny strip of wood at the very bottom where the baseboard meets the floor. It’s a magnet for sawdust and debris.
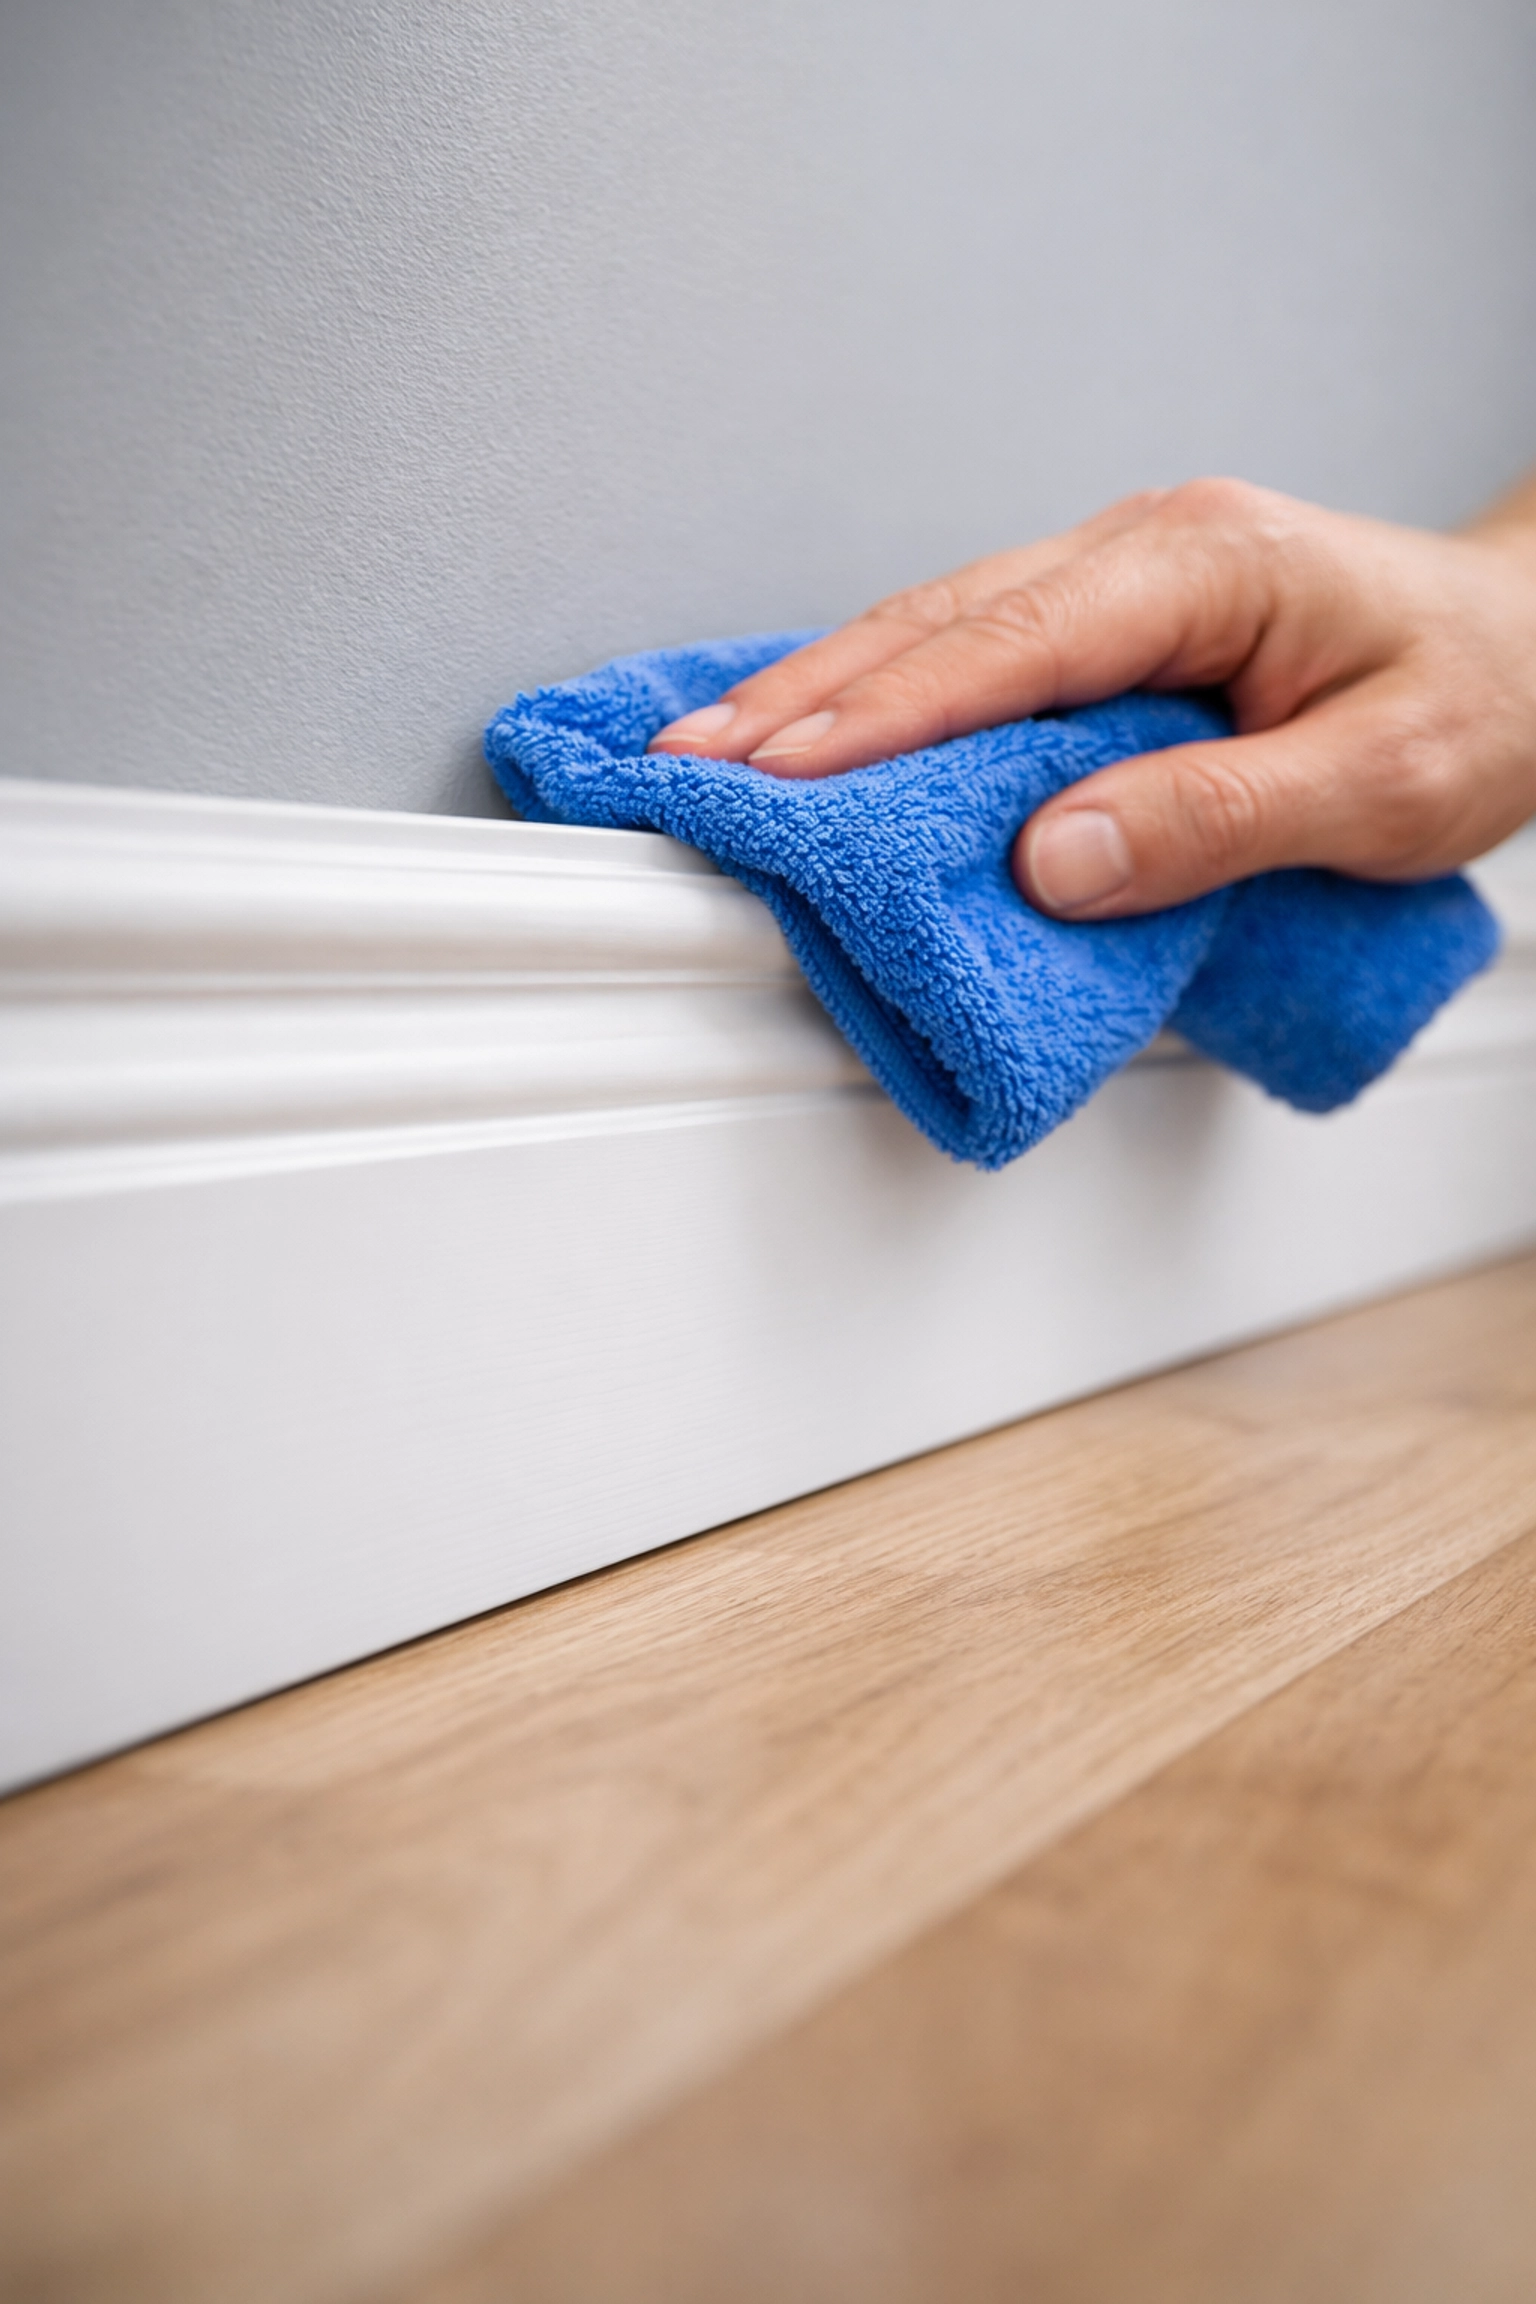
4. Step Two: The "Three-Towel" Technique
When it’s time to move on to wet cleaning, we recommend the three-towel method. This ensures you aren't just moving dirt around and that you’re leaving the wood dry to prevent warping.
- The Wash Towel: Dip a microfiber cloth into a mixture of warm water and a few drops of mild dish soap. Wring it out until it is barely damp. You never want dripping water on your baseboards.
- The Rinse Towel: Keep a second cloth dampened with just plain water. This removes any soapy residue that might attract more dust later.
- The Dry Towel: Use a fresh, dry microfiber cloth to buff the baseboard dry immediately after rinsing. This gives the trim a professional-level shine.
5. Dealing with Paint Drips and Splatters
Even the best painters sometimes leave a "calling card" in the form of a small drip or a stray splatter on the top edge of the baseboard.
- If the paint is fresh (less than 24 hours): You can often gently scrape it off with a fingernail or a plastic putty knife. Don't use metal, as it will gouge the wood.
- If the paint is dry: A melamine sponge (Magic Eraser) can be helpful here, but listen closely: be gentle. Melamine sponges act like extremely fine sandpaper. If you scrub too hard, you will take the finish right off your baseboard. Use a light "dabbing" motion with a damp sponge to slowly wear the stray paint away.
- For stubborn latex drips: A tiny bit of rubbing alcohol on a cotton swab can sometimes dissolve a latex splatter without hurting the oil-based or high-quality acrylic trim paint underneath: but always test an inconspicuous spot first!
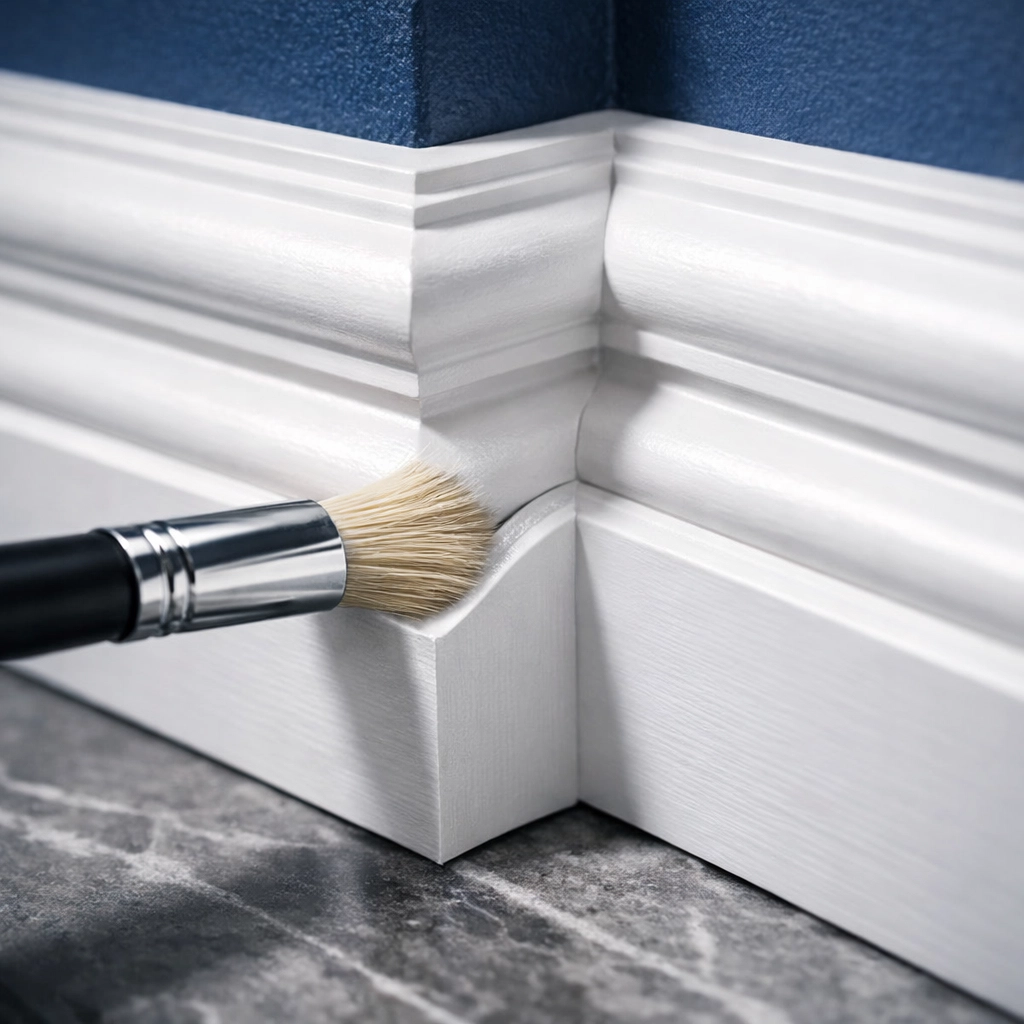
6. The Ninja Secret: Don't Forget the Corners
The most common mistake people make when cleaning baseboards is ignoring the inside and outside corners. Dust and hair love to congregate in these 90-degree angles. This is where your soft-bristled toothbrush comes in.
Dip the toothbrush in your cleaning solution and gently scrub the corners and any decorative grooves in the molding. This extra 10% of effort is what makes a room go from "okay" to "magazine-ready."
7. Why Green Cleaning Matters After Construction
When a house has been under construction or recently painted, the indoor air quality often takes a hit. VOCs (Volatile Organic Compounds) from the paint and fine particulate matter from sanding are already floating around.
By choosing green cleaning solutions like vinegar and water or castile soap, you aren't adding more toxic fumes to the mix. It’s better for your lungs, your kids, and your pets. Plus, vinegar is a natural deodorizer that can help neutralize that "new paint" smell that some people find overwhelming.
8. Protecting Your Baseboards Long-Term
Once your baseboards are finally clean, you’ll want to keep them that way. Here are a few "Ninja" tips for long-term maintenance:
- Weekly Dusting: Include your baseboards in your weekly cleaning routine. Using a vacuum brush once a week takes 30 seconds per room and prevents the heavy buildup that requires deep scrubbing.
- The Dryer Sheet Hack: Some people swear by rubbing a new dryer sheet along clean baseboards. The anti-static properties can help repel dust for a few weeks. However, if you prefer to stay 100% green, a simple microfiber cloth is just as effective.
- Felt Pads: Ensure all furniture near the walls has felt pads on the feet. This prevents "gouging" or scuffing if a chair or table gets bumped against the trim.
9. When to Call the Professionals
Sometimes, a renovation leaves a mess that is just too big for one person and a bucket of soapy water. If you’ve just finished a major remodel and find yourself staring at a whole house full of dusty trim, it might be time to call in the experts.
At The Cleaning Ninjas Inc, we specialize in getting homes back to a livable, breathable state. Our team understands the nuances of post-construction cleaning, from managing HEPA filtration to the delicate touch needed for freshly painted surfaces. You can learn more about us and how we tackle these challenges with a smile.
Cleaning baseboards isn't the most glamorous job in the world, but it is the "frame" for your home's beautiful new "painting." When they are clean, the whole room feels intentional and polished.
If you’re ready to reclaim your home from the post-painter chaos but don't have the time to scrub every inch of trim yourself, check out our services. We’d love to help you cross "cleaning the baseboards" off your to-do list so you can get back to enjoying your beautiful new space!
Stay clean, stay green, and enjoy that fresh paint!


