

Let’s be honest: there is nothing quite like the shine of a freshly mopped tile floor. It makes the whole house feel brighter, cleaner, and just… better. But if you’ve ever spent an hour scrubbing away only to find streaks, hazy residue, or dirty grout lines once the floor dries, you know that mopping is an art form.
At The Cleaning Ninjas Inc, we believe your home should be your sanctuary. Whether you’ve got ceramic in the kitchen, porcelain in the bathroom, or natural stone in the entryway, keeping those surfaces sparkling is a top priority. In this edition of The Cleaning Ninjas Tip, we’re breaking down the absolute best practices for mopping tile floors using eco-friendly methods that are safe for your family, your pets, and the planet.
Step 1: The Pre-Mop Ritual (Don’t Skip This!)
One of the biggest mistakes people make is jumping straight into mopping. If you apply a wet mop to a floor covered in dust, pet hair, and crumbs, you aren’t cleaning: you’re just making "floor soup." You’ll end up pushing wet dirt into the grout lines, which is exactly where you don’t want it.
Before any water touches the floor, you need to sweep or vacuum. We recommend using a vacuum with a hard floor setting or a soft-bristle broom. Avoid vacuum beaters that are designed for carpets, as they can occasionally scratch softer tile finishes. Getting up that loose debris makes the actual mopping process ten times more effective.
Step 2: Choose the Right Tools
If you’re still using that old-school string mop or a giant yellow sponge mop, it might be time for an upgrade. Sponge mops tend to push dirty water into grout lines and are notorious for leaving streaks.
The Ninja Choice: Microfiber Mops
Microfiber is a game-changer for tile. The tiny fibers are incredibly effective at grabbing bacteria and fine dust that traditional mops miss. Plus, they require less water, which helps your floors dry faster.
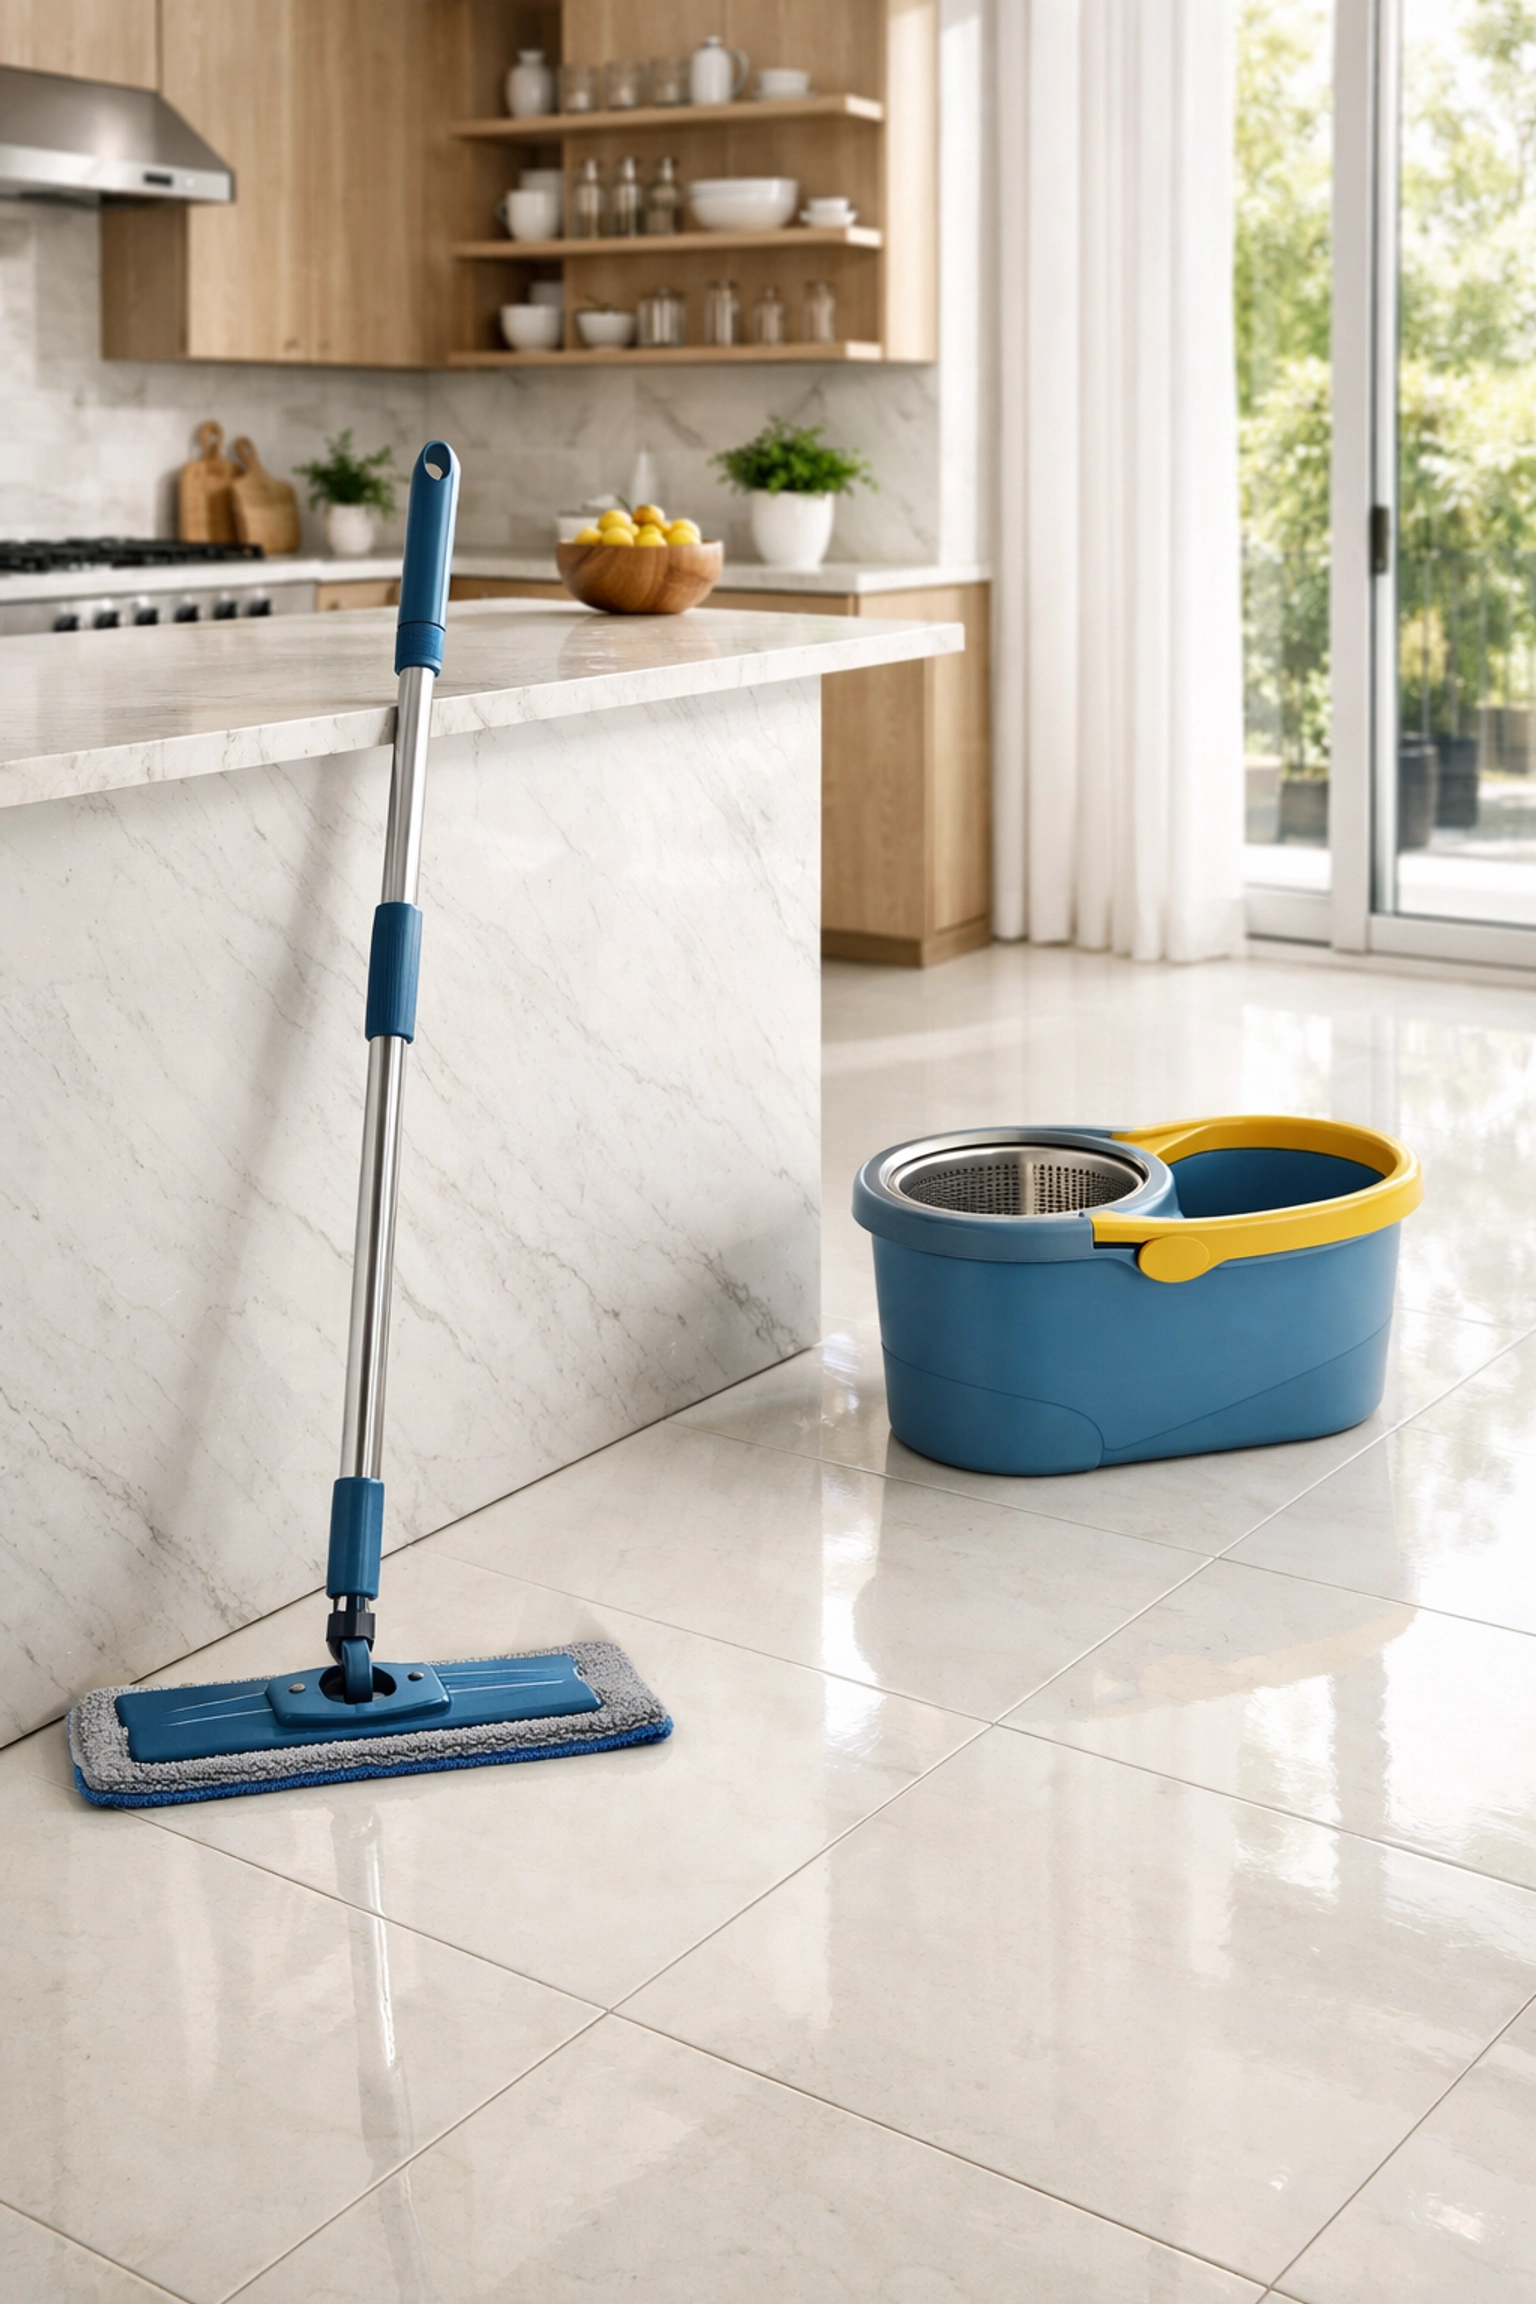
Another great tool is a spin mop with a foot pedal. This allows you to wring out the mop head until it’s just damp, not soaking wet. Controlling the moisture level is the secret to a streak-free finish. If you’re managing a busy household, keeping up with these details can be tough. That’s why many of our clients opt for weekly house cleaning to ensure their floors never reach that "sticky" stage.
Step 3: Mix an Eco-Friendly Cleaning Solution
You don’t need harsh, toxic chemicals to get a deep clean. In fact, many commercial cleaners leave a waxy buildup that actually attracts more dirt over time. At The Cleaning Ninjas Inc, we love green solutions.
For most tile floors (ceramic and porcelain), a simple mixture of warm water and a few drops of mild, eco-friendly dish soap works wonders. If your floors are feeling a bit greasy or have lost their luster, you can add half a cup of white distilled vinegar to a gallon of water. Vinegar is a natural disinfectant and helps cut through film without leaving a scent once it dries.
Note: If you have natural stone tiles like marble or limestone, skip the vinegar! The acid can etch the stone. Stick to a pH-neutral cleaner specifically designed for stone.
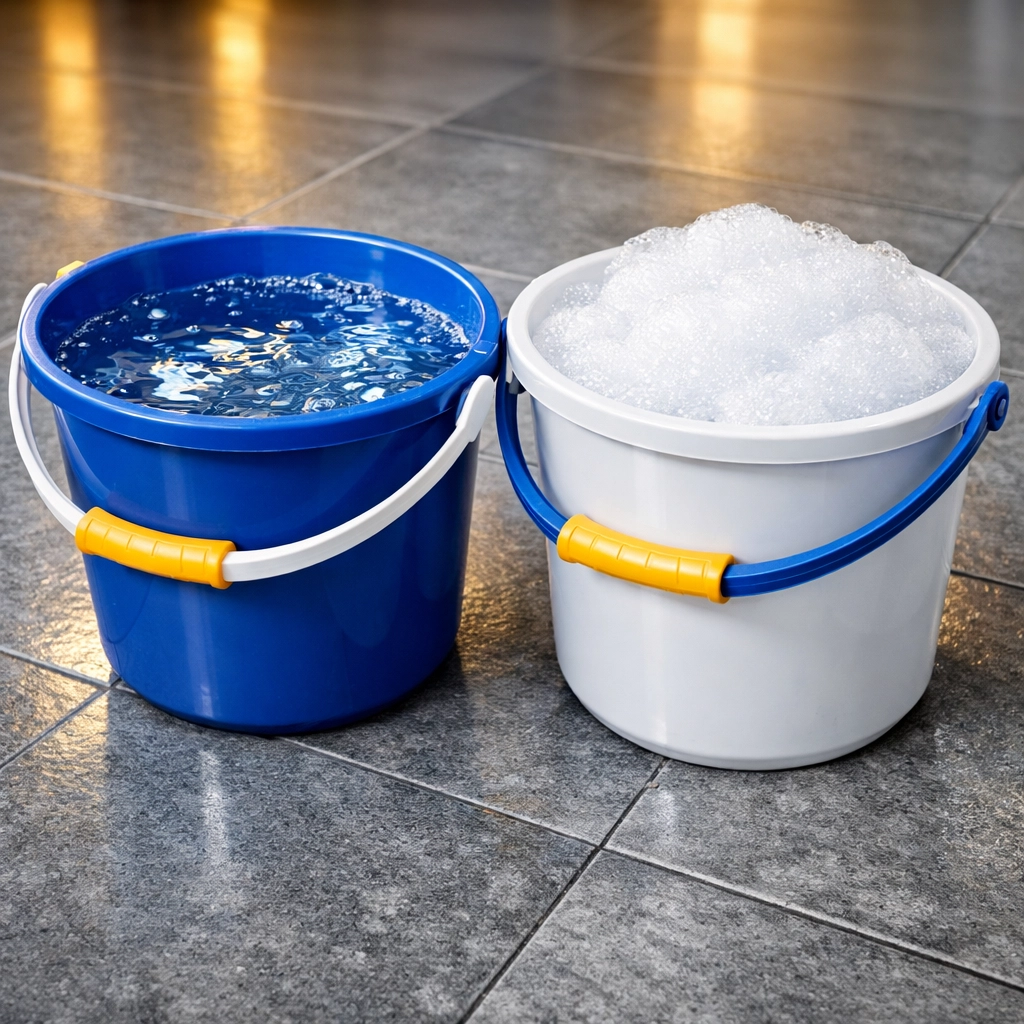
Step 4: The Two-Bucket Method
This is a professional secret that will change your life. Instead of one bucket of soapy water, use two.
- Bucket One: Your cleaning solution (water + eco-friendly soap/vinegar).
- Bucket Two: Plain warm water for rinsing.
Dip your mop in the cleaning solution, mop a section of the floor, then rinse the dirty mop in the plain water bucket before going back into the cleaning solution. This ensures you aren't just spreading dirty water back onto the floor. It keeps your cleaning solution fresh and your floors significantly cleaner.
Step 5: Master the Mopping Technique
How you move the mop matters. Start at the farthest corner of the room and work your way toward the exit so you don't trap yourself!
Use an "S" pattern or figure-eight motion rather than just pushing the mop back and forth. This technique helps "trap" the dirt in the mop head rather than just sliding it around. Pay extra attention to high-traffic areas where spills are more common. If you find yourself constantly battling floor grime, a bi weekly house cleaning schedule can be a perfect way to keep the heavy lifting off your shoulders while maintaining a healthy home environment.
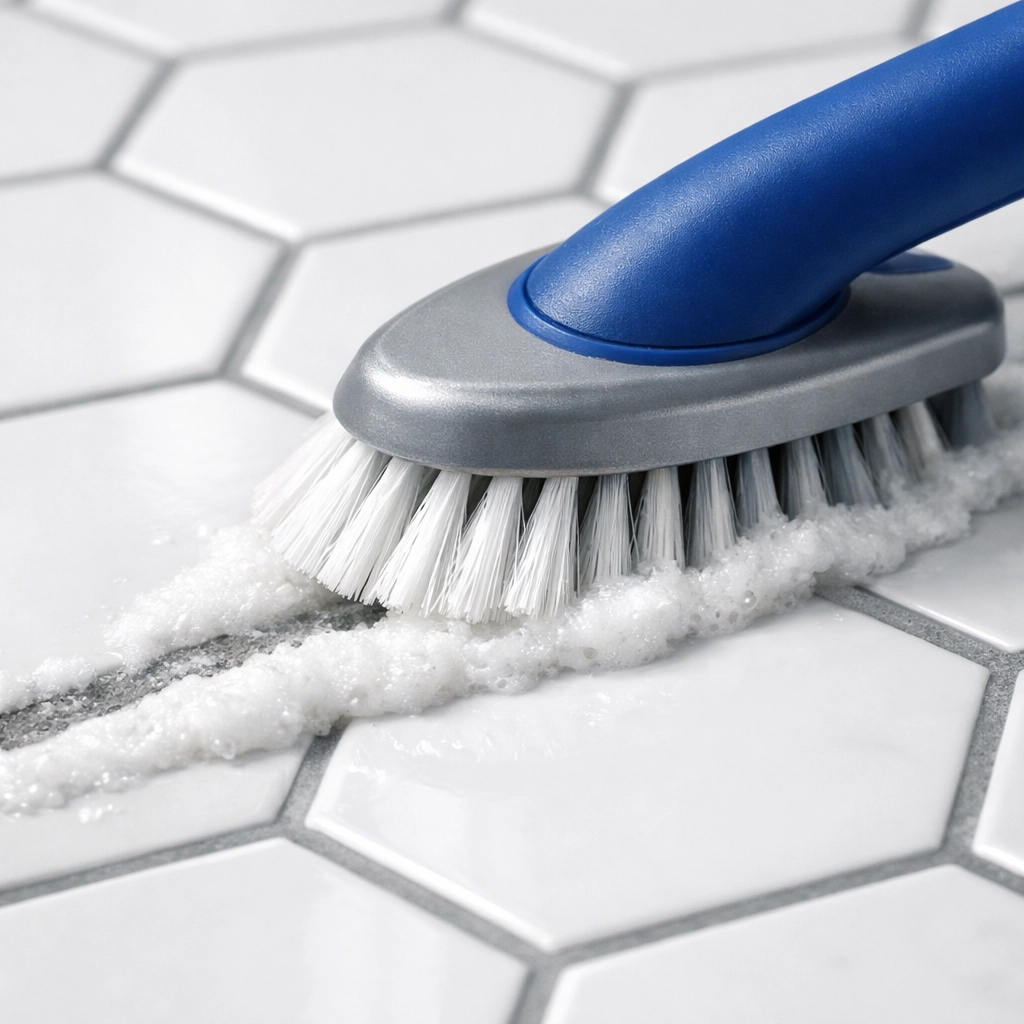
Step 6: Don't Forget the Grout!
Grout is porous, meaning it loves to soak up liquids and stains. If your tiles look clean but your floors still look "off," it’s probably the grout.
For an eco-friendly grout refresh, make a paste of baking soda and water. Apply it to the grout lines and let it sit for about ten minutes. Then, grab an old toothbrush (or a dedicated grout brush) and give it a gentle scrub. Rinse with a damp cloth. It’s a bit of work, but the results are incredibly satisfying.
Step 7: The Final Dry
Most people let their floors air dry. While that’s fine if you’re in a rush, if you want that "magazine-cover" shine, you should dry the floor manually. Use a clean, dry microfiber cloth or a large towel to buff the floor after mopping. This prevents water spots and ensures that no lingering moisture seeps into the grout. It also prevents the "slipperiness" that can be dangerous for kids or seniors in the home.
Why Consistency Matters
Tile floors are durable, but they aren't invincible. Sand and grit act like sandpaper on the finish of your tiles, and sitting moisture can eventually weaken grout. This is why consistent maintenance is so important.
Between our professional visits, we always tell our clients that a quick 5-minute sweep daily can save you hours of deep cleaning later. If you feel like you're constantly playing catch-up with your chores, exploring our services might be the breath of fresh air you need. We specialize in taking the stress out of home maintenance so you can focus on what really matters.
Common Mopping Mistakes to Avoid
To wrap up this The Cleaning Ninjas Tip, let’s look at a few things you should definitely avoid doing:
- Using Too Much Soap: More soap doesn’t mean more clean. It usually just means more residue, which makes your floors feel sticky and look dull.
- Mopping with Dirty Water: If your rinse water looks like chocolate milk, it’s time to change it.
- Using Abrasive Scrubbers: Steel wool or harsh scouring pads can permanently scratch the glaze on your tiles.
- Ignoring Spills: The longer a spill sits, the more likely it is to stain the grout. Always spot-clean spills as soon as they happen.

Let The Ninjas Handle the Heavy Lifting
We get it: life is busy. Between work, family, and trying to have a social life, spending your Saturday morning on your hands and knees scrubbing grout isn't exactly the dream. That’s where we come in. Whether you need a one-time deep clean or a regular weekly house cleaning to keep your home in tip-top shape, The Cleaning Ninjas Inc is here to help.
Our team is trained in these best practices and more, using eco-friendly products that keep your home safe and sparkling. You can learn more about us and our commitment to quality on our website.
A clean floor is the foundation of a clean home. By following these steps: sweeping first, using microfiber, choosing eco-friendly solutions, and drying the surface: you’ll ensure your tile floors stay beautiful for years to come.
Stay tuned for more Ninja Tips to help you master every corner of your home!


