We’ve all been there. You finish a load of laundry, pull out that mesh screen, and peel off a satisfying layer of grey fluff. It feels like you’ve done your part for home maintenance, right? Well, here at The Cleaning Ninjas Inc, we like to dig a little deeper. While cleaning that lint screen is a great start, there is a secret world of lint hiding just beneath the surface, literally.
If you’ve noticed your clothes are taking two cycles to dry or your laundry room feels like a sauna every time the dryer is running, you probably have a lint buildup problem that goes way beyond the filter. Not only does this waste energy, but it’s also one of the leading causes of home fires. Today, we’re sharing a "Ninja Tip" on how to perform a deep dive into your dryer’s anatomy using eco-friendly methods to keep your home safe and efficient.
The Hidden Danger Under the Hood
Most homeowners think the lint trap catches everything. In reality, fine particles of fabric and dust bypass that mesh screen every single time you run a load. Over months and years, this debris settles into the bottom of the dryer housing, wraps around the heating element, and clogs the exhaust vent.
Research shows that significant lint buildup occurs in the spaces below and around the lint trap opening. In some cases, as much as four cups of lint can accumulate in areas you can't even see! This isn't just a "dusty" problem; it’s a performance killer. When air can't flow freely, your dryer has to work twice as hard, which spikes your electricity bill and puts unnecessary wear and tear on your appliance.
If you’re someone who invests in weekly house cleaning, you’re already ahead of the game in terms of surface dust. But the "guts" of your appliances need a little specialized attention every few months to stay in peak condition.
Step 1: Gear Up for the Deep Clean
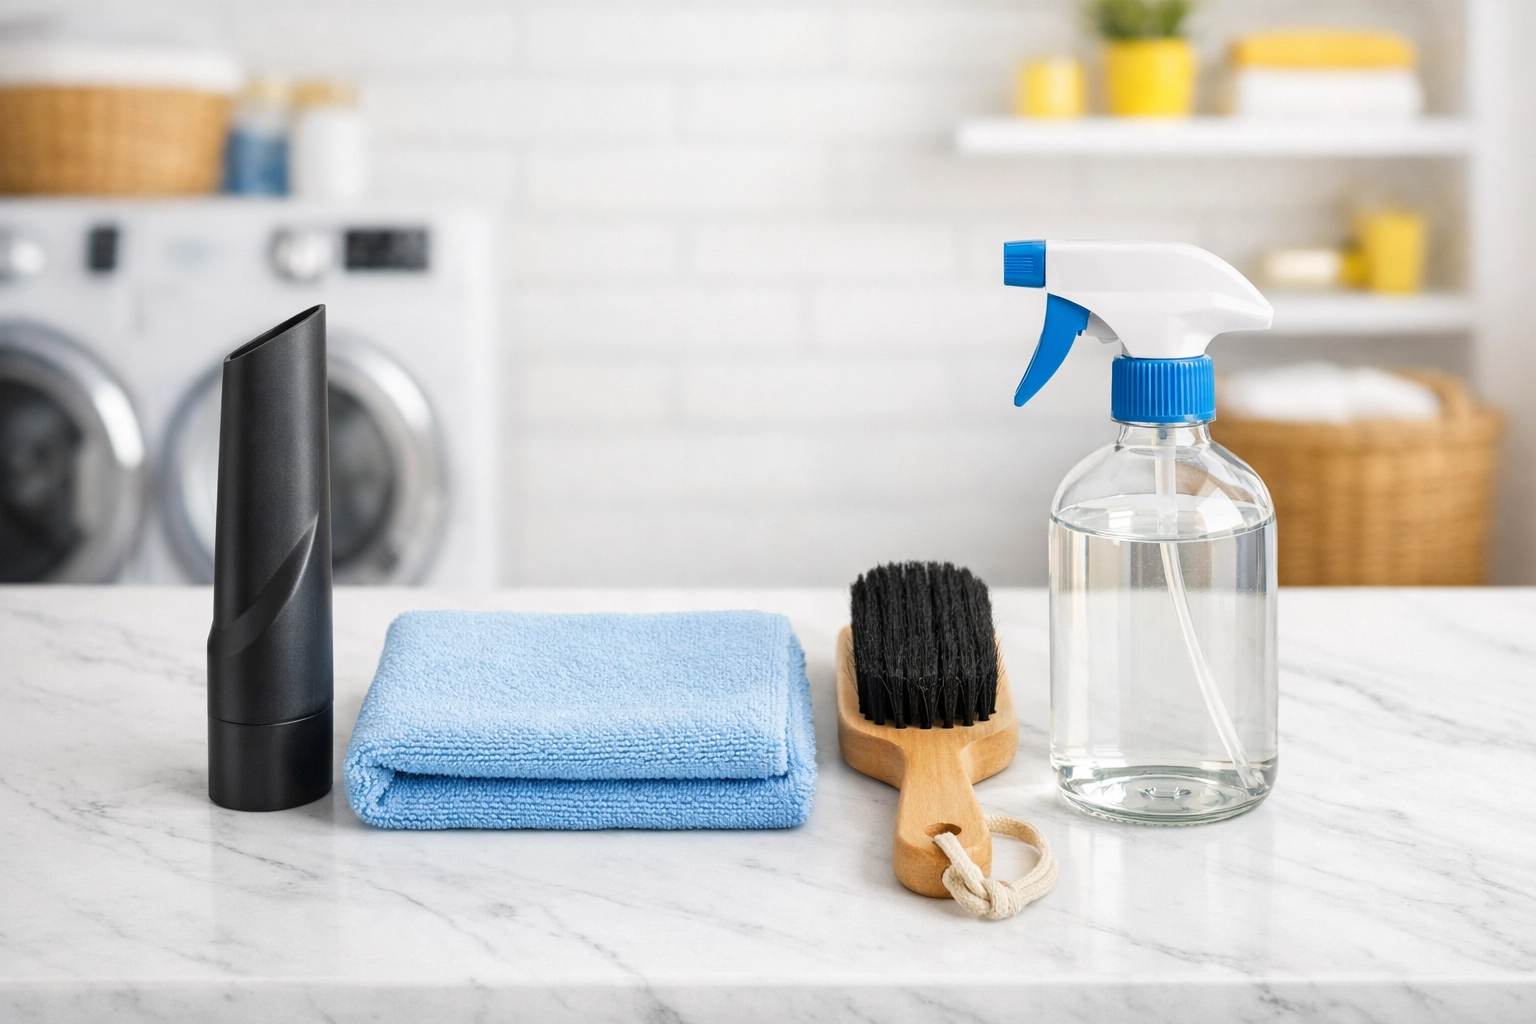
Before we get our hands dirty, let’s talk tools. You don’t need harsh chemicals or expensive gadgets. To stay eco-friendly and effective, grab the following:
- A vacuum with a long, flexible crevice tool (or a specialized dryer lint vacuum attachment).
- A screwdriver (usually a Phillips head).
- A long-handled dryer vent brush.
- A damp microfiber cloth.
- A bit of white vinegar and water.
Safety first: Always unplug your dryer before you start. If you have a gas dryer, you should also turn off the gas supply line to be extra cautious.
Step 2: Vacuum the "Abyss"
Even after you pull out the lint filter, there’s a deep slot where that filter sits. Look inside with a flashlight. You’ll likely see a mountain of grey fuzz at the bottom. This is where most of the "bypass" lint lives.
Take your vacuum’s crevice tool and reach as far down into that slot as possible. Move it around gently to break up the clumps. If your vacuum hose is too thick, you can actually DIY a thinner attachment using an empty cardboard paper towel roll and some tape. Just flatten the end of the roll to fit into the narrow gap!
Step 3: Removing the Front or Back Panel
For a truly "Ninja-level" clean, you may need to open up the dryer housing. Most dryers have a few screws on the back or a front panel that clips off. Check your manual if you’re unsure.
Once the panel is off, you’ll likely see lint clinging to the motor, the belt, and the base of the machine. Use your vacuum to carefully suck up this dust. Be gentle around wires and sensors. Many modern dryers have moisture sensors located near the lint trap; if these are covered in a film of dryer sheet residue or fine dust, they won't accurately tell when your clothes are dry, leading to over-drying and wasted energy.
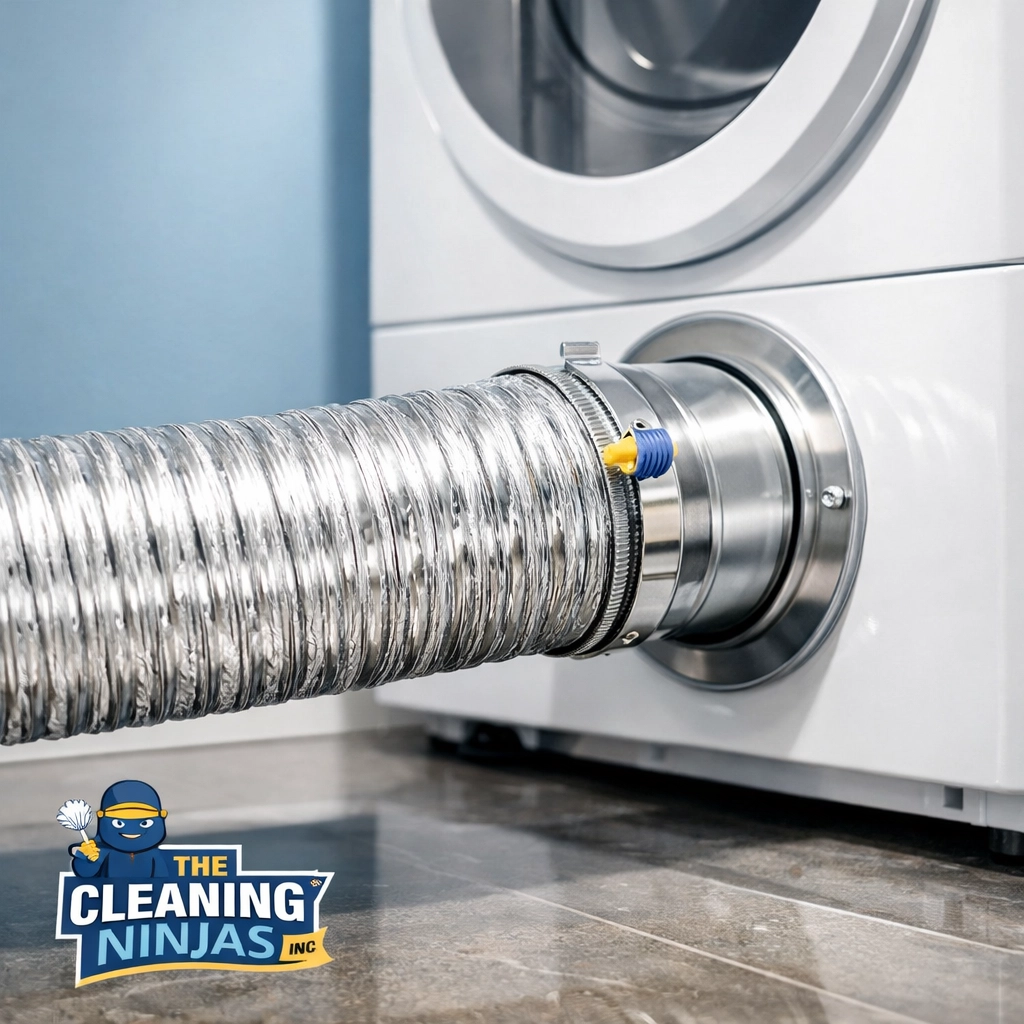
Step 4: The Exhaust Vent and Hose
This is the part most people neglect until it’s too late. The silver accordion-style hose behind your dryer is a prime spot for clogs.
- Detach the hose: Loosen the clamps and pull the hose away from the dryer and the wall.
- Vacuum the ends: Reach in as far as you can with the vacuum.
- Use a brush: A long dryer vent brush can be fed through the hose to push out stubborn blocks.
- Check the exterior vent: Go outside your house and find where the dryer vents to the exterior. Make sure the flap moves freely and isn't blocked by bird nests or matted lint.
Keeping this pathway clear is essential for bi weekly house cleaning maintenance mindsets. If air can't get out, your dryer is basically a giant tinder box.
Step 5: Refresh the Drum Naturally
Once the internals are clear, don't forget the drum itself. Over time, waxes from dryer sheets and detergents can create a thin, invisible film on the inside of the drum. This film can actually transfer back onto your clean clothes or interfere with the moisture sensors.
Instead of using a chemical-heavy cleaner, mix a 50/50 solution of white vinegar and water. Spray it onto a microfiber cloth and wipe down the interior of the drum and the rubber seals around the door. The vinegar acts as a natural degreaser and deodorizer. Leave the door open for a few minutes to let it air out, and the vinegar scent will vanish quickly, leaving nothing but a clean, fresh-smelling dryer.
Why This Matters for the Environment
At The Cleaning Ninjas Inc, we’re big fans of eco-friendly living. Beyond just using natural cleaners, being "green" means reducing your energy consumption. A clogged dryer can use up to 30% more energy than a clean one. By clearing out that hidden lint, you’re significantly shortening your dry times.
Think about it: if you save 15 minutes of drying time per load, and you do five loads a week, that’s over an hour of high-voltage electricity saved every single week. It’s better for the planet and better for your wallet.

Integrating Deep Cleaning into Your Routine
We know that life gets busy. Between work, family, and trying to have a social life, tearing apart your dryer probably isn't at the top of your "fun Saturday" list. This is where professional help comes in.
While a standard weekly house cleaning focuses on making your living spaces sparkle, scheduling a deeper, more comprehensive clean every few months can help address these maintenance tasks that often fall through the cracks. Our team at The Cleaning Ninjas Inc is all about the details: the things you don’t see are just as important as the things you do. You can learn more about us and our philosophy of thoroughness on our website.
Signs You Need a Deep Clean ASAP
If you aren't sure if your dryer is overdue for a "beyond the filter" cleaning, look for these red flags:
- Hot to the touch: The top of the dryer feels unusually hot while running.
- The "Musty" Smell: Your clothes come out smelling a bit damp or dusty even after a full cycle.
- Long Dry Times: Heavy items like towels are taking more than an hour to dry.
- Lint on the floor: You see bits of lint accumulating behind or under the machine.
- No air outside: If you go outside while the dryer is on and don't feel a strong breeze coming out of the vent, you have a blockage.
Final Thoughts
Cleaning the lint trap is a habit we should all have, but don't let it give you a false sense of security. Taking an hour once or twice a year to clean "beyond the filter" will protect your home from fire hazards, extend the life of your appliance, and keep your energy bills low.
If you're feeling overwhelmed by the never-ending list of home maintenance tasks, remember that you don't have to do it all alone. Whether you need a hand with bi weekly house cleaning or just want to reclaim your weekends, The Cleaning Ninjas are here to help.
Stay safe, stay clean, and keep those dryers breathing easy!