

Let’s be honest: when was the last time you actually looked under your toaster? If you’re like most people, it’s probably been a while. We use our toasters every single morning, popping in bagels, sourdough, or those frozen waffles the kids love, and then we walk away. But inside that little stainless steel box, a crumb graveyard is growing.
At The Cleaning Ninjas Inc., we see it all the time. A kitchen can look spotless, but the second you move the toaster, a small mountain of burnt bread bits spills out. Not only is this a bit gross, but it’s also a legitimate fire hazard. That’s why we’re diving into the "Way of the Toaster" today. Keeping your appliances in top shape is a key part of any solid weekly house cleaning routine.
Whether you’re a kitchen pro or someone who just wants their toast to stop smelling like a campfire, this guide is for you. Let’s get those crumbs under control with some Ninja-approved maintenance.
Why Your Toaster Needs a Little TLC
You might think, "It’s just crumbs, Penny. What’s the big deal?" Well, there are actually three big reasons why you should keep that crumb tray clear and the slots clean:
- Fire Safety: Those dry, tiny bits of bread are basically kindling. If they pile up high enough to touch the heating elements, they can ignite.
- Flavor: Ever wonder why your toast tastes a little "smoky" even when it’s barely golden? It’s likely because old, burnt crumbs are smoldering at the bottom every time you turn the machine on.
- Appliance Longevity: Toasters aren't the most expensive things in the world, but why replace one every year? Excess debris can trap heat and wear out the internal components faster than necessary.
If you’re sticking to a bi weekly house cleaning schedule, you might find that the toaster is one of those spots that collects mess faster than you’d expect. A quick Ninja intervention once a week can make a world of difference.

Step 1: The Ninja Safety Protocol (Unplug It!)
Before we go anywhere near the "innards" of an electrical appliance, we have to talk safety. This is Ninja Rule #1. Never, ever stick anything: especially metal: into a toaster that is plugged in. Even if it’s turned off, there’s still electricity sitting in those wires.
Unplug the unit and let it cool down completely. If you just finished making a round of avocado toast, give it ten minutes. You don’t want to burn your fingers while trying to save your kitchen from a fire hazard.
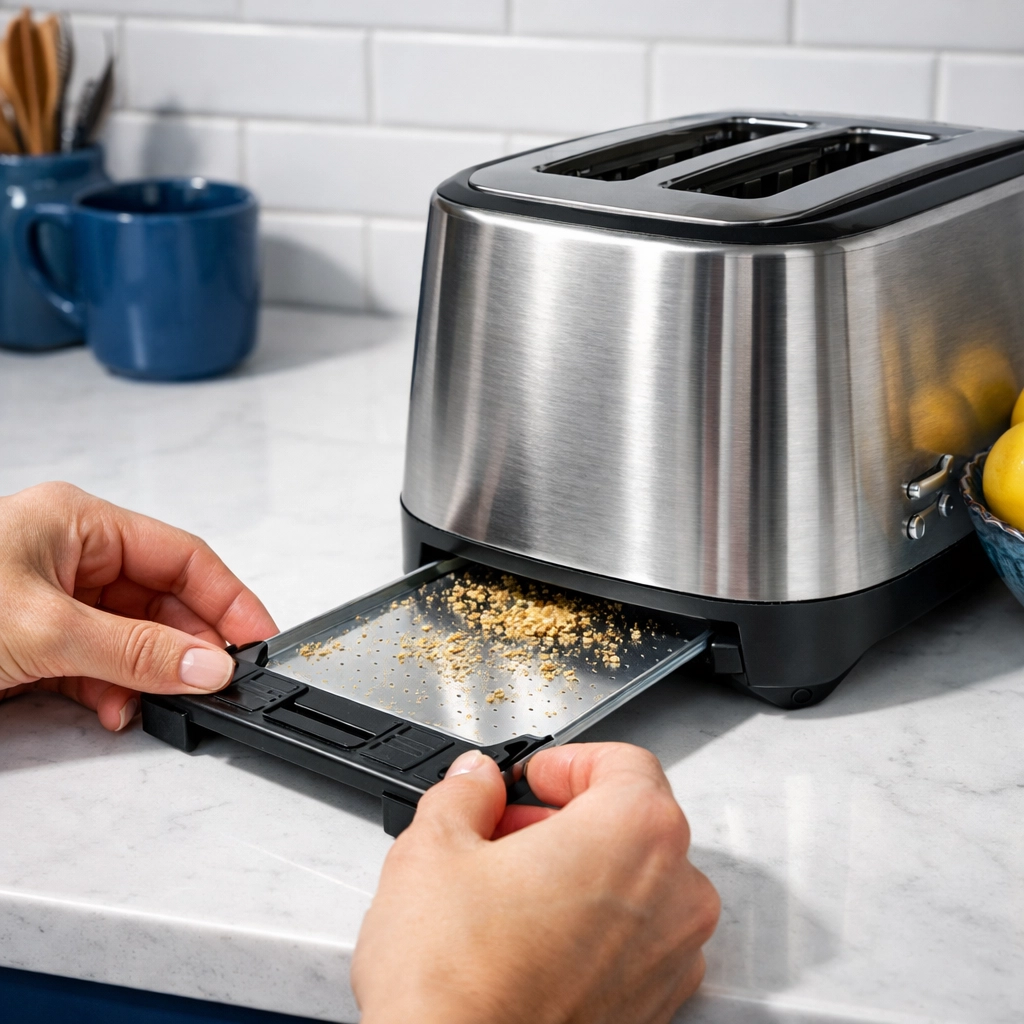
Step 2: The Secret of the Crumb Tray
Most modern toasters have a secret drawer at the bottom. This is the crumb tray. If you didn’t know it existed, don’t feel bad: many people don’t! It’s usually a small handle or a "push-to-release" tab located at the very base of the back or side.
The Ninja Tip for the Tray:
Don’t just shake the crumbs into the trash and slide it back in. Over time, oils from the bread and moisture from the air turn those crumbs into a sticky, stubborn film.
Once you slide that tray out:
- Dump the loose crumbs into the bin.
- Take the tray to the sink and wash it with warm, soapy water.
- If there are burnt-on bits, let it soak for five minutes.
- Crucial Step: Make sure it is 100% dry before putting it back. Putting a damp tray into an electrical appliance is a big "no-no" in the Ninja handbook.
If you find that your tray is looking a bit worse for wear during your weekly house cleaning, a quick scrub with a soft sponge will keep it looking brand new.
Step 3: The "Shake and Bake" (Without the Bake)
Even with the tray removed, crumbs like to hide in the corners and on the support bars inside the toaster. This is where you have to get a little physical.
Take your toaster over to the sink or outside over the grass. Turn it completely upside down and give it a gentle shake. You’ll be surprised at how much stuff falls out even after the tray is gone. Think of it like a Ninja workout: you’re clearing the path for better toast!
Pro Tip: If you have a stubborn piece of crust wedged in there, do not use a fork. Use a wooden chopstick or a plastic spatula to gently nudge it loose. Metal tools can damage the delicate heating filaments, and then your toaster is toast (pun intended).
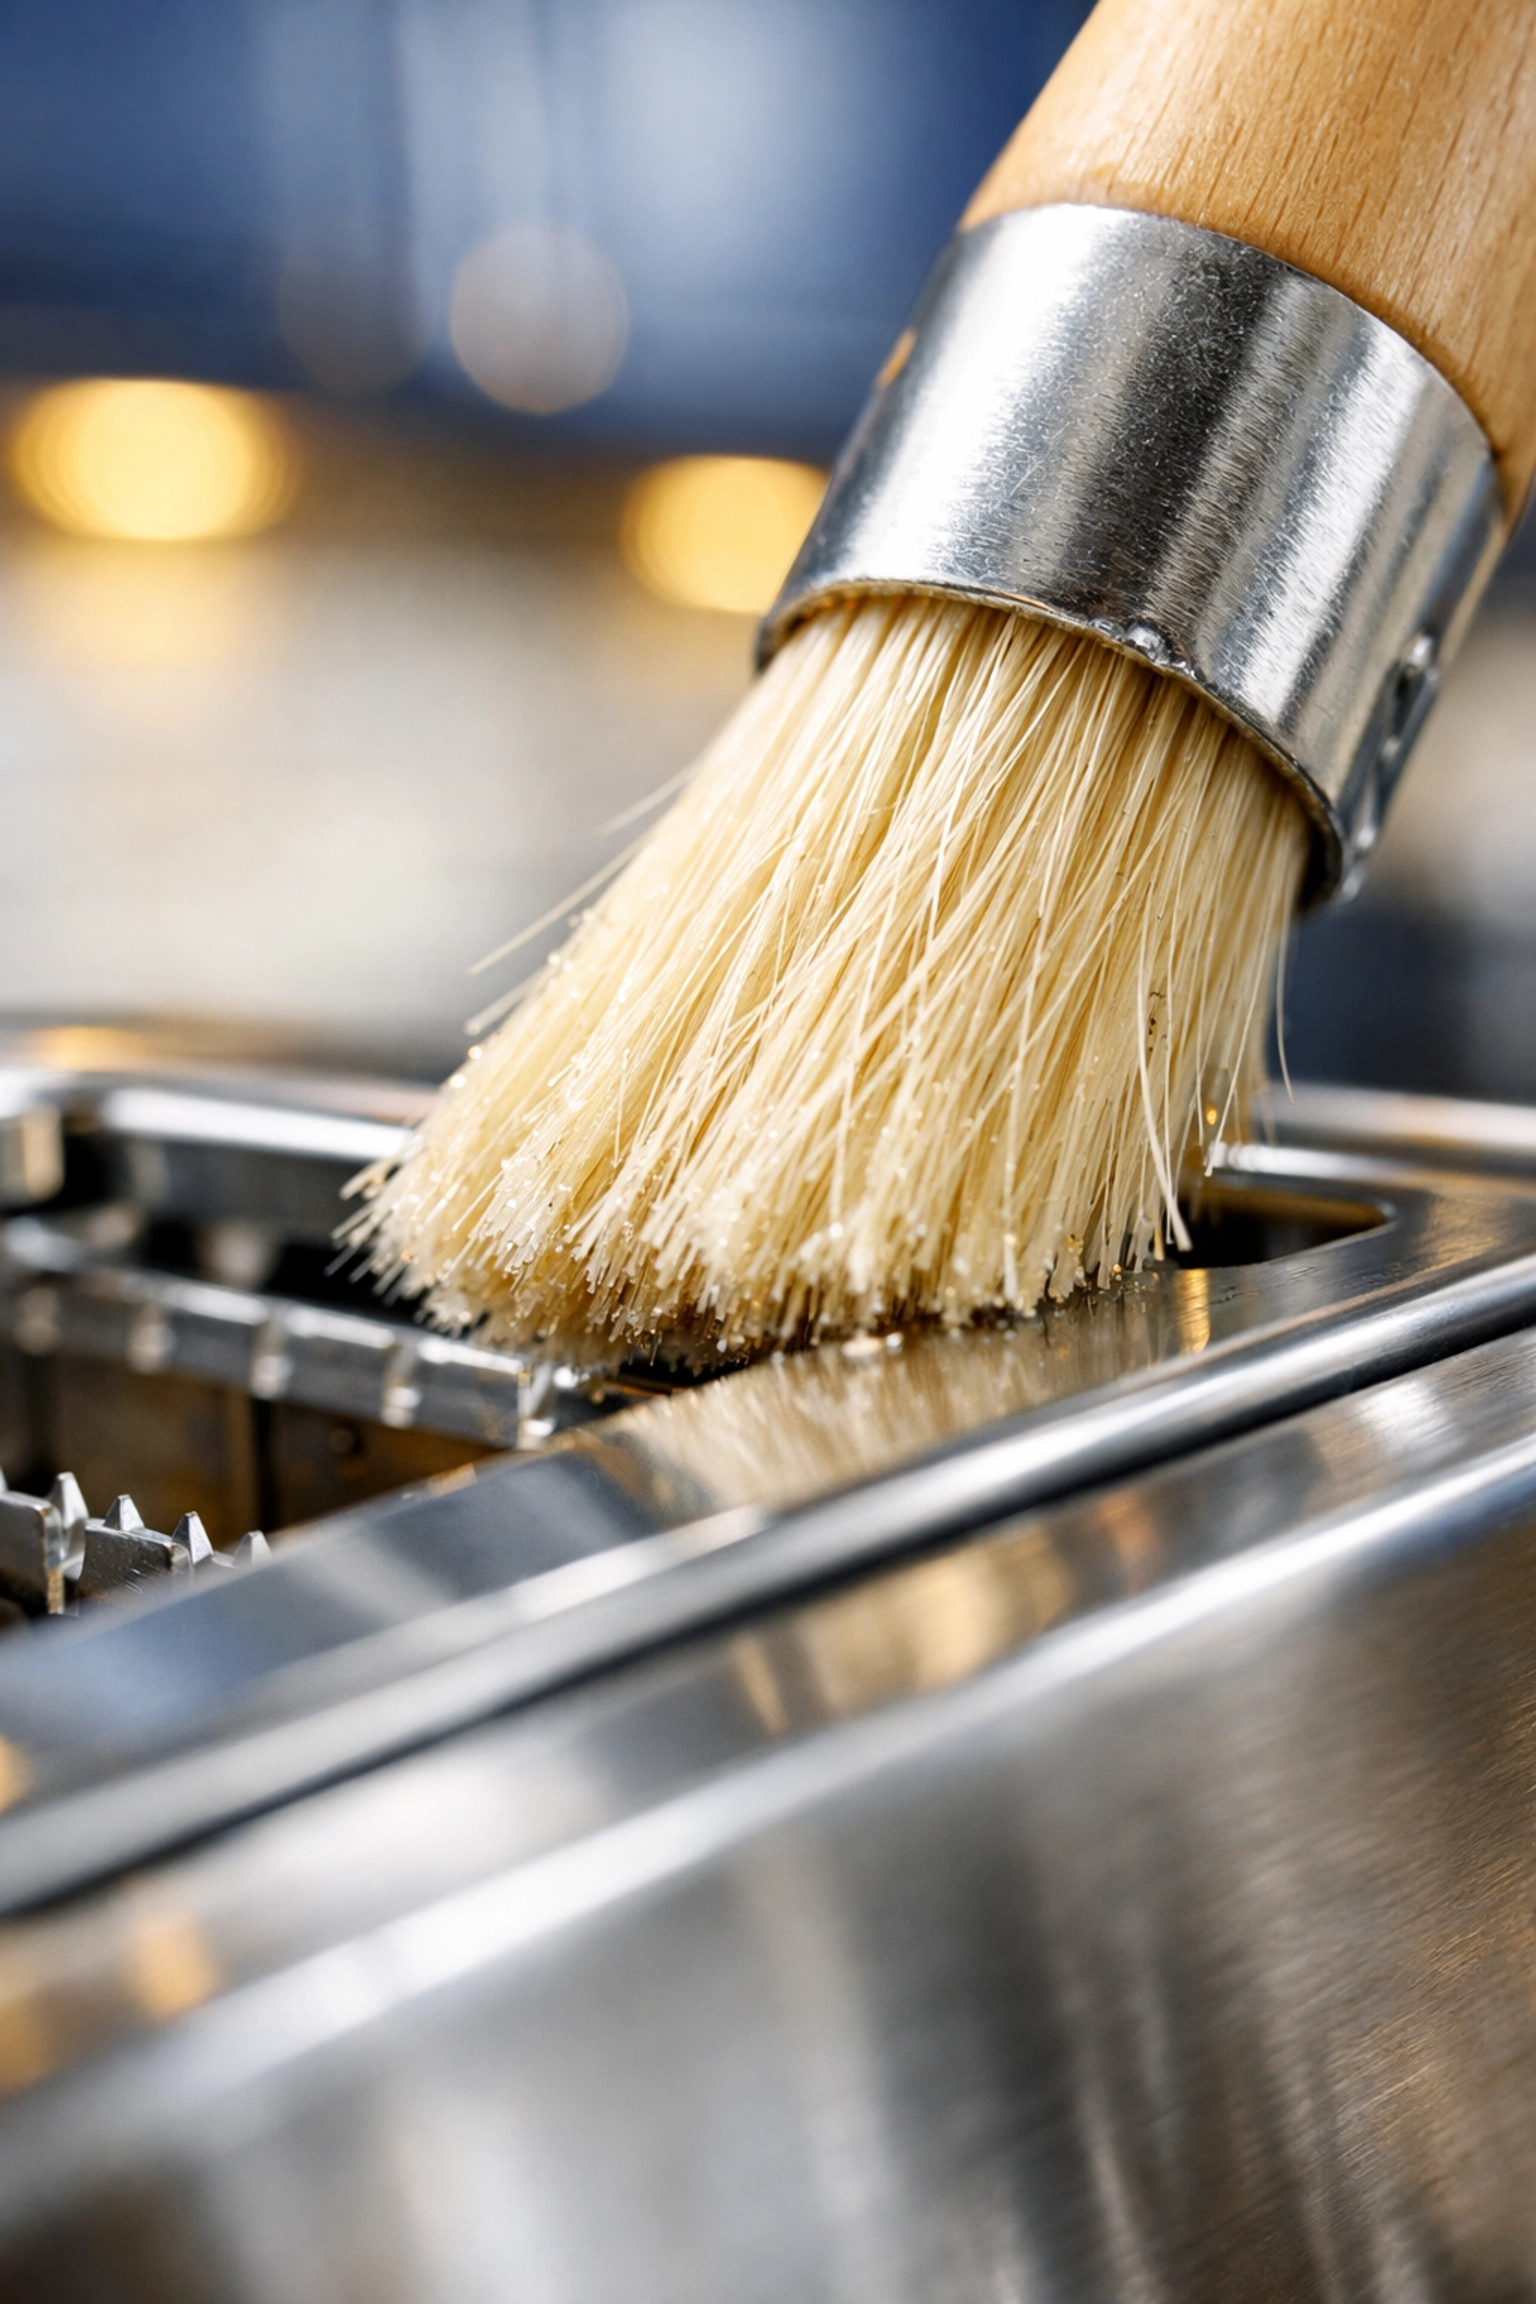
Step 4: Slot Surgery with a Pastry Brush
Sometimes shaking isn't enough. For a truly deep clean: the kind we recommend during a bi weekly house cleaning session: you need a tool for the tight spots.
A clean, dry pastry brush or a dedicated soft-bristled paintbrush is a Ninja’s best friend here. With the toaster still unplugged and the crumb tray out, gently run the brush along the interior wires and into the corners. This knocks down the fine "bread dust" that the tray misses.
Step 5: The Exterior Glow-Up
Now that the inside is pristine, let’s talk about the outside. Whether your toaster is plastic or stainless steel, it’s a magnet for fingerprints, grease splatters, and "breakfast mystery spots."
- For Plastic Toasters: A simple damp microfiber cloth with a drop of dish soap does wonders.
- For Stainless Steel Toasters: This is where the real Ninja magic happens. To get that mirror-like shine, use a tiny bit of white vinegar on a soft cloth. Wipe with the grain of the metal. If you want to go the extra mile, a single drop of olive oil on a dry cloth will buff it to a showroom shine and help repel future fingerprints.
Keeping the exterior clean is a small task that makes your whole kitchen feel more organized. It’s those little details that we take pride in at The Cleaning Ninjas Inc..
Establishing a Cleaning Rhythm
How often should you be doing this? It really depends on how much toast your household consumes.
- Daily Toasters: If you’re a family of four having breakfast together every day, you should really be emptying that crumb tray as part of your weekly house cleaning.
- Occasional Toasters: If you only use it for the occasional weekend brunch, you can probably get away with a deep clean every two weeks.
In our experience, consistency is better than intensity. It’s much easier to dump a tray of fresh crumbs once a week than it is to scrape out a year's worth of carbonized bagel bits that have essentially turned into concrete at the bottom of the machine.

When to Call in the Pros
We get it: life moves fast. Between work, kids, and trying to have a social life, sometimes the toaster is the last thing on your mind. That’s where we come in. At The Cleaning Ninjas Inc., we handle the "hidden" messes so you don't have to. Our teams are trained to look for those often-forgotten spots, ensuring your home is not just surface-clean, but truly Ninja-clean.
If you’re interested in reclaiming your weekends and letting us handle the bi weekly house cleaning (including the appliances!), check out our services. We bring the tools, the techniques, and the "Ninja" focus to every job.
Final Ninja Thought: Don't Forget the Cord!
One last tip before you go: while you’re cleaning the toaster, take five seconds to wipe down the power cord. It’s another spot that tends to get sticky and dusty sitting behind the appliance. A quick wipe with a damp cloth (careful not to get the plug wet!) completes the transformation.
A clean toaster means better-tasting breakfast, a safer kitchen, and a longer-lasting appliance. It only takes five minutes, but the peace of mind is worth so much more. Now, go grab that toaster and see what’s hiding underneath: you might be surprised!
Happy cleaning, and may your toast always be golden brown! 🥷✨🍞

