Let’s be honest: your gaming controller is probably the hardest-working piece of tech in your house. Think about it. It’s the one item that stays glued to your hands for hours at a time, absorbing every bit of sweat, skin oil, and: if we’re being real: dust from those late-night snack sessions. Over time, that "gamer gunk" builds up in the seams, around the buttons, and under the joysticks. Not only is it a bit gross to look at, but it can actually affect your performance. Sticky buttons or a "crunchy" trigger can be the difference between a win and a loss.
At The Cleaning Ninjas Inc, we’re all about precision and stealthy cleaning tactics. While our professional cleaning services cover the big stuff like your kitchen and living areas, we know that the little details matter too. A clean home feels great, but a clean controller feels like a fresh start for your next campaign.
In this edition of Ninja Tips, we’re diving deep into the art of sanitizing your gear without damaging those sensitive electronics. Grab your supplies, and let’s get to work.
The Science of "Gamer Gunk"
Before we jump into the "how," let’s talk about the "why." Your hands are home to natural oils and sweat. When you’re in a high-intensity match, those sweat glands are working overtime. Combine that moisture with dead skin cells and ambient household dust, and you get a sticky residue that migrates into the tiny cracks of your Xbox, PlayStation, or Switch controller.
Beyond the aesthetics, controllers are high-touch surfaces. Just like doorknobs and remote controls, they can harbor bacteria and viruses. If you’ve recently had a cold or if friends have been over for a local multiplayer session, your controller is essentially a petri dish. Sanitizing it isn’t just about making it look new; it’s about keeping your environment healthy.
Your Ninja Cleaning Toolkit
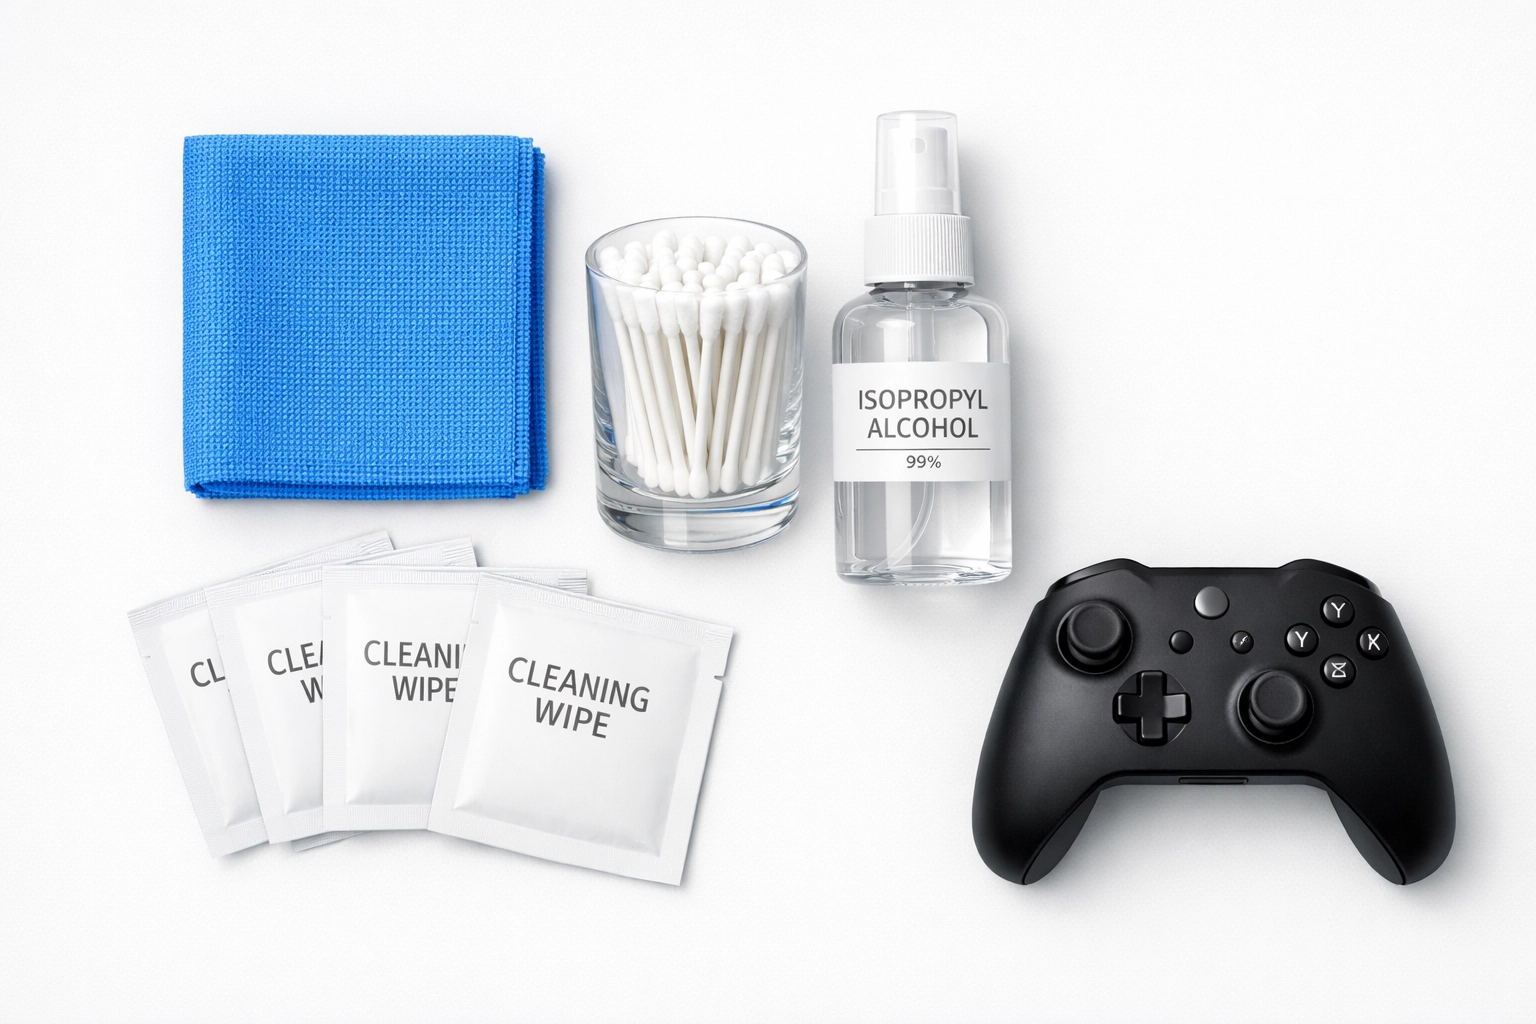
You don’t need a specialized "tech cleaning kit" that costs $30. You likely already have everything you need in your medicine cabinet. Here is the ultimate checklist for a professional-grade controller deep clean:
- 70% Isopropyl Alcohol: This is the gold standard. It kills 99.9% of germs and evaporates almost instantly, which is crucial for electronics. Avoid using 99% alcohol if possible; ironically, 70% is actually better for disinfection because the water content allows it to penetrate cell walls more effectively before it evaporates.
- Alcohol Wipes: Pre-moistened wipes (like Clorox or Lysol brands) are great for the broad surfaces of the controller.
- Cotton Swabs (Q-tips): These are your precision tools. They allow you to get into the crevices where wipes can’t reach.
- Microfiber Cloth: For buffing the controller dry and removing any streaks.
- Wooden Toothpick or a Thin Plastic Pick: For the really stubborn gunk stuck in the seams.
- A Can of Compressed Air (Optional): Great for blowing out dust from under the thumbsticks.
Step 1: The Pre-Mission Prep
Safety first! Before you touch any cleaning liquid to your controller, make sure it is completely powered off. If it’s a wireless controller, remove the batteries or unplug the charging cable. If you’re cleaning a Nintendo Switch Joy-Con or a Pro Controller, make sure it’s disconnected from the console.
The first step in any cleaning mission at The Cleaning Ninjas Inc is washing your own hands. There’s no point in cleaning a device if you’re just going to transfer more oils back onto it immediately. Scrub up with soap and water, dry your hands thoroughly, and you’re ready to begin.
Step 2: The Broad Surface Wipe-Down
Take an alcohol wipe or dampen your microfiber cloth with a small amount of 70% isopropyl alcohol. Pro Ninja Tip: Never spray the liquid directly onto the controller. Liquid can seep into the internal circuitry and cause a short circuit or "stick drift."
Gently wipe down the handles (the grips), the back of the controller, and the faceplates. Use light, sweeping motions. If you have a limited edition controller or an Elite Series 2, be extra gentle. These often have special coatings or rubberized grips that can be sensitive to aggressive scrubbing.
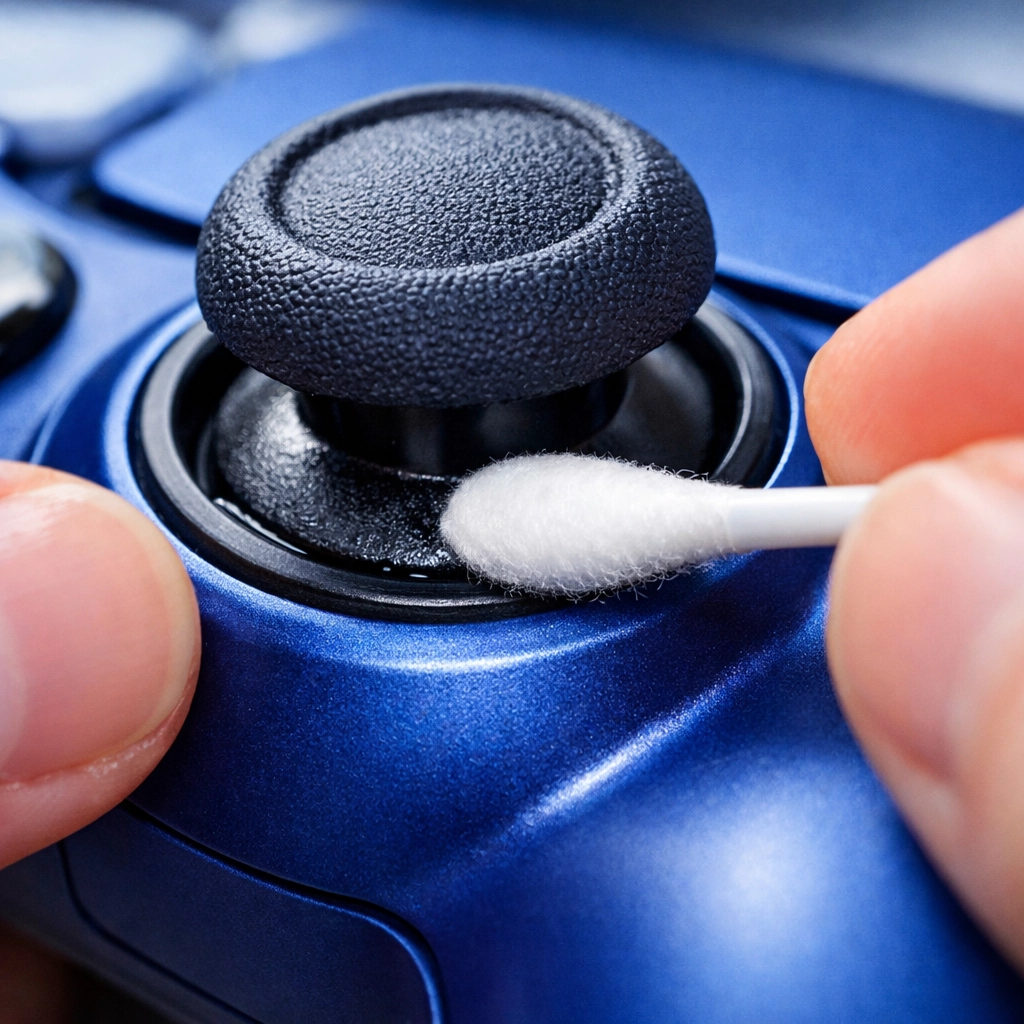
Step 3: Precision Work with Cotton Swabs
This is where the real cleaning happens. Dip a cotton swab into the alcohol until it’s damp, but not dripping. If it’s too wet, give it a little squeeze.
Now, run the swab around the base of the thumbsticks. This is where dust and skin cells love to hide. Rotate the sticks as you clean to ensure you get every angle. Next, move to the buttons (A, B, X, Y or Triangle, Circle, X, Square). Use the swab to clean the circular gap between the button and the controller casing. If a button has been feeling "sticky," this step usually fixes it.
Don’t forget the D-pad and the shoulder buttons (L1/R1, L2/R2). These areas have deep recesses that act as magnets for grime.
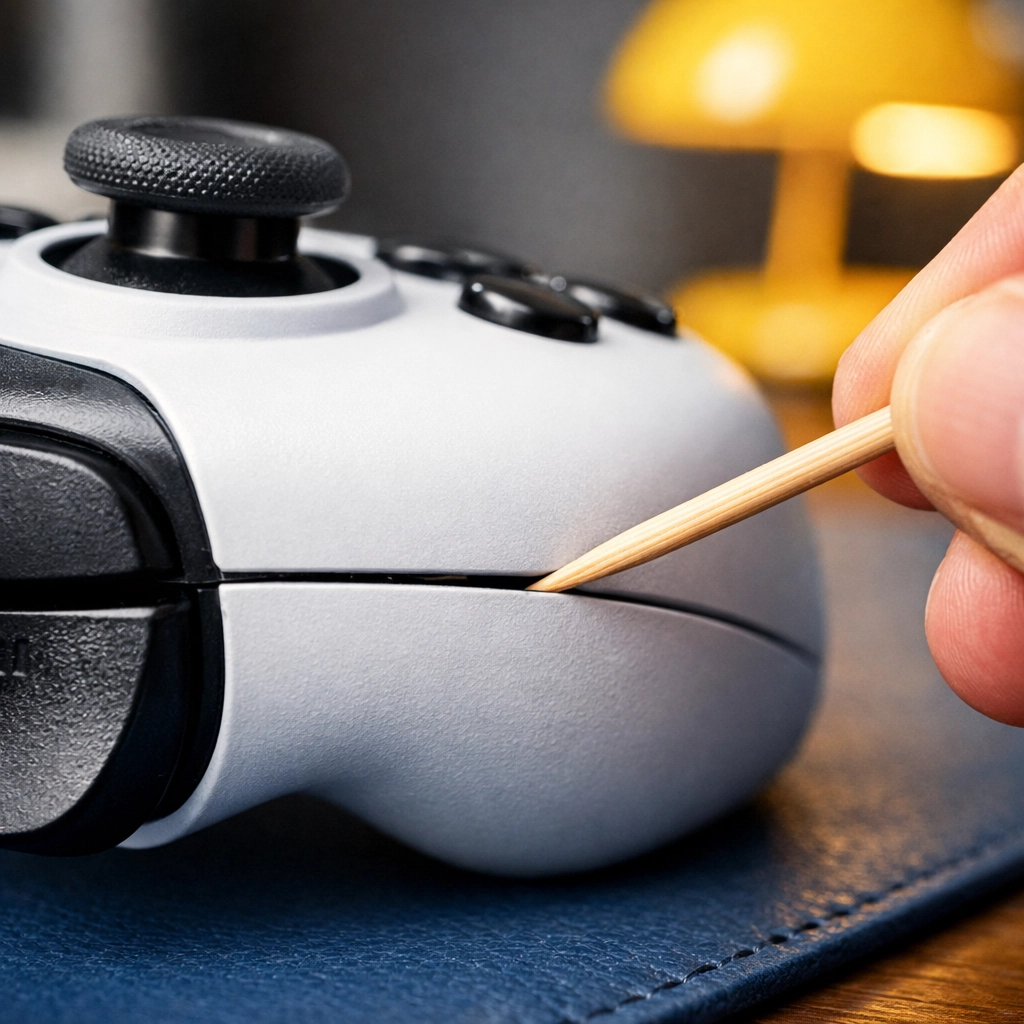
Step 4: Tackling the Seams
Look at the side of your controller. You’ll see a line where the front and back plastic shells meet. This seam is the primary residence for "gamer gunk."
If a wipe or swab doesn’t cut it, take a wooden toothpick. Gently: and we mean gently: run the tip of the toothpick along the seam. You’ll likely see a small "string" of debris come out. It’s satisfying, but be careful not to poke too deep or use a metal tool, as metal can scratch the plastic. Once the debris is loosened, follow up with an alcohol-dampened swab to sanitize the area.
Step 5: The Ports and Battery Compartment
The charging port and headphone jack are delicate. Avoid sticking anything wet inside them. If there’s visible lint in the port, use a blast of compressed air to dislodge it.
If you use a controller with a battery compartment (like the standard Xbox controller), open the hatch. Wipe the inside of the plastic door with your alcohol wipe. If there’s any dust near the metal contacts, use a dry cotton swab to gently whisk it away. Ensure the compartment is bone-dry before reinserting batteries.
Step 6: The "Dwell Time" and Drying
One of the biggest mistakes people make when sanitizing is wiping the surface dry immediately. For alcohol or disinfectant wipes to actually kill bacteria and viruses, they need "dwell time."
According to research and manufacturer guidelines, you should let the surface remain visibly wet for at least 30 seconds (and up to 4 minutes for some hospital-grade disinfectants). Since 70% alcohol evaporates quickly, a thin film is usually perfect. Set the controller on a clean towel and let it air dry completely. This shouldn't take more than a few minutes. Once it's dry, give it a final buff with a clean microfiber cloth to remove any remaining streaks or film.
Special Care for Elite and Pro Controllers
If you’re a pro gamer using high-end gear like the Xbox Elite Series 2 or the DualSense Edge, you need to take a few extra precautions. These controllers often have interchangeable parts.
- Detach the Components: Remove the paddles, thumbsticks, and D-pads if they are magnetic. Clean these pieces separately.
- Rubberized Grips: High-end controllers often feature textured rubber grips. These can absorb oils more deeply than smooth plastic. Use a slightly more damp (but not soaking) cloth to get into the texture, but avoid using heavy pressure which could peel the adhesive.
- The Touchpad: On PlayStation controllers, the touchpad is a sensitive input device. Treat it like a smartphone screen: wipe it gently and avoid getting moisture under the edges.
What to Avoid: The "Do Not" List
To keep your gear in fighting shape, avoid these common cleaning pitfalls:
- No Bleach: Bleach is way too harsh for the plastics used in controllers and can cause discoloration or brittleness.
- No Paper Towels: Believe it or not, paper towels can be abrasive and leave behind tiny scratches or lint. Stick to microfiber or cotton swabs.
- No Submerging: Never, ever dunk your controller in water or cleaning solution. It seems obvious, but you’d be surprised!
- No Heavy Pressure: Especially on the joysticks. Modern sensors are delicate; if you push too hard while cleaning, you might accidentally cause mechanical damage.
Establishing a Ninja Maintenance Habit
Now that your controller is sparkling clean and sanitized, how do you keep it that way? Here are a few "Ninja Habits" to keep the gunk at bay:
- The "No-Snack" Zone: Try to avoid eating greasy snacks (we're looking at you, orange-dusted chips) while playing. If you must eat, use a napkin or wash your hands before picking the controller back up.
- Weekly Wipe-Down: You don't need a deep clean every day. A quick 10-second wipe with an alcohol-free electronic wipe after a long session can prevent buildup from ever starting.
- Storage Matters: When you aren't playing, don't leave your controller on the floor or in a high-dust area. A charging dock or a dedicated drawer keeps it clean and ready for action.
Keeping the Rest of Your "Base" Clean
Sanitizing your controller is a great start, but your gaming environment: your desk, your chair, and your console: also needs love. Dust in your console can cause overheating, and a dusty desk just migrates back onto your gear.
If your "base of operations" is starting to feel a bit overwhelmed by the chaos of daily life, remember that the Ninjas are here to help. Whether you need a one-time deep clean or regular maintenance to keep your home healthy, you can check out all our services to see how we can take the stress out of cleaning.
A clean home isn't just about looks: it's about the mental clarity to focus on what you love. Whether that's hitting a new high score or just relaxing after a long day, we've got your back. Stay clean, stay safe, and happy gaming!