

Let’s be honest for a second: how often do you actually look down at your window tracks? If you’re like most of us, you probably spend plenty of time wiping down the glass to get that perfect, streak-free shine, only to realize there is a literal ecosystem of dust, dead bugs, and mystery grime living in the grooves below.
Cleaning window tracks is one of those chores that everyone avoids because it feels tedious. It’s narrow, it’s awkward, and if you do it wrong, you just end up moving mud around. But here at The Cleaning Ninjas Inc, we believe that no corner of the home is too small to master. Having clean tracks doesn't just make your home look better; it actually helps your windows glide more easily and prevents allergens from blowing into your home every time you catch a breeze.
If you’re ready to stop ignoring the gunk and start seeing clear results, you’ve come to the right place. We’re diving into the fastest, most efficient ways to tackle window tracks, plus a bonus "Ninja Hack" for those impossible oven glass panes.
Why Window Tracks Become a Nightmare
Before we get into the "how," let’s talk about the "why." Window tracks are magnets for debris. Between the condensation that builds up on the glass and the dust that floats through the air, you have the perfect recipe for "window mud." Over time, this mixture hardens into a crust that can actually damage the seals of your windows or cause the sliding mechanism to stick.
For many homeowners, this buildup happens slowly over a season. By the time spring rolls around, those tracks are black with soot and pollen. If you’re looking for more ways to keep your home in tip-top shape, check out our other cleaning tips to stay ahead of the game.
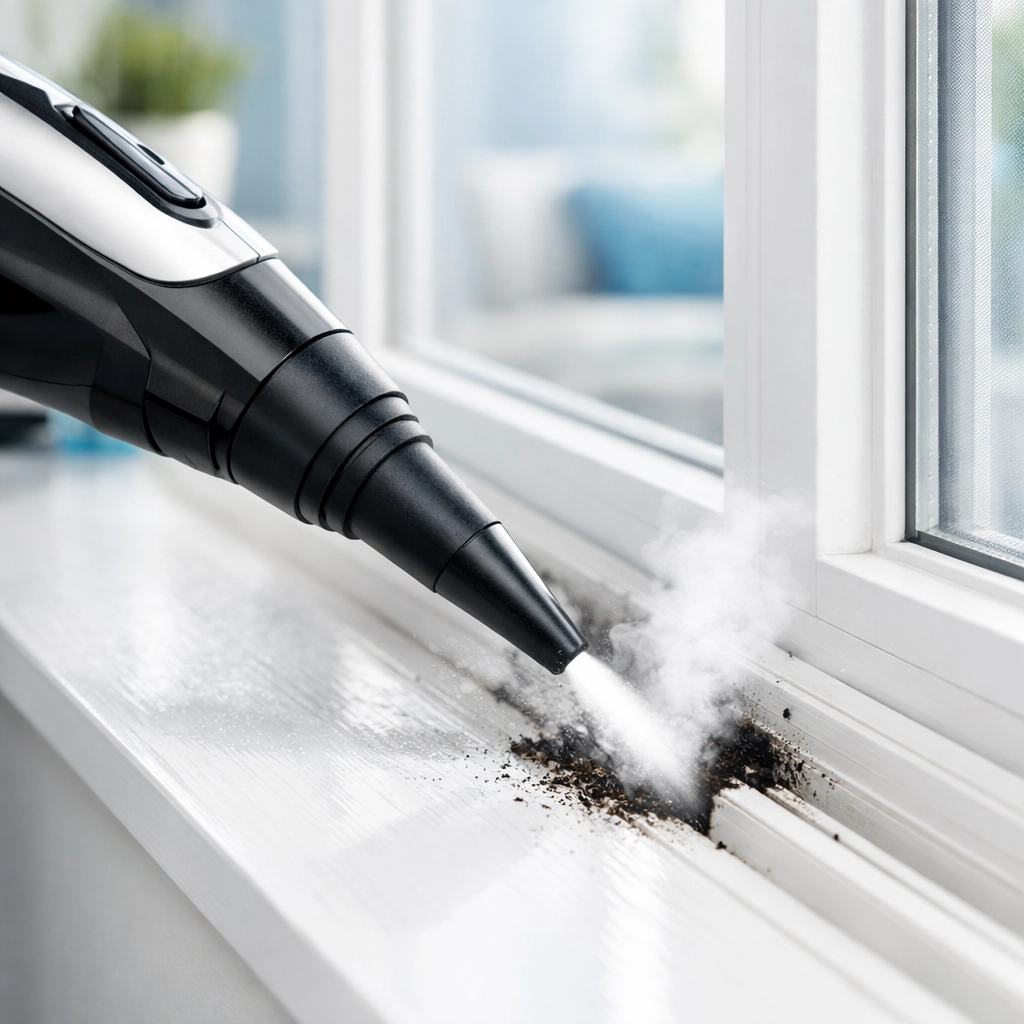
Method 1: The Steam Ninja (The Fastest Way)
If you want to move like a true ninja: fast, silent, and effective: steam is your best friend. This is arguably the most efficient method because it uses heat and pressure to do the heavy lifting for you.
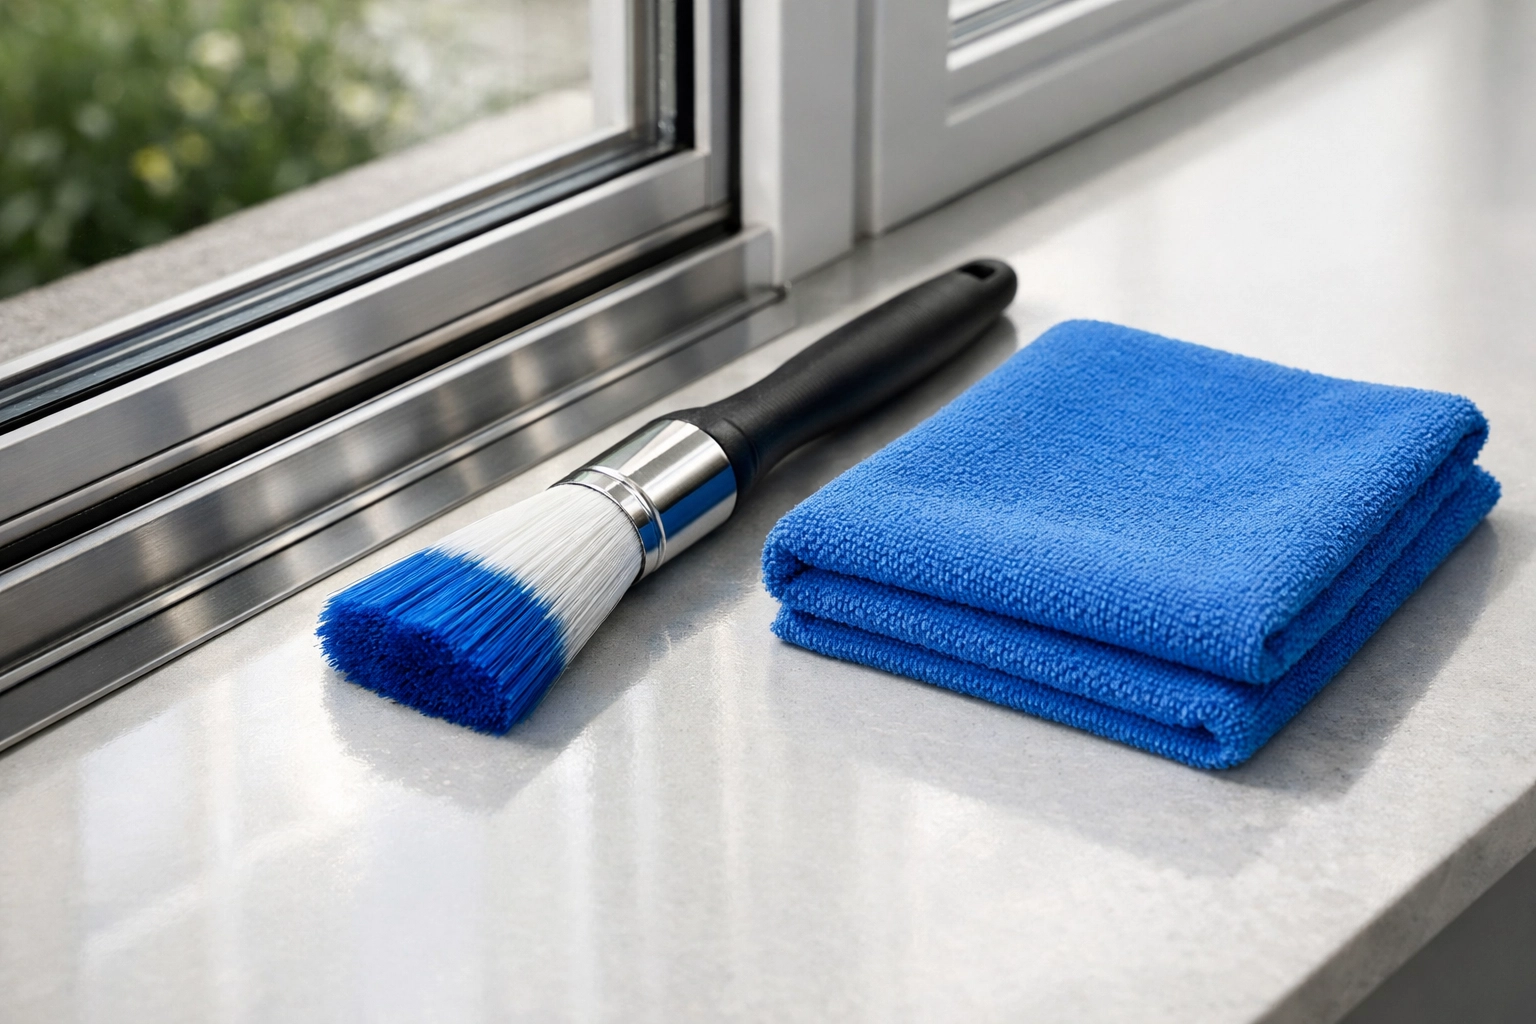
The Tools:
- A handheld steam cleaner with a nozzle attachment.
- A microfiber cloth.
- A detail brush or an old toothbrush.
- A magic eraser.
The Process:
- Blast the Grime: Direct the steam nozzle right into the corners of the tracks. The high-pressure steam will instantly liquefy the hardened dirt and "melt" the gunk out of the crevices.
- The Wipe Down: While the dirt is still wet and loose, use your microfiber cloth to wipe it away. You’ll be shocked at how easily it comes up compared to scrubbing with cold water.
- Detailing: For any stubborn black marks or scuffs, use a damp magic eraser. It fits perfectly into those narrow grooves and acts like a tiny eraser for dirt.
- Dry It Off: Give it one last pass with a dry cloth to make sure no moisture is left behind to attract new dust.
Method 2: The Traditional "No-Mud" Approach
Don’t have a steam cleaner? No problem. You can still get professional results with a few household staples. The key here is to avoid making a mess. Most people make the mistake of spraying cleaner directly onto a dusty track, which creates a muddy sludge that’s impossible to remove.
Step 1: The Dry Vacuum
Before you let a single drop of liquid touch that track, grab your vacuum. Use the crevice tool or a small brush attachment to suck up as much loose dust, pet hair, and dried bugs as possible. This one step will save you twenty minutes of frustration later.
Step 2: The Baking Soda and Vinegar Reaction
This is a classic for a reason. Sprinkle a light layer of baking soda along the track, focusing on the corners. Then, spray it with a mixture of half white distilled vinegar and half water. Let it fizz for about 5 to 10 minutes. This chemical reaction breaks down the bond between the dirt and the track.
Step 3: The Scrub
Use a dedicated track brush (or an old toothbrush) to agitate the mixture. You’ll see the grime start to lift. Because you vacuumed first, you’re dealing with a concentrated paste rather than a giant bucket of mud.
Step 4: The Final Reveal
Wipe the tracks clean with paper towels or a rag you don’t mind getting dirty. For the absolute tightest corners, wrap a thin cloth around a flat-head screwdriver to reach all the way into the edge.
The Ultimate Ninja Hack: Between the Oven Glass
Since we’re talking about "hidden dirt," we have to address the biggest "how do I even clean that?" spot in the kitchen: the space between the glass panes of your oven door. Over time, grease and crumbs find their way through the vents, leaving unsightly streaks that you can't reach from the inside or the outside.
Most people think you have to take the entire oven door apart to fix this, but we have a "Ninja Hack" that saves you the trouble.
The "Wand" Method:
- Create Your Tool: Take a thin wire coat hanger and straighten it out, or use a long, thin yardstick.
- Attach the Cleaner: Secure a cleaning wipe or a microfiber cloth soaked in glass cleaner to the end of your "wand" using a rubber band. Make sure it's tight so it doesn't get stuck inside the door!
- The Entry Point: Open your oven door and look at the bottom (or sometimes the top). You’ll see small vents or slots.
- The Slide: Gently slide your DIY cleaning wand through the slot and into the gap between the glass. Move it back and forth to wipe away the streaks and dust.
- The Buff: If you want a really clear finish, do a second pass with a dry microfiber cloth attached to the wand.
This simple trick can make your oven look brand new without the risk of breaking the door assembly. It’s these kinds of details that we love at The Cleaning Ninjas Inc.
Why Deep Cleaning These Spots Matters
You might think, "It's just a window track, who cares?" But at The Cleaning Ninjas Inc, we look at the big picture.
- Longevity: Dirt acts like sandpaper. Every time you open or close a dirty window, that grit is wearing down the tracks and the rollers. Keeping them clean ensures your windows last for decades.
- Health: Window tracks are a prime spot for mold growth due to condensation. If you have allergies, those tracks are likely holding onto pollen and dust mites.
- Efficiency: A clean window seals better. If there is debris in the track, the window might not close fully, leading to drafts and higher energy bills.
If this sounds like a lot of work, remember that you don't have to do it alone. Our team is trained to handle these deep-cleaning tasks so you can spend your weekends doing literally anything else. You can learn more about us and our commitment to making homes sparkle across the area.

Essential Tools for Your Cleaning Kit
To keep your window tracks (and your home) in top shape, we recommend putting together a small "Ninja Detail Kit." Here is what we keep in our bags:
- Small Vacuum Attachments: A flexible crevice tool is a game-changer.
- Microfiber Cloths: They trap dirt rather than just pushing it around.
- Grout/Track Brushes: These have stiff, angled bristles designed for narrow spaces.
- White Vinegar: The ultimate eco-friendly degreaser.
- Handheld Steamer: If you’re serious about speed, this is the best investment you can make.
When to Call in the Pros
We know that life gets busy. Sometimes, the window tracks are just the tip of the iceberg. If you look around and feel overwhelmed by the "hidden dirt" in your home: from the baseboards to the ceiling fans: it might be time to bring in the experts.
Our professional cleaning services are designed to give you back your time. We don't just "surface clean"; we get into the tracks, under the appliances, and behind the furniture. We treat your home with the precision and care of a ninja, leaving nothing but a fresh, clean space behind.
Final Thoughts
Cleaning your window tracks might not be the most glamorous Saturday afternoon activity, but the results are incredibly satisfying. There is something about seeing a bright, white, debris-free track that makes the whole room feel cleaner.
Start with the vacuum, try the steam method if you have the gear, and don't forget that sneaky oven glass hack. Once you see the difference, you’ll never look at your window tracks the same way again.
Stay clean, stay sharp, and remember: if the grime is winning the battle, The Cleaning Ninjas Inc are always ready to jump in! For more information on how we can help you keep your home pristine, feel free to visit our website.


