

We’ve all been there. You pop in a fresh slice of sourdough, push the lever down, and wait for that golden-brown perfection. But instead of the sweet aroma of toasted grains, your kitchen starts smelling like a controlled forest fire. You look down, and there’s a thin wisp of smoke curling out of the toaster slots. No, your house isn't haunted by a burnt-toast-loving ghost, your toaster is just screaming for a deep clean.
At The Cleaning Ninjas Inc, we believe that every appliance in your home deserves a bit of stealthy maintenance to keep it running smoothly. The toaster is often the most neglected item on the counter. We wipe the outside when we're cleaning the kitchen, sure, but the inside? That’s a dark, crumb-filled abyss. Over time, those crumbs don’t just sit there; they bake, they smoke, and they can eventually become a fire hazard.
In this guide, we’re going to show you how to perform a "Ninja Deep Clean" on your toaster. We’re talking about getting into those hard-to-reach heating elements and making the crumb tray look like it just came out of the box.
Why Your Toaster Smells Like a Campfire
Before we dive into the "how," let's talk about the "why." Every time you toast bread, tiny fragments fall off. These crumbs land on the heating elements or settle at the very bottom of the unit. After dozens of toast cycles, these crumbs are essentially being "re-toasted" over and over again. Eventually, they carbonize, turn black, and start emitting that acrid, burnt smell.
Beyond the smell, a dirty toaster is less efficient. If the heating elements are coated in burnt-on food particles, they can't radiate heat evenly. This leads to that annoying phenomenon where one side of your bread is white and the other is charred. Plus, a massive buildup of dry crumbs is literally fuel for a fire. A quick deep clean every few months keeps your kitchen safe and your breakfast delicious.
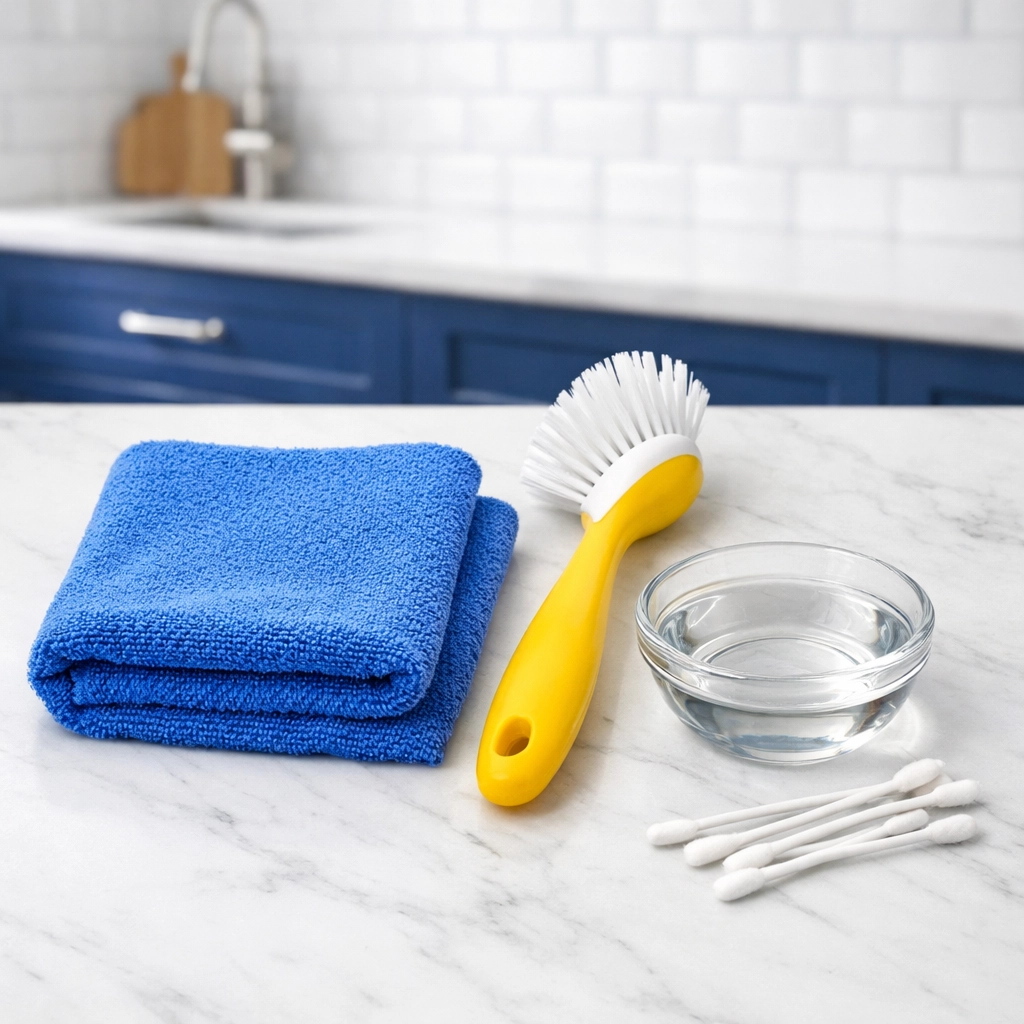
The Ninja Toolkit: What You’ll Need
To clean like a pro, you need the right gear. Most of these items are probably already hiding in your pantry or under the sink.
- An old toothbrush: This is your primary weapon for cleaning the heating wires without damaging them.
- A beverage straw and masking tape: This is a secret Ninja hack for your vacuum.
- Dish soap and a sponge: For the removable parts.
- Ethyl alcohol (rubbing alcohol): For degreasing the stubborn spots.
- Cotton swabs (Q-tips): For the tight corners.
- A chopstick and a rubber band: To create a custom reach-tool.
- A micro-fiber cloth: For that final, streak-free shine.
Step 1: Safety First (The Ninja Way)
Before you do anything, unplug the toaster. This seems obvious, but you’d be surprised how many people start poking around with metal tools or damp cloths while the unit is still live. We’re cleaning a toaster, not auditioning for a science fiction movie about electricity. Once it’s unplugged, make sure it’s completely cool to the touch. If you just made a bagel, give it ten minutes to chill out.
Step 2: The Crumb Tray Extraction
Most modern toasters have a removable tray at the bottom. If yours doesn't, don't worry, we’ll get to the "shake method" in a second.
Slide the tray out carefully. Usually, it’s overflowing with a mountain of bread debris. Dump the crumbs into the trash and then take the tray to the sink. Wash it with warm, soapy water just like you would a dinner plate. If there are burnt-on bits that won't budge, let it soak for five minutes. Dry it thoroughly before setting it aside. Putting a damp tray back into an electric appliance is a big no-no.
Step 3: Gravity is Your Best Friend
Even with the tray out, there are likely thousands of crumbs caught in the nooks and crannies of the interior housing. Take your toaster over to the trash can (or outside if it’s a nice day) and turn it completely upside down.
Give it a firm but gentle shake. You’ll be amazed (and maybe a little grossed out) by how much falls out. Tap the sides lightly to dislodge any "clingers." This simple gravity trick does 60% of the work for you.
Step 4: The Toothbrush Maneuver
Now we’re getting into the precision work. Take that old toothbrush and gently: very gently: run the bristles along the interior walls and the wire heating elements. You aren't trying to scrub them like you’re cleaning grout; you just want to knock loose the carbonized bits of food stuck to the wires.
Ninja Tip: Always brush from the top down. You want the debris to fall out through the bottom where the crumb tray usually sits.
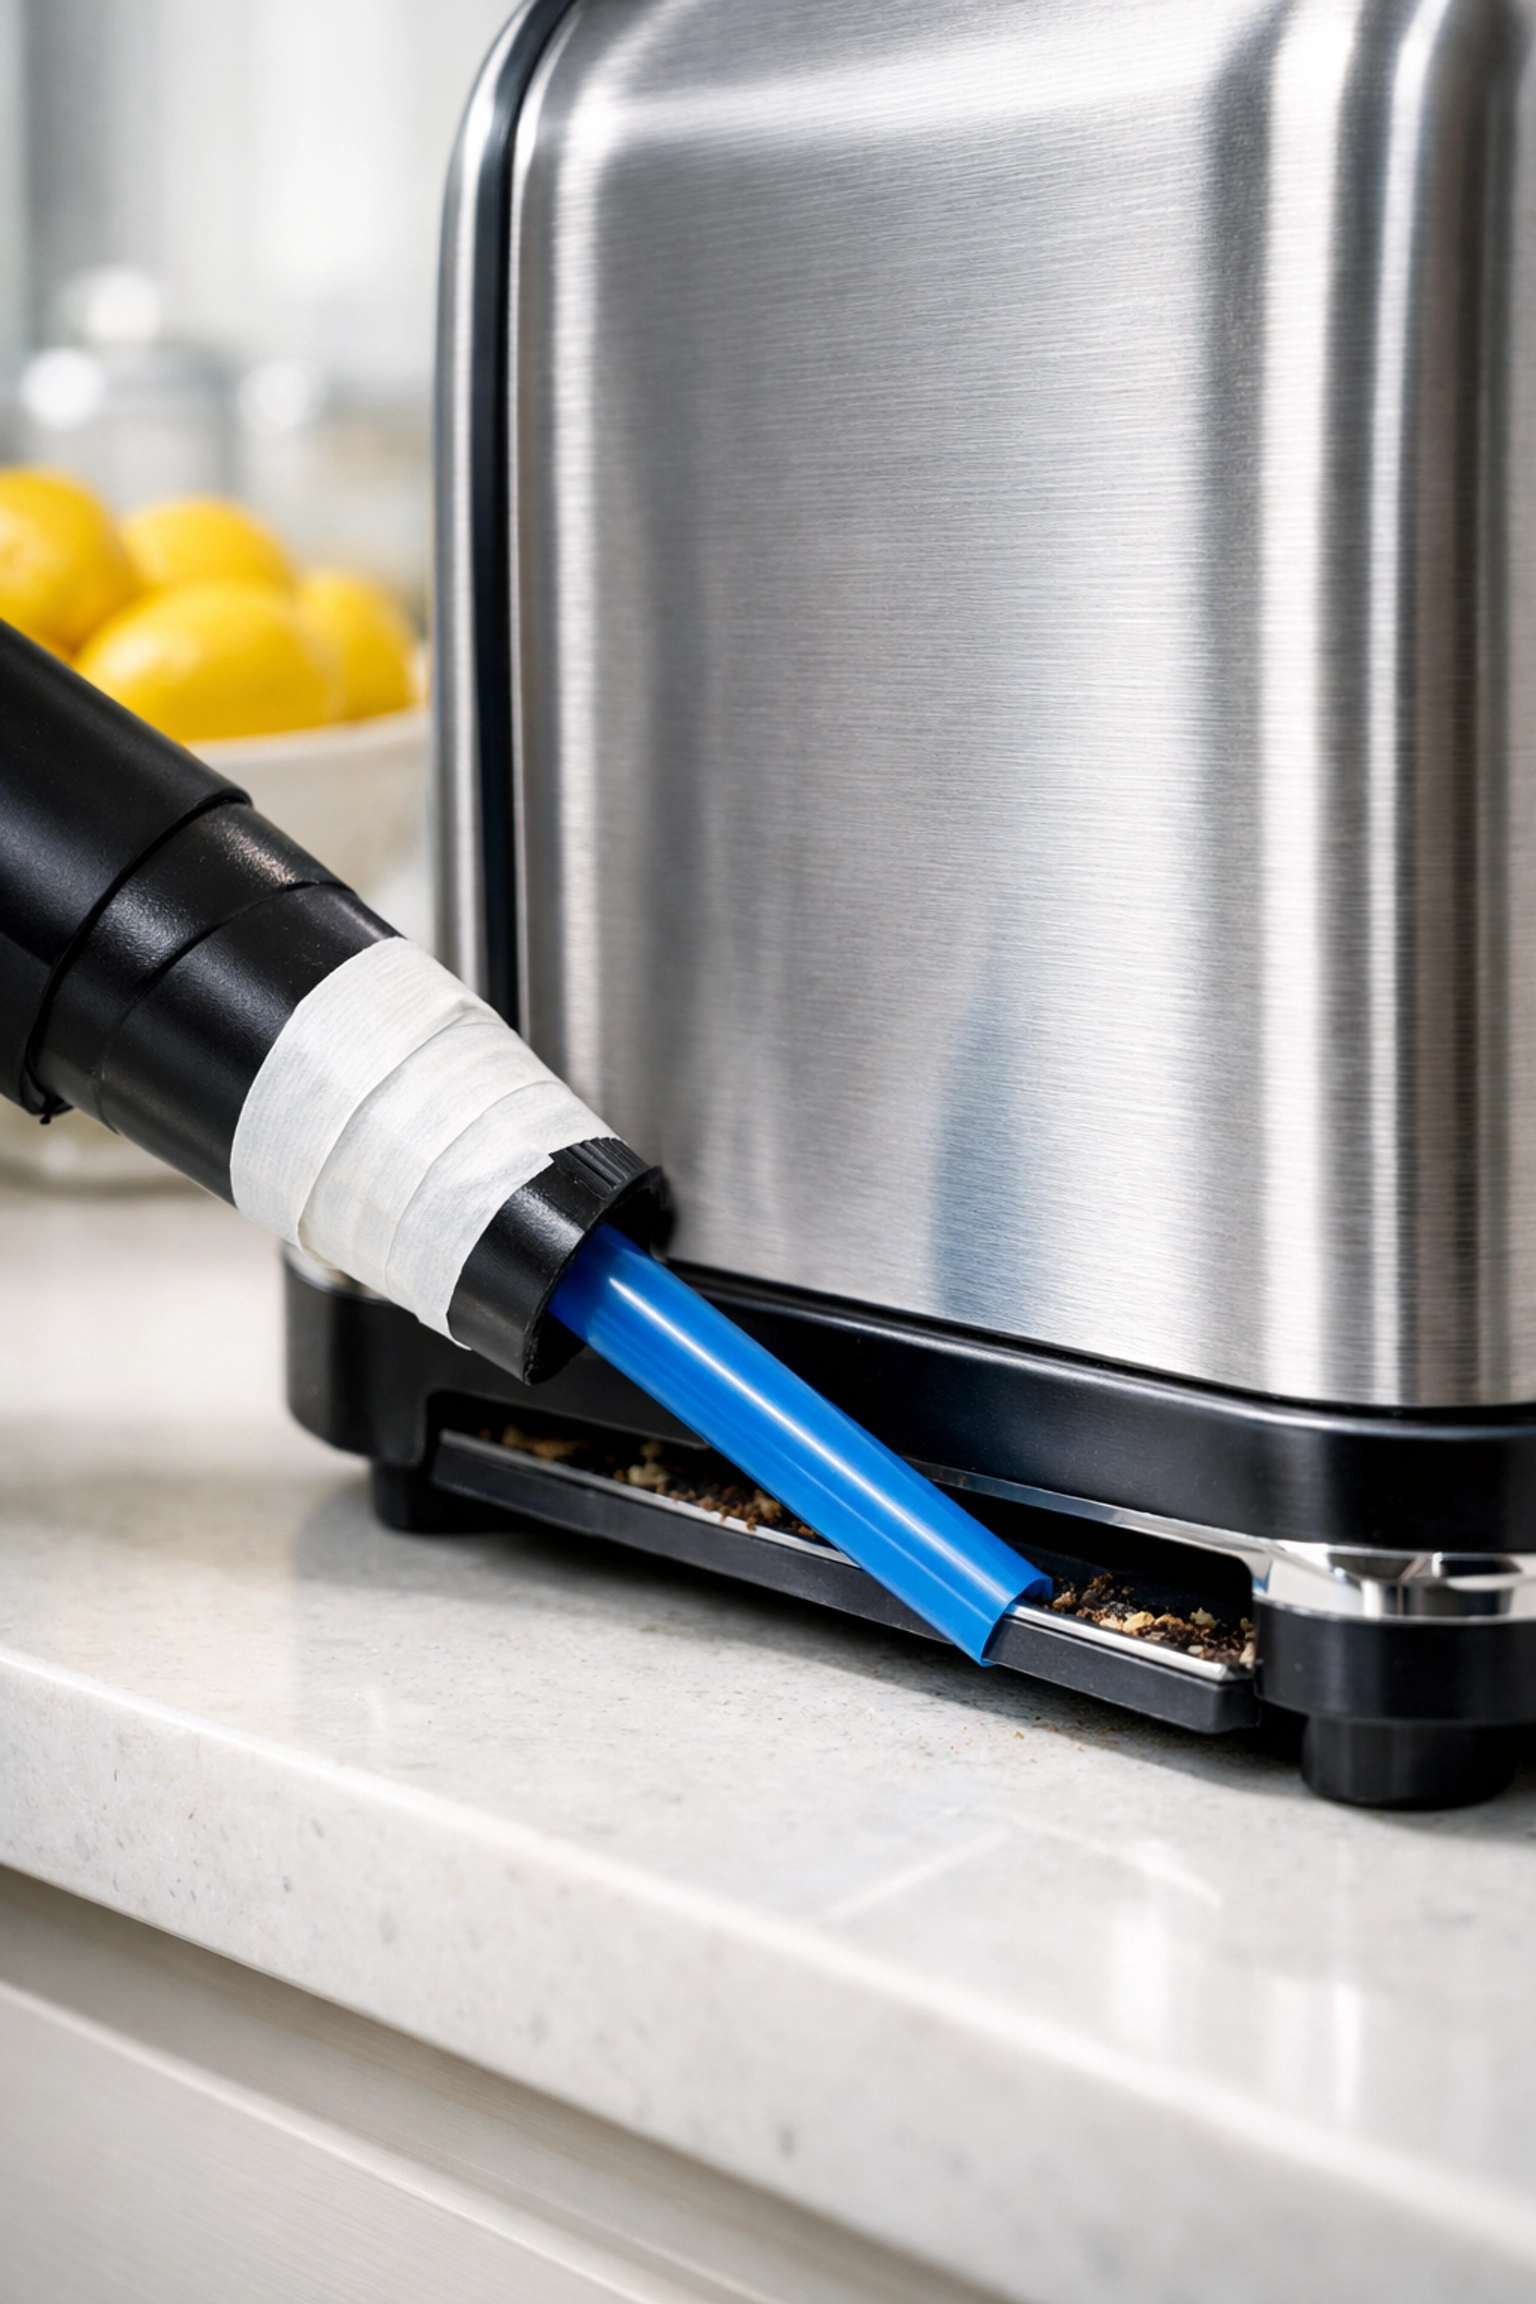
Step 5: The Vacuum Straw Secret
Even after shaking and brushing, some crumbs will be trapped in the bottom corners where the tray slides in. A standard vacuum attachment is usually too big to get in there.
Here is our favorite Ninja hack: take a standard drinking straw and attach it to the end of your vacuum’s crevice tool using masking tape. Seal it tight so all the suction goes through the straw. Now, you have a high-powered, micro-vacuum attachment that can reach into the tiniest gaps of the toaster. Run the straw along the bottom tracks and around the internal base to suck up every last speck of dust.
Step 6: Deep Cleaning the Interior Walls
If your toaster has a lot of grease buildup (common if you toast things like buttery Texas toast or pastries), you might need a bit more firepower.
Wrap a damp (not dripping) kitchen cloth around the end of a chopstick and secure it with a rubber band. This creates a long, thin cleaning wand. For the really stubborn grease, dip a cotton swab in a little bit of ethyl alcohol and rub it along the non-electrical metal surfaces inside. The alcohol cuts through the grease almost instantly and evaporates quickly, which is exactly what we want.
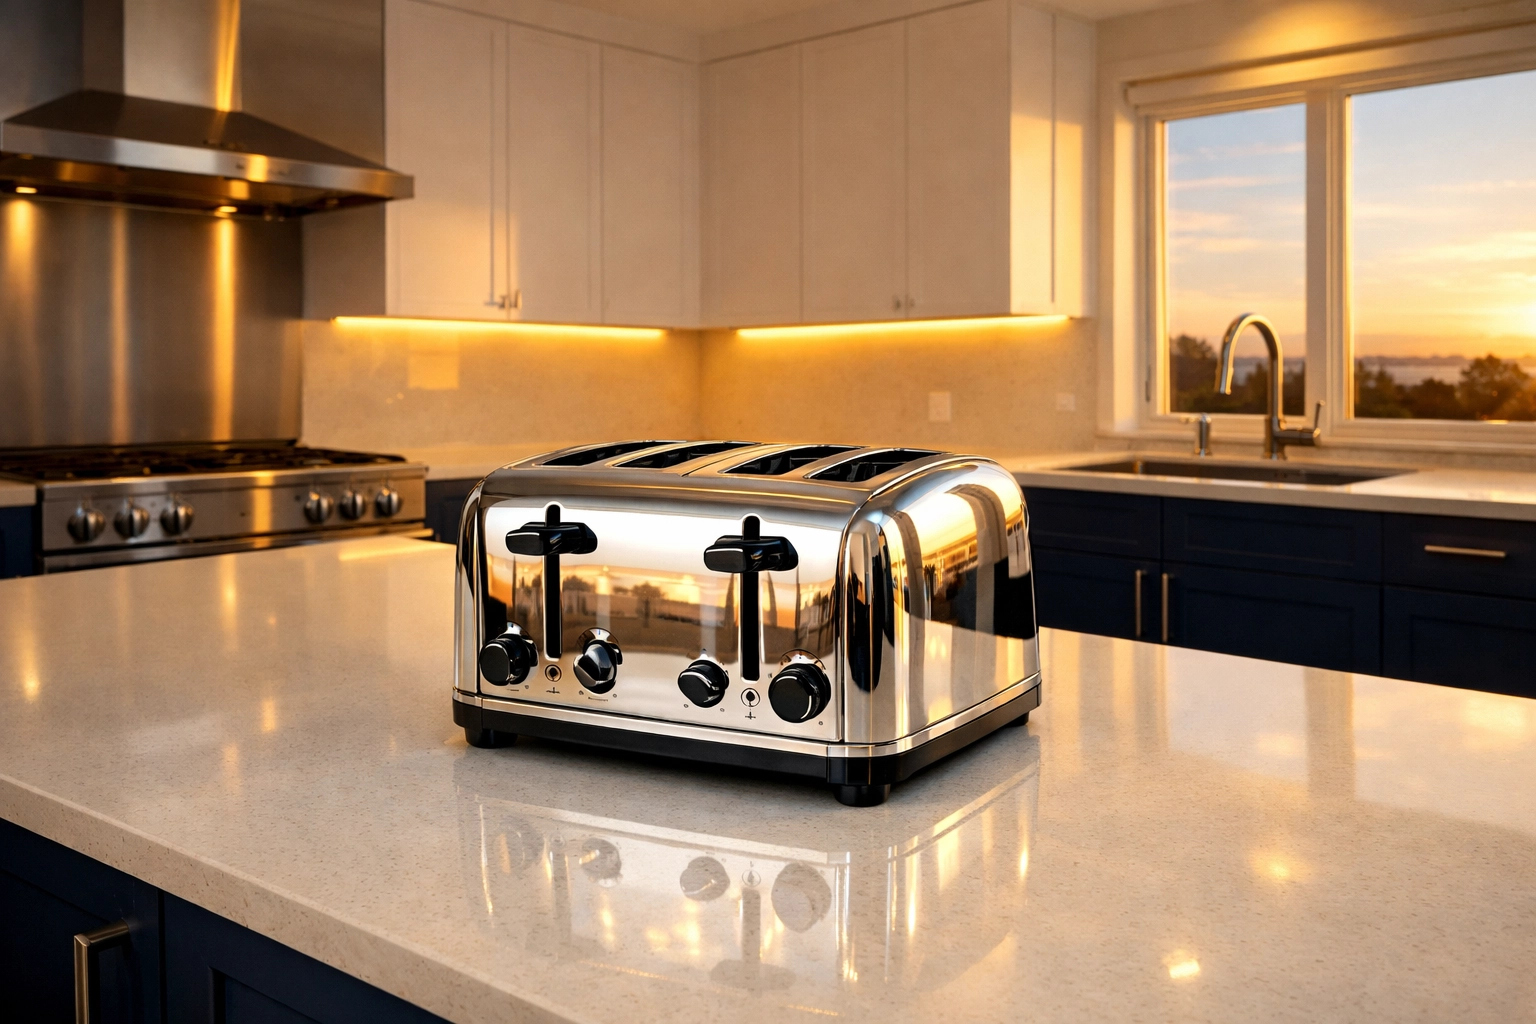
Step 7: Polishing the Shell
Now that the inside is pristine, let's make the outside match. If you have a stainless steel toaster, you know how easily it picks up fingerprints and water spots.
- Wipe the exterior with a damp sponge and a drop of dish soap to remove kitchen grease.
- Dry it with a clean cloth.
- For that "new appliance" glow, put a tiny bit of rubbing alcohol on a microfiber cloth and buff the surface in circular motions. It will remove streaks and leave the metal sparkling.
Don’t forget the knobs and the lever! These are high-touch areas that harbor plenty of bacteria. A quick wipe with a disinfectant or the alcohol cloth will keep things sanitary.
Step 8: The "Burn-Off" Phase
Once everything is dry and the crumb tray is back in place, plug the toaster back in. But don't put bread in it just yet!
Run the toaster for one cycle on a medium setting without any food. This is the "burn-off" phase. It ensures that any microscopic fibers from your cleaning cloth or any residual cleaning agents are burned off before they touch your food. You might smell a very faint "hot" smell, which is normal. After this cycle, you’re officially ready for the best-tasting toast of your life.
How Often Should You Be Doing This?
At The Cleaning Ninjas Inc, we recommend a quick crumb tray dump once a week. It takes thirty seconds and prevents the "burnt smell" from ever starting. For the full deep clean: the toothbrush, the vacuum straw, and the polishing: once every three months is usually plenty for the average household.
If you’re someone who uses your toaster every single morning for bagels, pop-tarts, and artisan breads, you might want to move that deep clean to a monthly schedule. Your taste buds (and your smoke detector) will thank you.
Need a Hand with the Rest of the Kitchen?
We get it: life moves fast. Between work, family, and trying to find five minutes of peace, deep cleaning your appliances is often the last thing on your mind. While we love sharing these Ninja Tips to help you tackle the small stuff, sometimes you just need a professional team to come in and handle the heavy lifting.
From deep-cleaning kitchens to making your entire home feel brand new, The Cleaning Ninjas Inc is here to help. You can learn more about us and our commitment to making homes sparkle, or check out our full range of cleaning services to see how we can take the stress out of your chores.
Whether you need a one-time deep clean or regular maintenance, we bring the same level of precision and "Ninja" care to your home that we do to a toaster.
Final Thoughts
A clean toaster isn't just about aesthetics; it’s about the quality of your morning routine. No one wants to start their day with the smell of smoke and the taste of charred crumbs. With about 15 minutes of effort and a few household items, you can restore your toaster to its former glory.
For more helpful guides on keeping your home in tip-top shape, feel free to browse our blog. We’re constantly adding new tips on everything from bathroom hacks to organizing your pantry like a pro.
Now, go grab that old toothbrush and show that toaster who’s boss! Happy toasting!


