

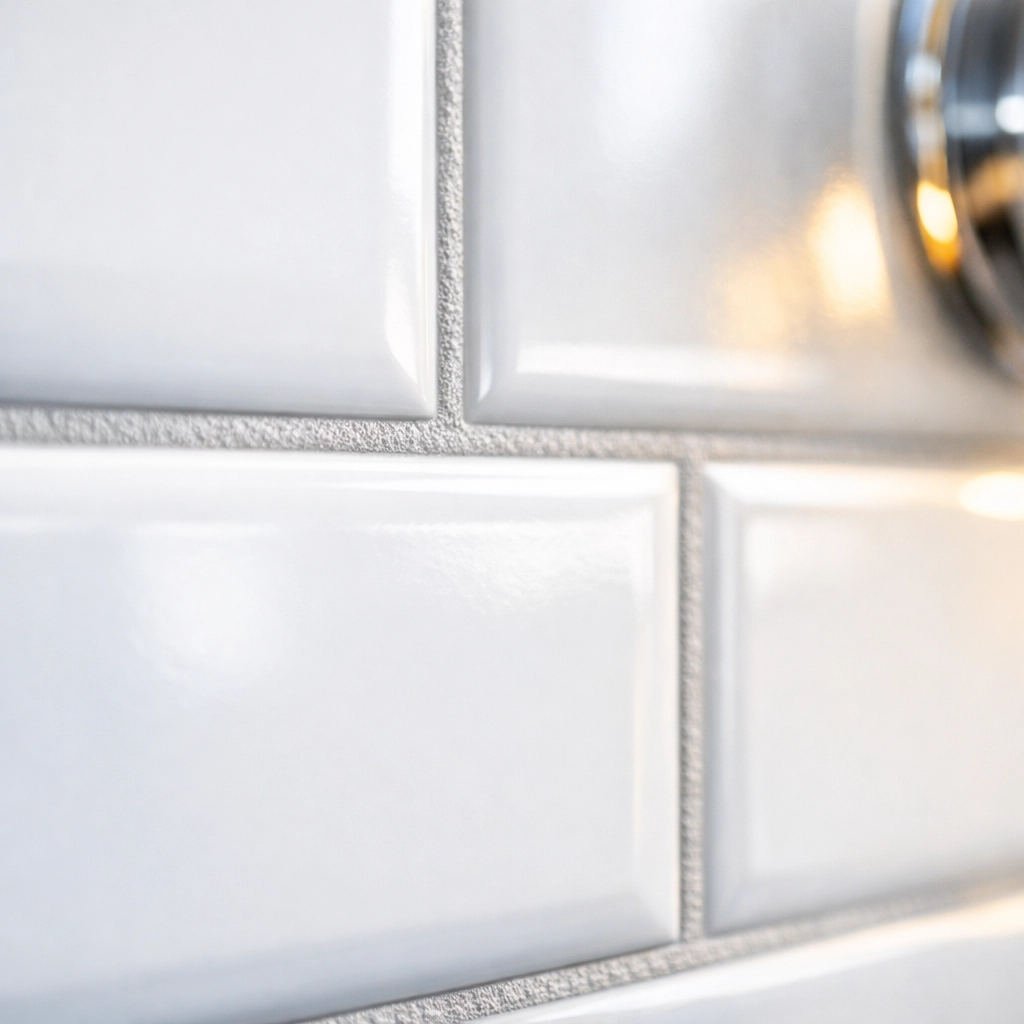
You’ve spent the morning scrubbing your bathroom. The mirrors are streak-free, the chrome is shining like a diamond, and the toilet is, well, as clean as a toilet can be. But as you step back to admire your handiwork, something catches your eye. Those pesky grout lines between your beautiful tiles are looking… dingy. Maybe they’re a sad shade of grey, or worse, a suspicious orange or black.
At The Cleaning Ninjas Inc, we call this the "Grout Gloom." It’s that frustrating reality where no matter how clean your tiles are, the whole room feels "off" because the grout is holding onto yesterday’s (and last year’s) grime. But don't worry! You don't need a sledgehammer and a renovation budget to fix this. You just need a few ninja-approved hacks to bring that brightness back.
In this guide, we’re going to walk you through the ultimate "Grout Rescue" mission. We’ll talk about why grout gets so dirty, the secret DIY mixtures that actually work, and how to keep it looking fresh for months at a time.
Why Does Grout Get So Dirty?
Before we jump into the "how," let’s talk about the "why." Grout is essentially a mixture of sand and cement. If you look at it under a microscope, it looks like a moonscape: full of tiny holes and pores. Because it’s so porous, it acts like a giant sponge for everything that happens in your bathroom.
Every time you shower, grout absorbs soap scum, body oils, and minerals from your water. Because bathrooms are naturally humid, those pores also become a cozy home for mold and mildew. Over time, these materials build up and harden, creating a layer of "yuk" that a regular mop just can’t reach.
The Ninja’s Secret Weapon: The Baking Soda & Peroxide Paste
If you’ve spent any time looking for cleaning tips, you’ve probably seen a dozen different DIY recipes. Some people swear by vinegar, others by lemon juice. But after years of testing in the field, our team at The Cleaning Ninjas Inc has found a clear winner: Hydrogen Peroxide and Baking Soda.
Why this combo? Baking soda is a mild abrasive that helps physically lift the dirt without scratching your tiles. Hydrogen peroxide is a natural whitener and disinfectant that kills mold spores on contact. When you mix them together, they create a fizzing reaction that works its way deep into those tiny grout pores.
The Recipe:
- 1/2 cup Baking Soda
- 1/2 cup Hydrogen Peroxide
- A squirt of liquid dish soap (optional, but helps cut through grease)
Mix these into a paste with the consistency of runny toothpaste. If it’s too thick, add more peroxide; if it’s too runny, add more baking soda.
Step-by-Step: The Deep Scrub Mission
Now that you have your "Ninja Paste," it’s time to get to work. This isn't a "spray and walk away" situation: it requires a little bit of elbow grease, but the results are worth it.
- Clear the Area: Remove rugs, bath mats, and any bottles from the shower floor or vanity.
- Dry Prep: Give the area a quick sweep or vacuum. You don't want to be mixing your cleaning paste with loose hair or dust.
- Apply the Paste: Using a spoon or a gloved hand, spread the paste directly onto the grout lines. Don't worry about being too neat; just make sure the grout is completely covered.
- The Ninja Wait: This is the most important part! Let the mixture sit for at least 5 to 10 minutes. This gives the peroxide time to break down the stains and the baking soda time to loosen the grip of the grime.
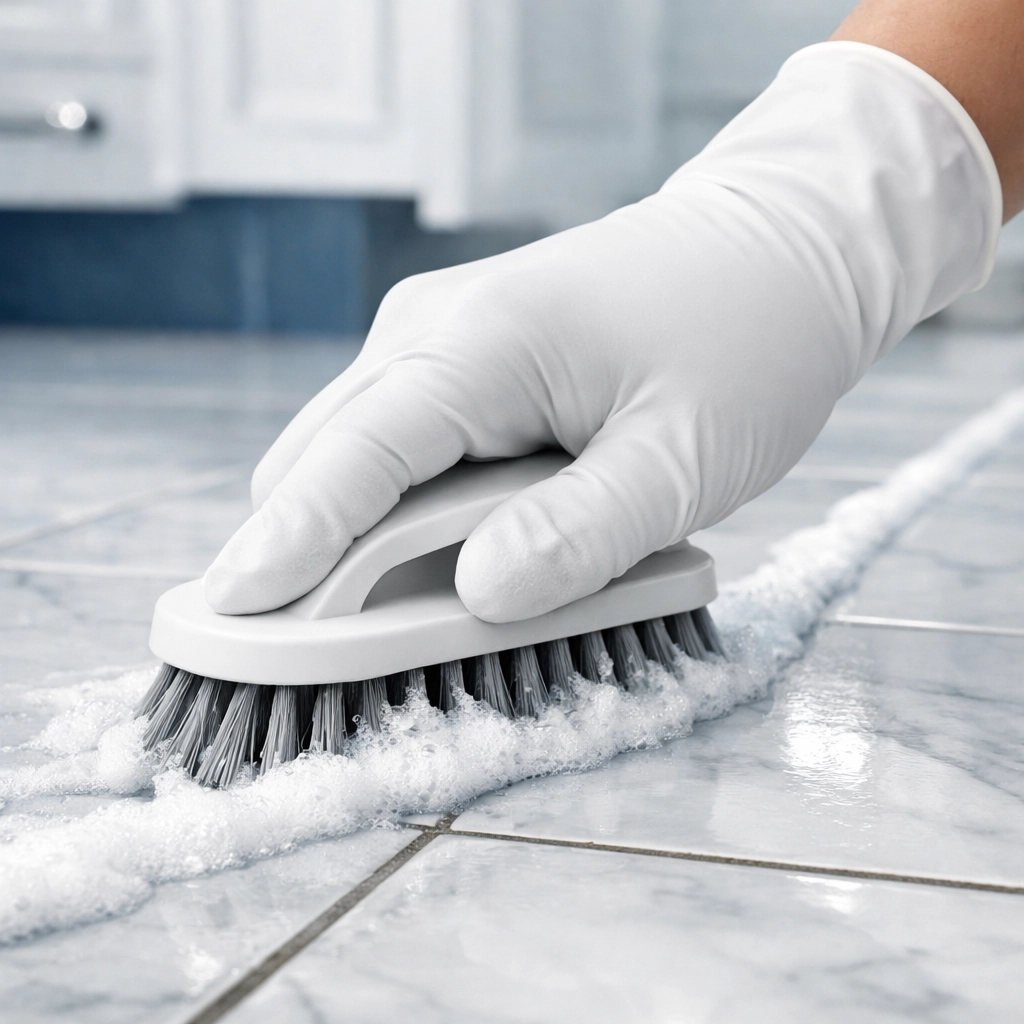
- The Scrub: Use a stiff-bristled nylon brush (or a dedicated grout brush) to scrub the lines. You’ll notice the paste turning grey or brown: that means it’s working!
- Rinse and Wipe: Wipe away the excess paste with a damp microfiber cloth or rinse it down the drain if you're in the shower.
Tools of the Trade: What’s in Your Ninja Kit?
You don’t need high-tech machinery to get professional results, but having the right tools makes the job 100% easier. If you check out our blog, you’ll see we’re big fans of efficiency. Here’s what we recommend for grout:
- Nylon Brushes: Never use a metal wire brush on grout! It can scratch your tiles and actually gouge out pieces of the grout itself. A stiff nylon brush is perfect.
- Electric Toothbrushes: Got an old electric toothbrush head? Don’t throw it away! The high-speed vibration is incredible for getting into tight corners behind faucets.
- Microfiber Cloths: These are the gold standard for rinsing. They grab onto the leftover baking soda particles much better than a standard sponge.
- Knee Pads: If you’re doing a large bathroom floor, trust us: your knees will thank you later.

For the "Uncleanable" Stains: When DIY Isn't Enough
Sometimes, grout has been neglected for so long that a DIY paste just won't cut through the layers of buildup. If you’ve tried the baking soda method and the grout still looks dark, it might be time for something stronger.
For heavy-duty restoration, we often recommend products like Zep Grout Cleaner and Brightener. These are acid-based cleaners designed specifically to eat through the top layer of grime.
Pro Tip: If you use a heavy-duty commercial cleaner, always wear gloves and ensure the room is well-ventilated. These chemicals are powerful and can be harsh on your lungs and skin. Apply it, let it sit for no more than 5 minutes, scrub, and rinse thoroughly.
The Bleach Warning: Why We Avoid It
You might be tempted to just pour straight bleach on your grout and call it a day. It makes things white instantly, right? While it's tempting, the "Ninjas" generally advise against it for regular maintenance.
Bleach is a harsh chemical that can actually weaken the structure of the grout over time. It can make the grout more brittle, leading to cracks and crumbling. Even worse, bleach often leaves behind a sticky residue that actually attracts dirt, meaning your grout will get dirty again even faster than before. Stick to the peroxide method: it’s safer for your home and your grout’s longevity.
Keeping the Brightness: Prevention and Maintenance
Once your grout is sparkling white again, the last thing you want to do is repeat this deep-scrub process next month. Here are three ways to keep those lines bright:
1. The Squeegee Habit
Moisture is the enemy of clean grout. After every shower, take 30 seconds to squeegee the walls and the floor. By removing the standing water and soap scum before they have a chance to dry, you’re preventing the buildup from starting in the first place.
2. Ventilation is Vital
Run your bathroom exhaust fan during your shower and for at least 15 to 20 minutes afterward. If you don't have a fan, crack a window. Reducing the humidity levels in the room makes it much harder for mold and mildew to grow in the grout lines.
3. Seal the Deal
This is the step most homeowners skip, but it’s the most important one. Once your grout is clean and completely dry, apply a high-quality grout sealer. Sealing creates an invisible barrier that fills those tiny pores we talked about earlier. Instead of absorbing dirt, the grout will now repel it. We recommend re-sealing high-moisture areas every 6 to 12 months.

When to Call in the Ninjas
We get it: cleaning grout is a tedious, back-breaking job. Not everyone has the time or the inclination to spend their Saturday morning on their hands and knees with a toothbrush.
If your bathroom needs a total refresh and you’d rather spend your weekend doing literally anything else, that’s what we’re here for! Our team at The Cleaning Ninjas Inc specializes in getting into those nooks and crannies that most people miss. Whether it's a deep clean of your master bath or a full house refresh, we bring the tools and the expertise to get the job done right.
You can learn more about us and how we tackle even the toughest cleaning challenges. Ready to see your bathroom shine like it’s brand new? Check out our services and let us take the "scrub" out of your schedule.
A clean home isn't just about how it looks; it's about how it feels. And nothing feels quite as good as a bathroom that sparkles from the ceiling down to those perfectly bright grout lines. Happy cleaning!


