

You’ve finally done it. The renovation is finished, the contractors have packed up their tools, and your home looks exactly how you dreamed it would. There’s just one tiny, okay, maybe not so tiny, problem. Everything is covered in a fine, white, powdery film.
Welcome to the world of plaster dust.
If you’ve ever survived a construction project, you know that plaster and drywall dust are the ultimate uninvited guests. You wipe a counter, and ten minutes later, it’s white again. You sweep the floor, and a cloud rises up to settle on your bookshelves. It feels like a losing battle, but here at The Cleaning Ninjas Inc, we’ve fought this war many times.
Plaster dust is heavy, persistent, and has a knack for finding its way into every nook and cranny of your home. But don't worry! With the right strategy and a few green cleaning secrets, you can reclaim your space without losing your mind. Here is our ninja-approved guide to getting rid of that persistent plaster dust for good.
Why Plaster Dust is a Different Kind of Beast
Before we jump into the "how," let’s talk about the "what." Plaster and drywall dust aren't like the regular dust bunnies you find under your sofa. This stuff is made of gypsum, silica, and other minerals that have been ground into a microscopic powder.
Because the particles are so fine, they don't just sit there. they float. They get into your HVAC system, your closets, and even inside your kitchen cabinets. It’s also quite abrasive, which means if you try to scrub it off a delicate surface without the right technique, you could actually scratch your new finishes.
This is why a "one and done" wipe-down never works. You need a systematic, two-stage approach: the Dry Phase and the Wet Phase.
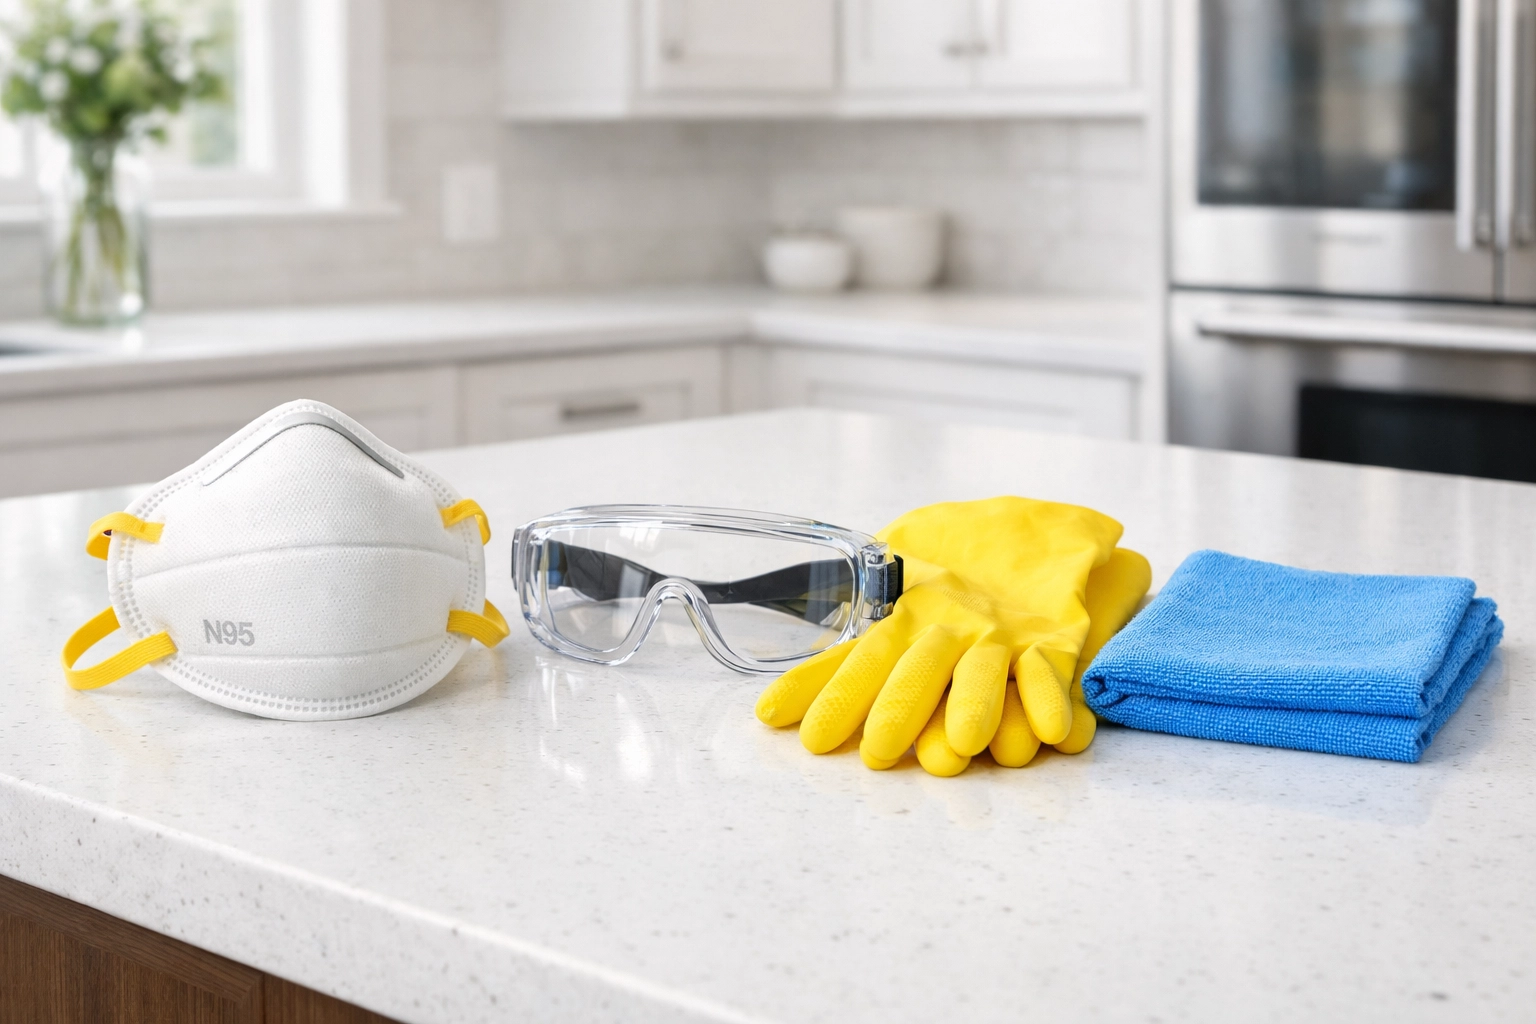
Safety First: Gear Up Like a Ninja
Before you start swinging a mop, you need to protect yourself. Breathing in plaster dust isn't just annoying; it can irritate your lungs and throat.
- The Mask: Use an N95 respirator mask. A simple cloth mask or a cheap paper one won't catch those tiny particles.
- The Eyes: Wear goggles if you’re cleaning ceilings or high shelves. You don’t want a rain of white powder in your eyes.
- The Ventilation: Open the windows if the weather allows. Use fans to blow air out of the house, not just around the room.
- Keep the Family Away: If possible, keep kids and pets out of the construction zone until the first round of heavy cleaning is done.
Phase One: The Dry Cleaning Method (Top to Bottom)
The golden rule of post-construction cleaning is Top to Bottom. If you clean the floors first, you’ll just end up covering them in dust again when you move to the ceiling.
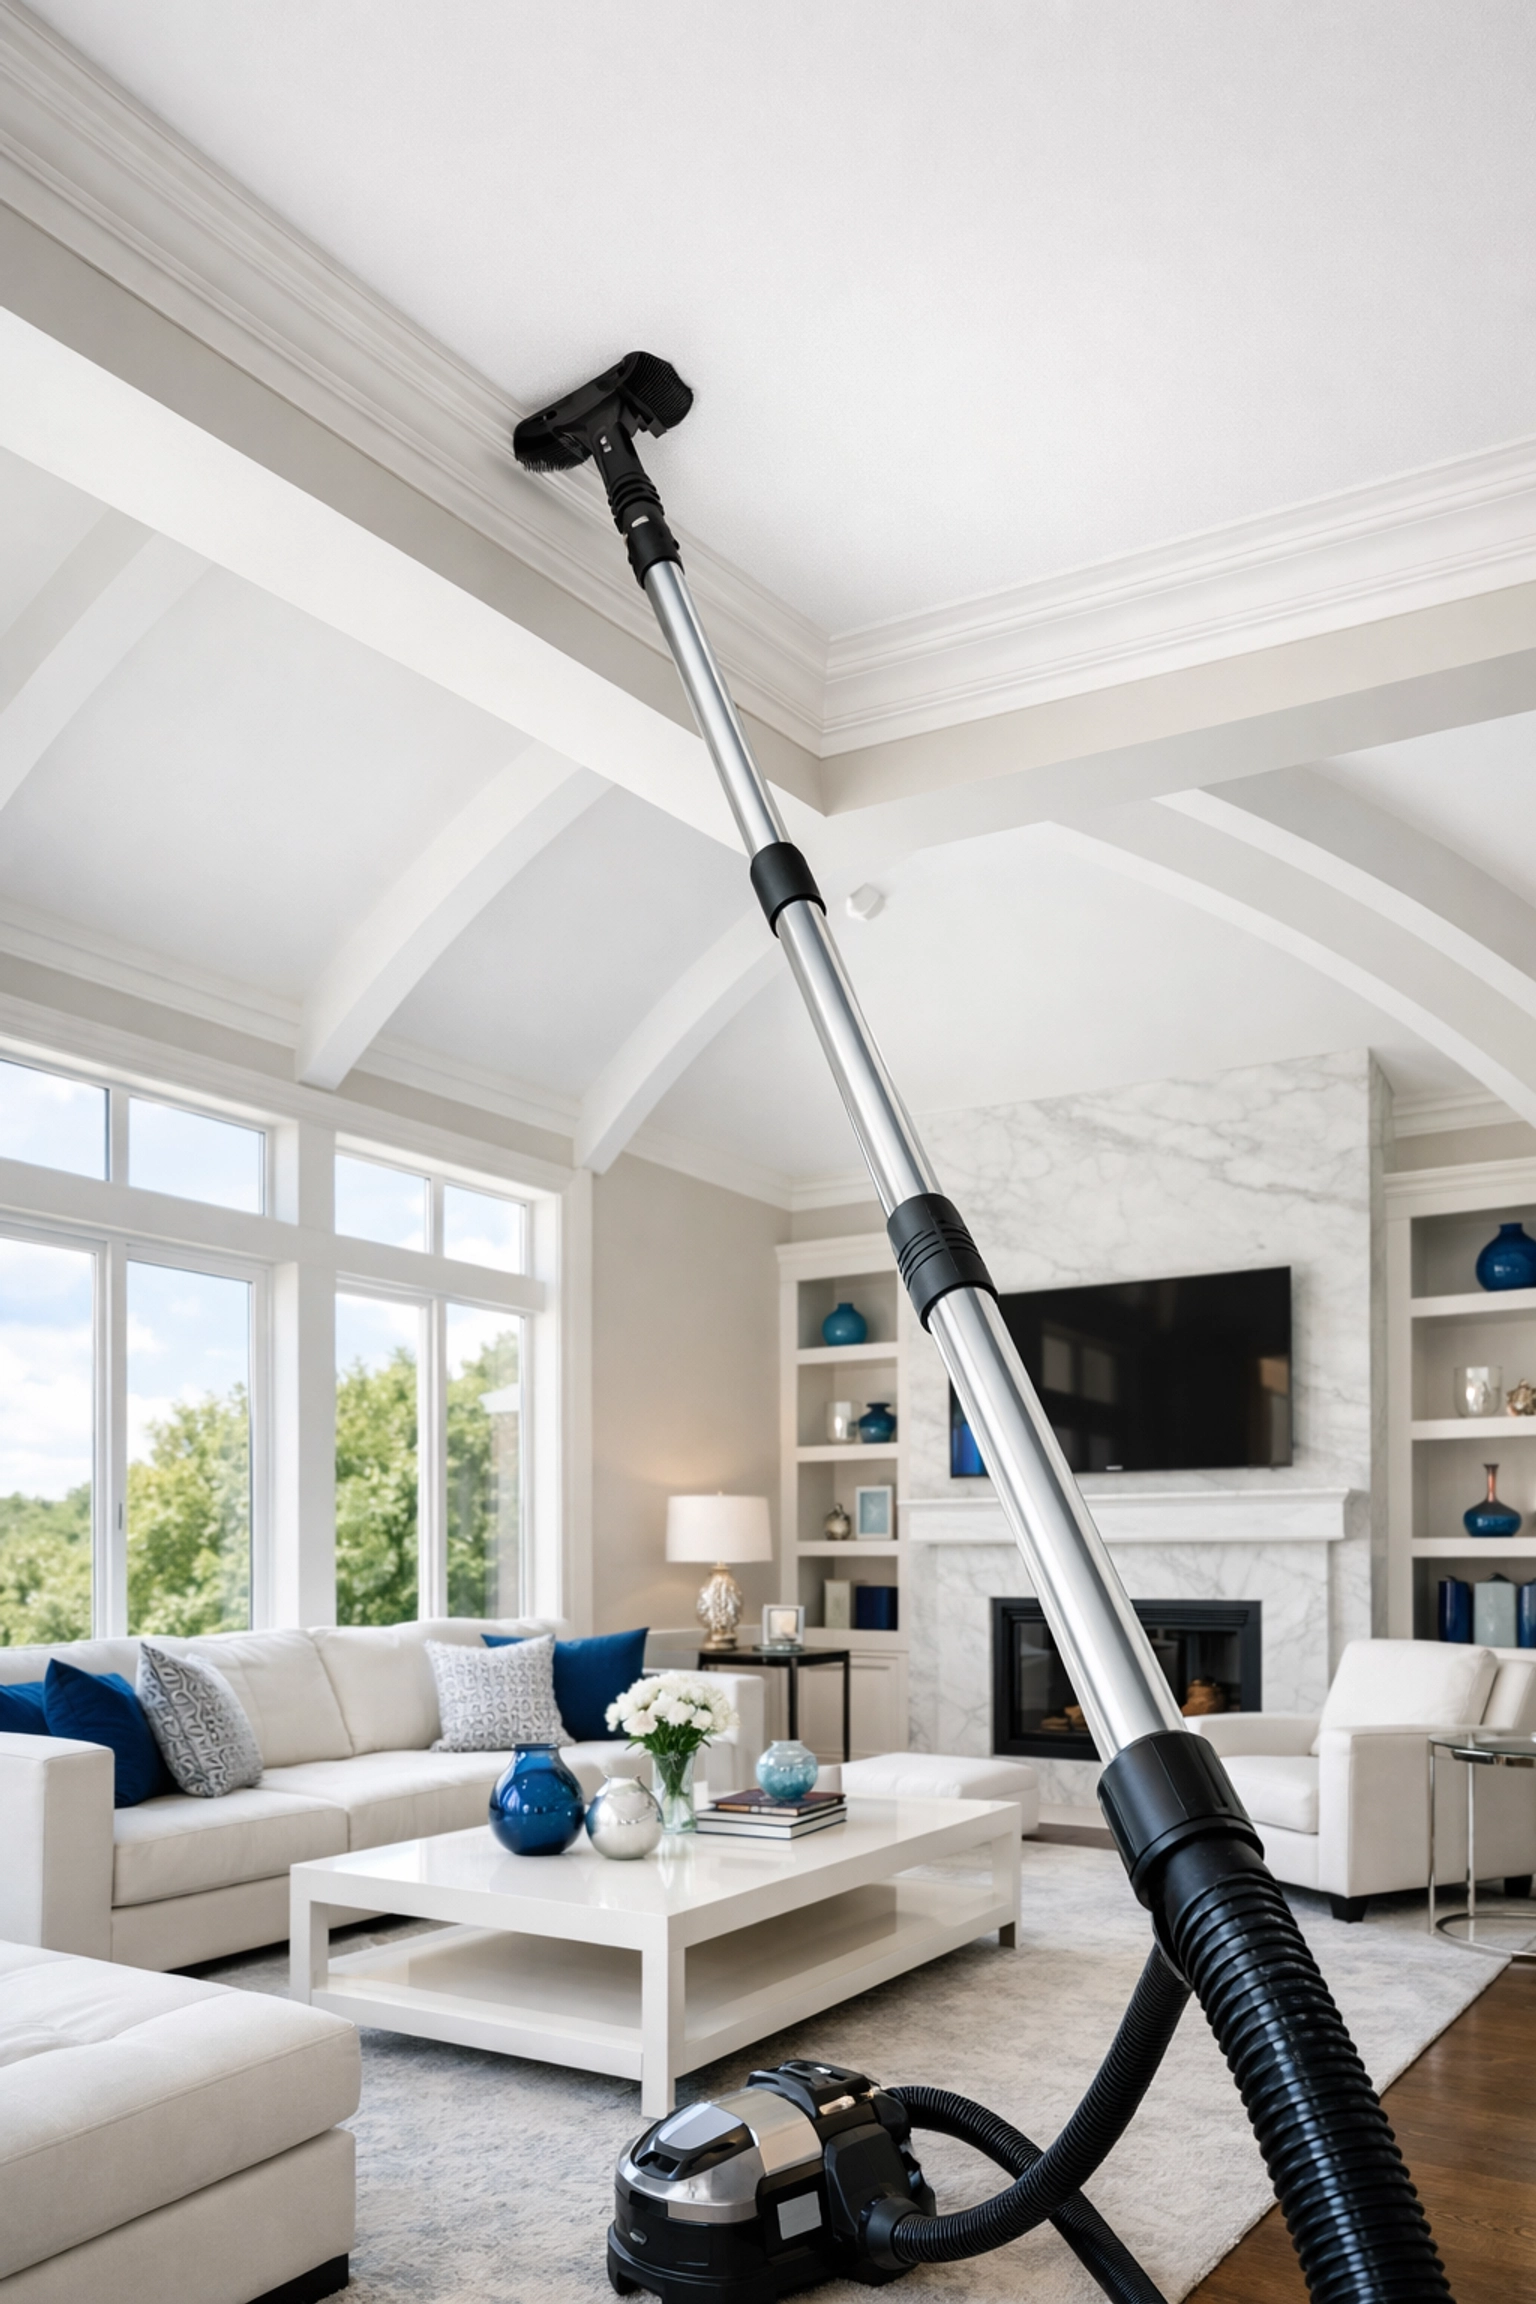
1. The Ceiling and Light Fixtures
Start at the very top. Use a HEPA-filter vacuum with a soft brush attachment to go over the ceiling. If you don’t have a vacuum that reaches that high, a long-handled microfiber duster works wonders. Don’t forget the tops of ceiling fan blades and the inside of light fixtures. Dust loves to hide in the globes of pendant lights.
2. The Walls
Walls are the biggest surface area for dust to cling to. Instead of a wet rag (which can turn the dust into a muddy paste), start with a dry microfiber cloth. Microfiber is a ninja’s best friend because it uses static electricity to actually "grab" the dust rather than just pushing it around.
- Ninja Tip: Wrap a large microfiber cloth around the head of a flat floor mop to reach the high parts of the walls quickly.
3. The Vacuuming (HEPA is Mandatory)
A regular household vacuum might actually make things worse. Many standard vacuums don't have fine enough filters to catch plaster dust, so they just suck it in and spit it right back out the exhaust.
You need a vacuum with a HEPA (High-Efficiency Particulate Air) filter. Use the brush attachments for baseboards, window sills, and outlet covers. Yes, even the outlet covers! Dust sits on that tiny ledge at the top of every single one.
4. The Dryer Sheet Trick
For baseboards, door frames, and narrow ledges, used dryer sheets are a secret weapon. They are designed to reduce static, which helps prevent the dust from sticking to the surface again. Just run a dryer sheet along the top of your baseboards after you’ve vacuumed them for a smooth, dust-repelling finish.
Phase Two: The Wet Cleaning Method (The Green Way)
Once you’ve removed as much dry dust as humanly possible, it’s time for the wet phase. This is where we pick up the "ghost" of the dust: that hazy residue that appears once the surfaces dry.
At The Cleaning Ninjas Inc, we’re big fans of green cleaning. You don't need harsh chemicals to tackle plaster dust. In fact, some chemicals can react with the minerals in the dust and create a sticky mess.
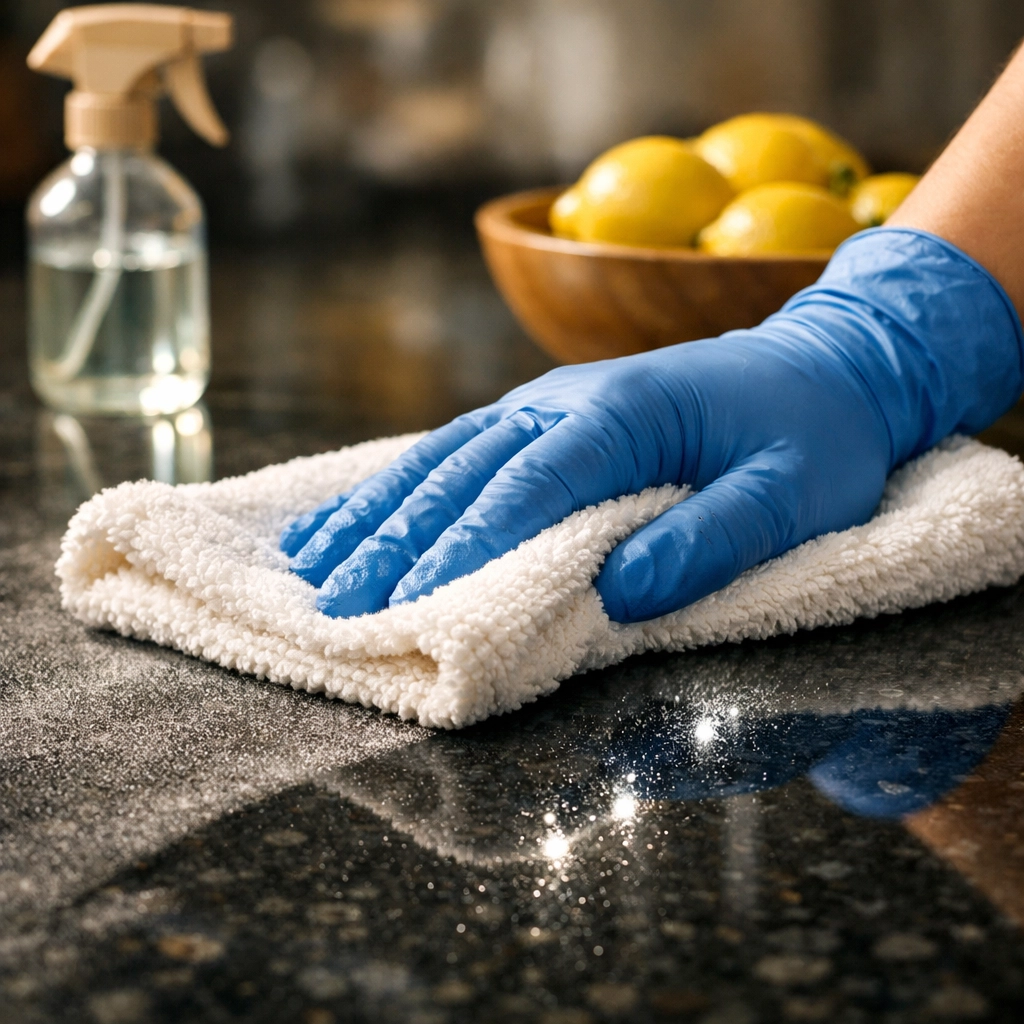
The Magic Vinegar Solution
Plaster dust is alkaline. Do you know what’s acidic? White vinegar. Mixing the two creates a neutral reaction that helps break down the bond between the dust and your surfaces.
- The Recipe: Fill a bucket with warm water and add 1 to 2 cups of plain white vinegar.
- The Technique: Dip a microfiber cloth into the solution, wring it out until it’s just damp (not dripping), and wipe.
- The Second Rinse: Always keep a second bucket of clean, plain water for rinsing your cloth. You don't want to keep dipping a dirty cloth back into your cleaning solution.
Don’t Forget the Hidden Spots
- Inside Cabinets: Even if the doors were closed, the dust found a way in. Wipe down every shelf.
- Hinges and Tracks: Use a damp toothbrush to get dust out of door hinges and sliding window tracks.
- Door Tops: Run your cloth along the very top edge of every door.
Handling the HVAC System
This is the part most people forget, and it’s the reason the dust keeps coming back. Your HVAC system has been breathing in that construction dust for weeks.
- Replace the Filters: This is non-negotiable. Change your furnace or AC filters immediately after construction ends. Then, change them again about 30 days later. You’ll be shocked at how much they catch in that first month.
- Vacuum the Vents: Take the vent covers off and vacuum as far into the duct as your hose can reach. Wash the vent covers in the sink with soapy water before putting them back.
- Professional Duct Cleaning: If the renovation was massive, you might want to consider a professional duct cleaning to ensure the "lungs" of your home are clear.
The Floors: The Final Frontier
Floors are the last thing you should touch. For hard floors (hardwood, tile, or laminate), you’ll likely need to mop three times.
- Pass 1: Use the vinegar and water solution to pick up the bulk of the residue.
- Pass 2: Use a clean microfiber mop with fresh water to remove any remaining haze.
- Pass 3: This is the "buffing" pass. Use a dry microfiber mop or cloth to ensure there are no water streaks, which can trap any remaining microscopic particles.

Why It Takes Time
Don’t be discouraged if you see a light dusting again the next morning. Plaster dust is so light that it can stay suspended in the air for hours or even days. As it slowly settles, you might need to do a quick "touch-up" wipe down. Think of it as the "settling period."
By following this top-to-bottom, dry-to-wet method, you’re significantly reducing the number of passes you’ll have to make.
When to Call the Ninjas
We get it: renovations are exhausting. By the time the contractors leave, the last thing you want to do is spend three days fighting a cloud of white powder. That’s where we come in.
Plaster dust is the enemy of a clean home. Our residential cleaning in Leominster MA experts use high-grade filtration to clear it for good.
At The Cleaning Ninjas Inc, we specialize in post-construction cleaning. We have the industrial HEPA vacuums, the eco-friendly solutions, and the ninja-level attention to detail required to make your home truly move-in ready. Whether you need a deep clean of your new kitchen or a full-house dust-down, check out our services to see how we can help.
You’ve worked hard on your home renovation. You deserve to enjoy it without the sneezing and the "white glove" anxiety. For more tips on keeping your space pristine, head over to our About Us page to learn more about our philosophy, or keep browsing our blog for more cleaning hacks!
Enjoy your new, dust-free space! 🥷✨
