

So, the contractors have finally packed up their ladders, the new "Morning Mist" gray on the walls looks absolutely stunning, and you’re ready to start moving the furniture back in. But then, you look down.
Right there, mocking your beautiful oak or maple floors, is a constellation of tiny white paint splatters. It’s the classic post-renovation heartbreak. Before you reach for the heavy-duty sandpaper or a metal scraper (please, don’t!), take a deep breath. At The Cleaning Ninjas Inc, we’ve tackled thousands of post-construction messes, and we’re here to tell you that those splatters don’t have to be permanent residents of your home.
Removing paint from hardwood requires a bit of finesse and a lot of patience. You want to be a "Cleaning Ninja": swift, effective, and leaving no trace of the battle behind. In this guide, we’re going to walk you through the safest, most eco-friendly, and non-abrasive ways to get your floors back to their former glory without ruining the finish.
Step 1: Identify Your Enemy (The "Ninja" Assessment)
Before we start scrubbing, we need to know what we’re dealing with. Not all paint is created equal. Most modern interior paints are water-based (latex or acrylic), which is great news for you because they are much easier to remove. However, if you’re in an older home or used specialty trim paint, you might be dealing with oil-based paint.
The Ninja Test:
Take a cotton ball or a soft microfiber cloth and soak it in a little bit of rubbing alcohol. Find a small paint splatter in an inconspicuous corner and rub it gently for about 30 seconds. If the paint comes off onto the cotton ball, it’s water-based. If the paint stays stubbornly attached and looks shiny, it’s likely oil-based.
Knowing this helps you choose the right "weapon" for the job. Most of our tips below focus on water-based paint, as that’s what we see in 90% of our post-construction cleaning projects.
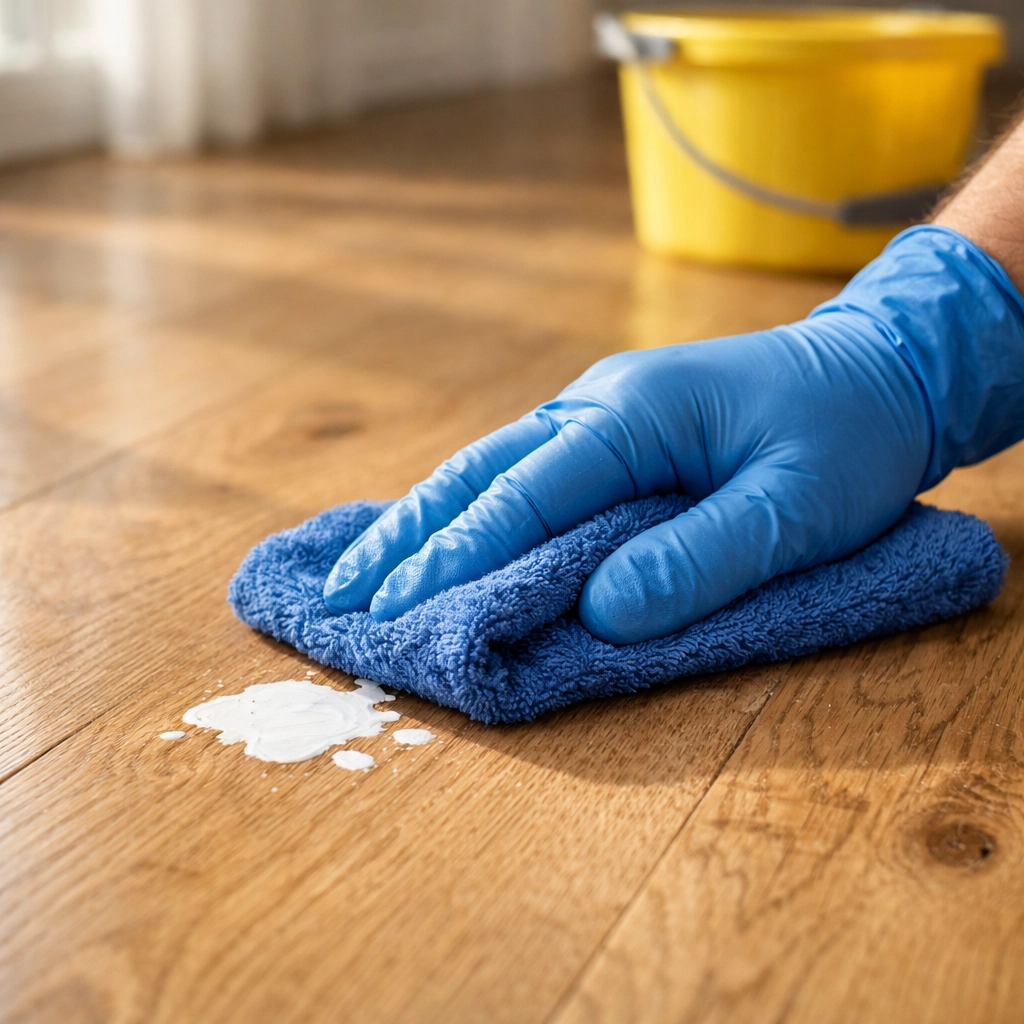
Method 1: The Gentle Dish Soap Solution
Believe it or not, the same stuff you use to clean your lasagna pans is one of the safest tools for your hardwood. This is the ultimate eco-friendly starting point.
- The Mix: Add about a teaspoon of mild dish soap to two cups of warm water. You want it sudsy but not a bubble bath.
- The Soak: Dip a microfiber cloth into the solution and wring it out so it’s damp, not dripping. Lay the damp cloth over the paint splatters for about five minutes. This helps soften the paint.
- The Wipe: Gently rub the splatter. If it’s fresh (less than a few days old), it might just wipe right away.
- The Scrape: If it doesn’t wipe off, use a plastic putty knife or even the edge of an old credit card. Hold it at a 45-degree angle and gently nudge the edge of the splatter. It should pop right off.
Method 2: The "Ninja Pantry" Mix (Alcohol and Lemon)
If the soap and water didn't do the trick, it’s time to raid the kitchen. This is a favorite "Ninja Tip" because it’s effective but avoids the harsh fumes of chemical paint thinners.
The acidity of the lemon juice combined with the solvent properties of rubbing alcohol creates a powerful, non-toxic paint lifter.
- The Recipe: Mix 3 parts rubbing alcohol (isopropyl alcohol) with 1 part lemon juice.
- The Application: Apply a small amount of the mixture to the paint splatter using a cotton swab or a clean rag.
- The Wait: Let it sit for about a minute. Don’t let it sit too long, as alcohol can dull some floor finishes if left for extended periods.
- The Scrub: Use an old soft-bristled toothbrush to gently agitate the paint. You’ll see it start to break down and become "slushy."
- The Clean-up: Wipe it away with a damp cloth and immediately follow with a dry cloth to buff the area.
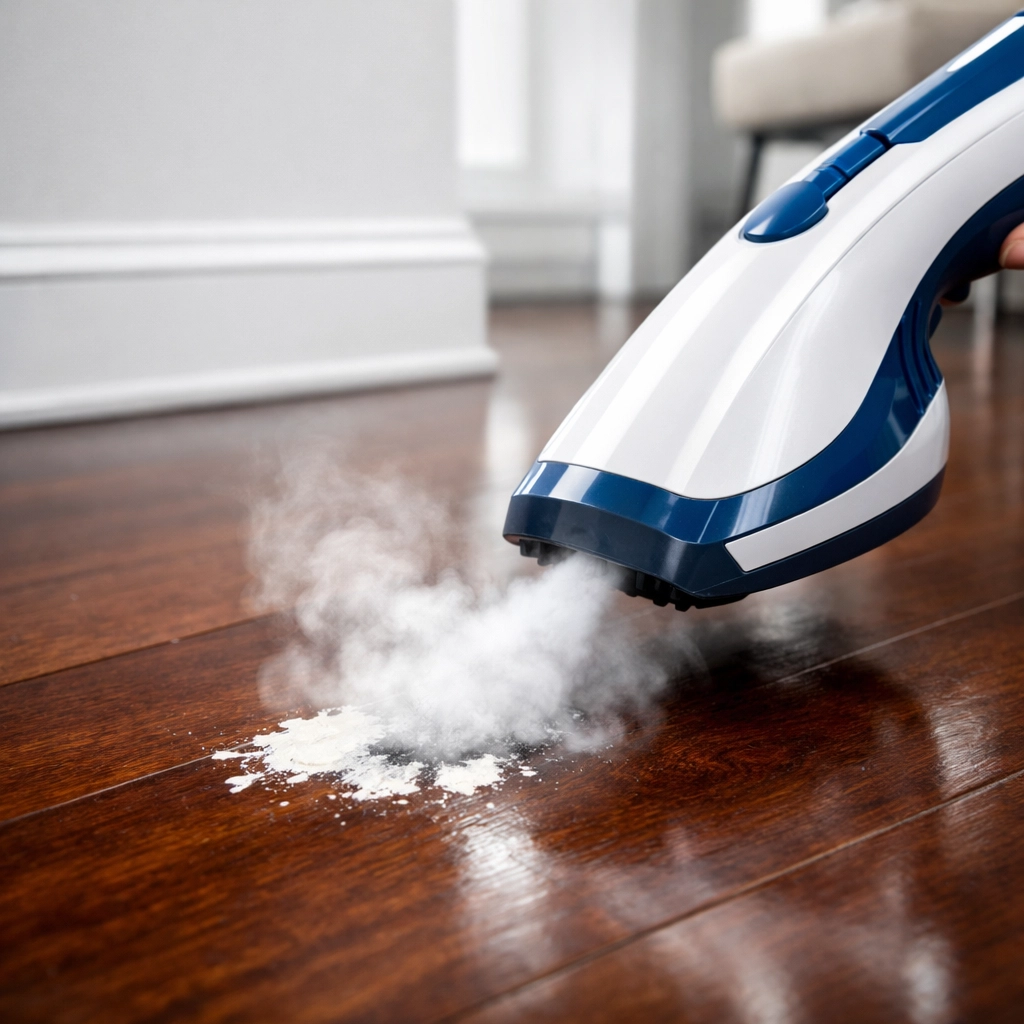
Method 3: The Power of Steam
At The Cleaning Ninjas Inc, we love steam. It’s the ultimate chemical-free cleaning method. If you have a handheld garment steamer, you’ve got a secret weapon for post-construction cleanup.
Steam works by using heat and moisture to break the bond between the paint and the floor’s finish.
- Hold the steamer about two inches away from the paint splatter for 10-15 seconds.
- Once the paint looks slightly "plump" or soft, use your plastic scraper to lift it.
- Wipe away the moisture immediately.
Ninja Pro-Tip: Be very careful not to over-saturate the wood. Hardwood and excessive water are not friends. Keep the steamer moving and dry the area quickly.
Method 4: The Heat Gun (For the Stubborn Stuff)
If you’re dealing with older, dried-on splatters that feel like they’ve become part of the wood, a little heat can go a long way. If you don't have a professional heat gun, a high-powered hair dryer works just as well for small spots!
The goal isn't to burn the paint; it's just to soften it. Point the heat at the splatter for about 20 seconds. Once it’s warm to the touch, use your trusty plastic putty knife to peel it up. This method is particularly effective for those thick "globs" that contractors sometimes leave behind.
Method 5: Using Specialty Products (When DIY Isn't Enough)
Sometimes, the DIY methods need a little boost. If you’ve tried the above and you’re still seeing spots, look for a product specifically labeled for "Hardwood Paint Removal."
Products like Goof Off Paint Splatter Remover for Hardwoods are formulated to be tough on paint but gentle on polyurethane finishes.
- Always test a small, hidden area first (like inside a closet) to make sure it doesn't discolor your wood.
- Apply, wait according to the bottle's instructions, and wipe.
- Always wash the area with a damp cloth afterward to remove any chemical residue.
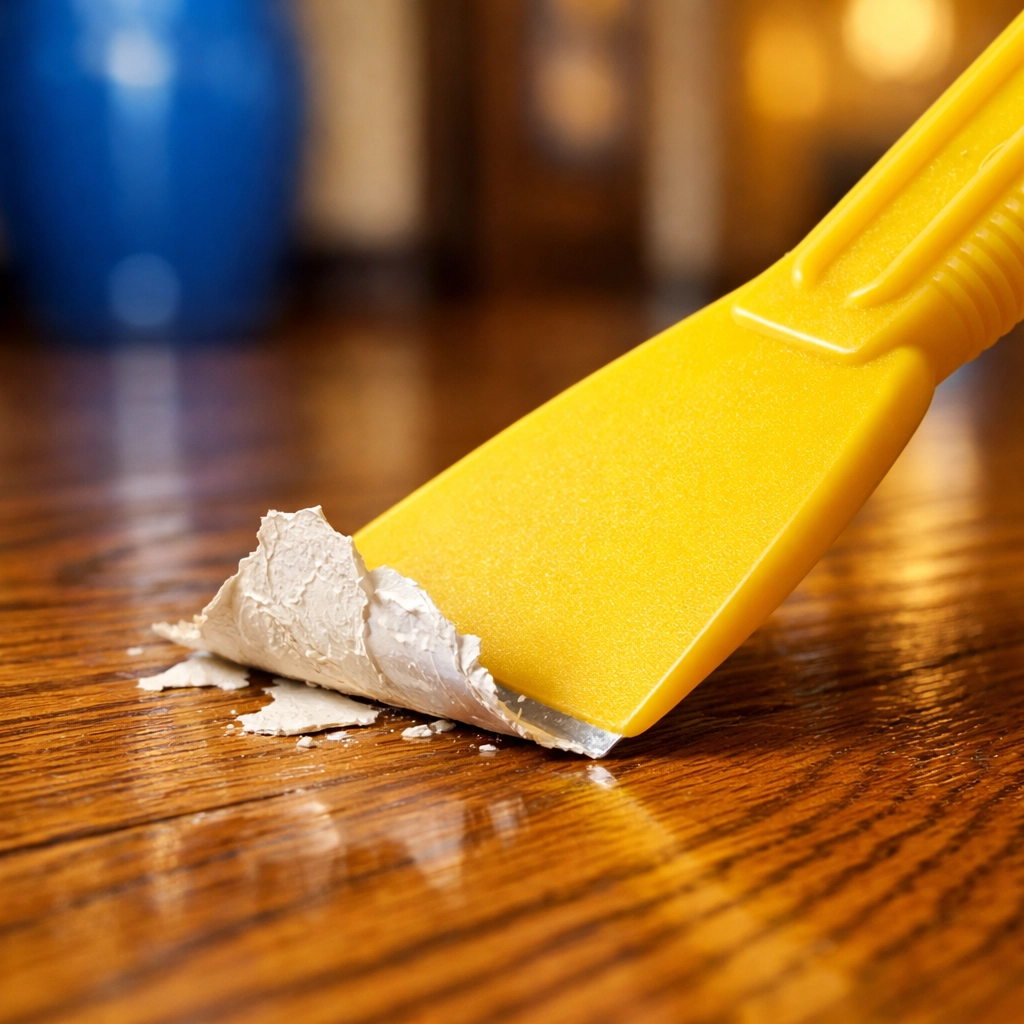
Why You Should Never Use Metal Scrapers
We can’t stress this enough: put down the metal putty knife. It is so tempting to grab a screwdriver or a metal scraper to "flick" that paint off, but one slip and you’ve created a permanent gouge in your expensive hardwood.
A plastic scraper is your best friend because it’s softer than the wood finish but harder than the paint. If a plastic scraper isn't working, it usually means the paint hasn't been softened enough yet: not that you need a sharper tool!
Post-Cleanup: Restoring the Shine
After you’ve successfully banished the paint, the area might look a little dull, especially if you used rubbing alcohol or a commercial cleaner. Don't worry, your Cleaning Tips journey doesn't end at removal!
To bring back the luster, use a high-quality hardwood floor polisher or a specialized wood cleaner. Buffing the area with a dry microfiber cloth in a circular motion will usually bring that "new floor" shine right back to life.
When to Call the Pros
Post-construction cleaning is exhausting. Between the fine drywall dust, the window stickers, and the floor splatters, it can feel like the renovation is never truly over. If you find yourself staring at a 2,000-square-foot house covered in contractor dust and paint specs, it might be time to call in the experts.
At The Cleaning Ninjas Inc, we specialize in taking a "construction zone" and turning it into a "home." Our team is trained in the exact methods described above, using professional-grade HEPA vacuums and specialized tools to ensure every nook and cranny is spotless. You can learn more about our philosophy and our team on our About Us page.
Ninja Prevention Tips for Next Time
While we’re always happy to help you clean up, we also love a good prevention strategy! If you have more painting projects on the horizon, remember these three Ninja rules:
- Double-Drop Cloths: Use a plastic layer on the bottom and a canvas layer on top. The canvas absorbs the drips so they don't track, and the plastic prevents liquids from soaking through to the wood.
- Tape the Edges: Use high-quality painter's tape along the baseboards, but don't leave it on for more than a few days, or the adhesive can become a whole new cleaning problem!
- Wipe as You Go: Keep a damp rag in your pocket while painting. A wet splatter takes 2 seconds to clean; a dry one takes 10 minutes.
Final Thoughts
Your hardwood floors are an investment, and they deserve a little TLC. By using these gentle, non-abrasive methods, you can clear away the evidence of your home's "growing pains" and finally enjoy your newly renovated space.
For more tips on keeping your home in tip-top shape, check out the rest of our blog. And if you're ready to hang up the microfiber cloth and let someone else handle the heavy lifting, give us a shout! We’d love to help you cross "cleaning" off your to-do list.
Happy cleaning, and enjoy your beautiful, paint-free floors!

