You’ve finally done it. The plastic sheets are down, the contractors have loaded up their trucks, and your home renovation is officially complete. You take a deep breath, ready to enjoy your beautiful new space, but then you hear it. That dreaded crunch-grind-scrape sound when you try to slide open a window to let in some fresh air.
If you’ve recently finished a major remodel, you know exactly what we’re talking about. Construction dust isn’t like regular house dust; it’s a mixture of drywall particles, sawdust, tiny metal shavings, and masonry grit. It has a way of finding the deepest, darkest crevices of your home: and window tracks are its favorite place to hide.
At The Cleaning Ninjas Inc, we’ve seen window tracks so packed with debris they looked like they were filled with cement. But don’t worry! You don't need to live with crunchy windows forever. We’re sharing our specialized "ninja techniques" to help you get those tracks sliding like silk again using eco-friendly methods that are safe for your family and your brand-new home.
Why Post-Construction Cleaning is Different
Before we dive into the "how," let’s talk about the "why." Why can’t you just run a damp rag through the track and call it a day?
Construction debris is abrasive. Drywall dust, in particular, is extremely fine and gets into the mechanical parts of the window. If you add water too early, that dust turns into a thick, sticky paste (basically DIY mud) that hardens in the corners. If you force the window open or closed over this grit, you risk scratching the tracks or damaging the rollers. This is why a strategic, multi-step approach is essential.
If this sounds like a lot of work after you’ve already spent months dealing with contractors, remember that we offer professional cleaning services specifically designed to handle post-construction chaos. But if you’re ready to tackle it yourself, grab your gear and let’s get to work!
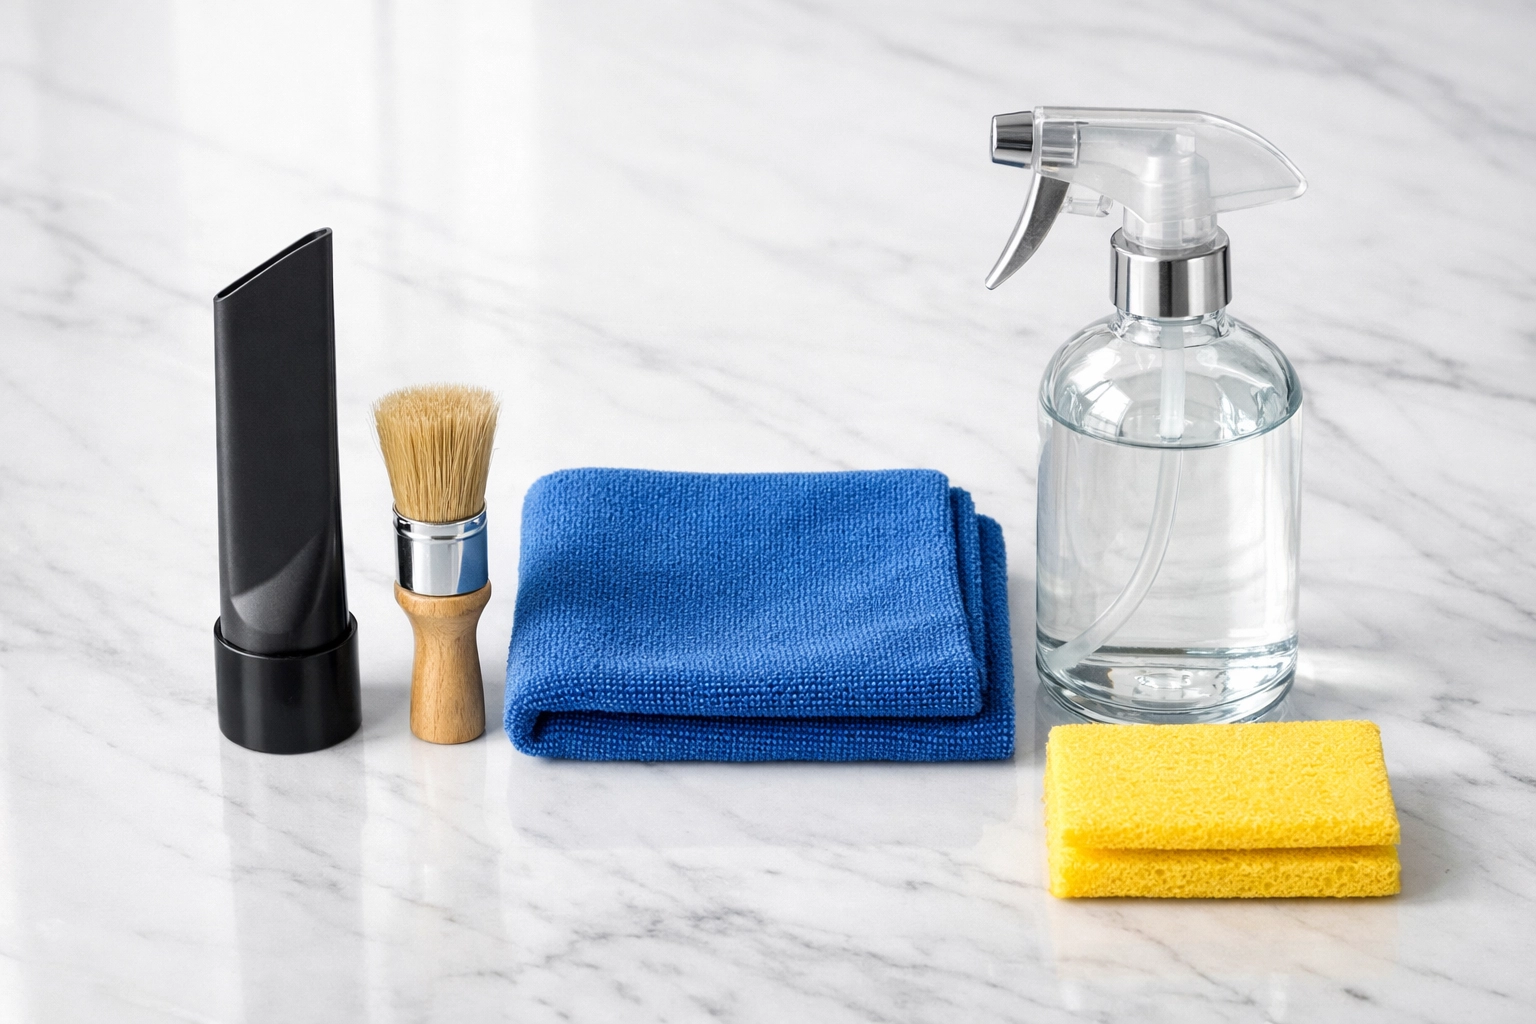
The Ninja Tool Kit
To clean like a pro, you need the right tools. Most of these you probably already have under your sink or in your garage.
- A Shop-Vac or a high-powered vacuum: With a crevice attachment and a brush attachment.
- A small, stiff paintbrush: This is our secret weapon for flicking dust out of corners.
- An old toothbrush: For those super-tight spots.
- Microfiber cloths: They grab dust better than paper towels.
- White distilled vinegar: Our favorite eco-friendly cleaner.
- Baking soda: For the extra-stubborn grime.
- A spray bottle: Filled with a 50/50 mix of water and vinegar.
- Wooden skewers or toothpicks: For cleaning out the tiny "weep holes" (drainage slots).
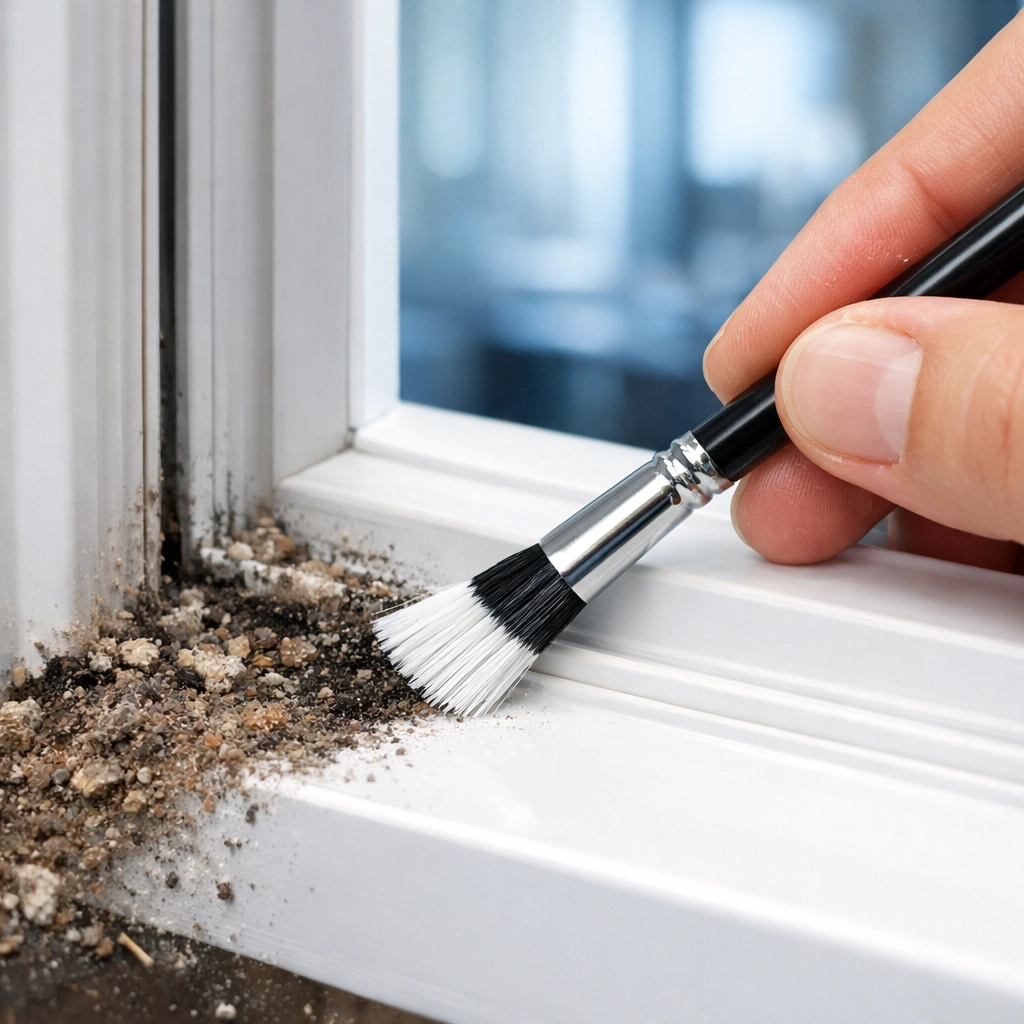
Step 1: The Dry Phase (Crucial!)
The biggest mistake homeowners make is spraying cleaner directly onto construction dust. Rule number one of the Cleaning Ninjas: Never make mud.
Start by using your vacuum’s crevice tool to suck up the big chunks of drywall and wood. Once the loose stuff is gone, take your small paintbrush. Use the bristles to agitate the dust in the corners and along the edges, sweeping it toward the center of the track where the vacuum can reach it.
Don't forget the vertical tracks! Construction dust settles on every horizontal surface, but it also clings to the sides. Run your brush up and down the vertical channels to knock the dust down into the bottom track, then vacuum it all up.
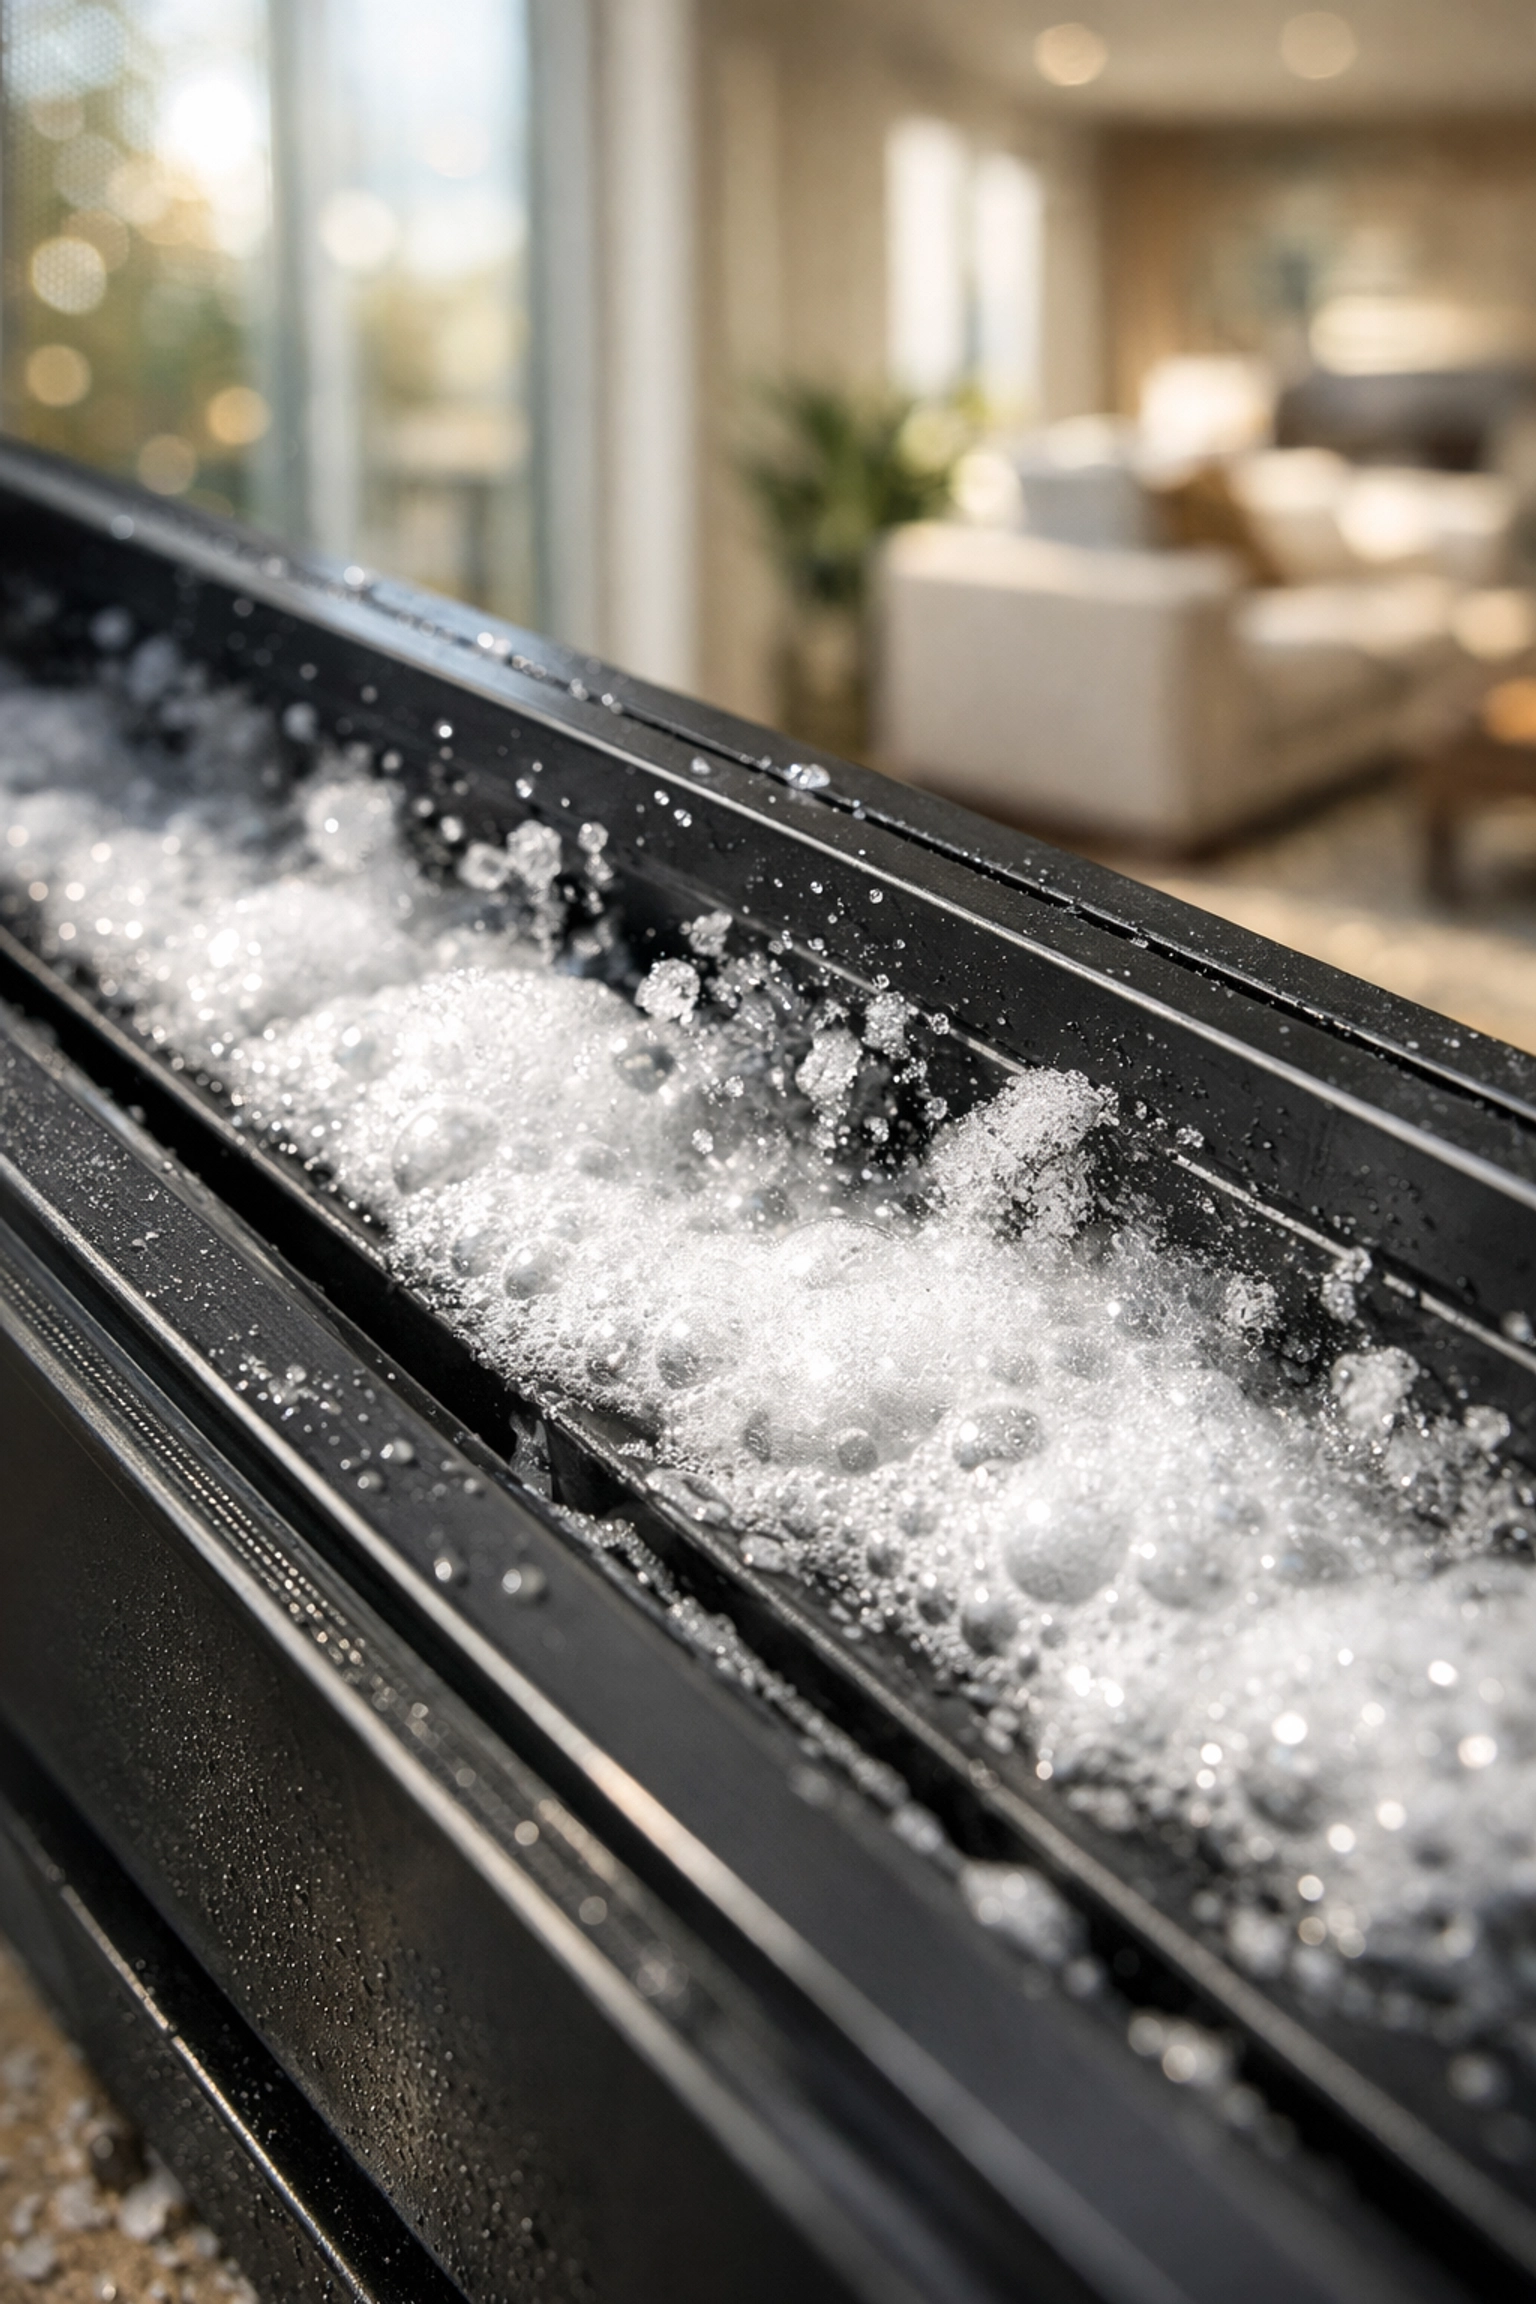
Step 2: The Vinegar and Baking Soda Reaction
Once you’ve removed as much dry debris as humanly possible, it’s time to tackle the "stuck-on" stuff. This is where we go eco-friendly.
Sprinkle a light dusting of baking soda along the window track. You don’t need much: just enough to cover the bottom. Next, spray your vinegar and water solution over the baking soda. You’ll see it start to fizz and bubble. This chemical reaction helps break down the bond between the construction film and the window track without the need for harsh chemicals.
Let it sit for about 5 to 10 minutes. This "dwell time" is a classic ninja move; let the cleaner do the heavy lifting so you don't have to scrub as hard.
Step 3: The Detailed Scrub
Now that the grime has softened, take your toothbrush and get into the corners. Move the brush in small, circular motions. You’ll notice the gray construction "paste" lifting away.
For the long, straight sections of the track, a microfiber cloth wrapped around a finger works wonders. If the track is too narrow for your finger, wrap the cloth around a flat-head screwdriver or a wooden skewer. This allows you to apply pressure right into the groove.
Pro Tip: Pay special attention to the "weep holes." These are the small rectangular slots on the outside of the window frame designed to let rainwater drain out. Construction dust often plugs these up. Use a toothpick or a pipe cleaner to ensure they are clear; otherwise, you might end up with water leaking into your house during the next big storm.
Step 4: The Rinse and Dry
After scrubbing, use a clean, damp microfiber cloth to wipe away the vinegar and baking soda residue. You might need to do this a couple of times. If you leave the residue behind, it will dry white and look just as bad as the construction dust you just removed!
Finally, take a dry cloth and buff the tracks dry. Leaving them damp can actually attract more dust, and in some climates, it can lead to mold growth in the window frame.
Step 5: The Ninja Secret Weapon – Steam
If you’ve gone through the steps above and your windows still feel "gritty," or if the renovation was particularly messy (like a full kitchen gut-out), it’s time to bring out the big guns: a handheld steam cleaner.
Steam is incredible for post-construction cleaning. The high pressure and heat blast construction dust out of places a toothbrush simply can’t reach. It liquefies old grease and grime and sanitizes the area at the same time.
At The Cleaning Ninjas Inc, we love using steam because it’s 100% eco-friendly: just pure water! Just be careful not to hold the steam jet in one spot on the glass for too long, especially in cold weather, as the temperature difference can potentially crack the pane. Focus the steam on the metal or vinyl tracks, then wipe away the loosened gunk with a cloth.
Maintaining Your Freshly Cleaned Windows
Now that your tracks are sparkling, you want to keep them that way. In the weeks following a renovation, dust will continue to settle. We recommend doing a quick vacuum of the tracks once a week for the first month after the contractors leave.
If you find the window still sticks a little bit, do not use WD-40 or oil-based lubricants. These actually attract dust and turn it into a thick sludge that will ruin your hard work. Instead, use a dry silicone spray or even a bit of paraffin wax (like a plain white candle) rubbed along the track to keep things sliding smoothly.
When to Call in the Ninjas
We know that a major renovation is exhausting. Sometimes, the last thing you want to do is spend your weekend on your hands and knees with a toothbrush. That’s why we’re here.
Our team specializes in the deep, detail-oriented work that makes a house feel like a home again. From window tracks to the tops of ceiling fans and the inside of cabinets, we hunt down construction dust wherever it hides. If you want to learn more about how we can help you cross "cleaning" off your post-reno to-do list, check out our About Us page to see the faces behind the masks.
We take pride in using products that are safe for your family and the environment, ensuring your new renovation is not just beautiful, but healthy too. You’ve put a lot of love (and money!) into your home: let us help you give it the finishing touch it deserves.
Final Thoughts
Cleaning window tracks might seem like a small detail, but it’s the difference between a home that looks finished and one that still feels like a construction zone. By using the dry-then-wet method, eco-friendly cleaners like vinegar and baking soda, and a little bit of ninja patience, you can restore your windows to their original glory.
Happy cleaning, and enjoy your beautiful new space! If you found these tips helpful, be sure to check out the rest of our cleaning tips for more ways to keep your home in tip-top shape.