

You’ve finally done it. The renovation is over. The new walls look crisp, the lighting is modern, and that old, dated wallpaper is a distant memory. You sit down on your sofa, take a deep breath of relief, and: cough: a cloud of fine white powder rises from the cushion. You look at your coffee table that you wiped down just an hour ago, and it’s already covered in a thin, ghostly film.
Welcome to the post-construction nightmare: persistent plaster dust.
At The Cleaning Ninjas Inc., we see this all the time. Whether you’ve had a full-scale home addition or just a small drywall repair, plaster and joint compound dust are the uninvited guests that refuse to leave. This stuff isn't like normal house dust. It’s finer, heavier, and has a weird way of "reappearing" minutes after you think you’ve cleaned it.
If you’re tired of chasing white footprints across your hardwood floors, don't worry. We’re going to walk you through the professional ninja tactics to banish that dust for good.
Why Plaster Dust is So Stubborn
Before we grab the mops, it helps to understand what we’re up against. Plaster and drywall dust are made of tiny, microscopic particles. When you sand down a wall, those particles go airborne and stay there for a long time. They settle into the tiniest crevices: inside your electronics, behind the baseboards, and even inside your light fixtures.
The biggest mistake people make is trying to tackle it like a normal cleaning job. If you just go in with a damp rag and a standard vacuum, you’ll likely just turn the dust into a milky smear that dries back into white powder. To get rid of it, you need a strategic, multi-phase approach.
Phase 1: The Tactical Setup
You can't just start wiping. If you don't control the environment, you'll just move the dust from the table to the chair.
- Ventilation is Key: Open the windows if the weather allows. If you have floor fans, point them outward to help pull airborne particles out of the house.
- Check Your HVAC: This is the most important step that people forget. Your heating and cooling system acts like a giant vacuum, sucking up construction dust and blowing it into every room in the house. Check your air filters. If they’re gray and fuzzy, replace them immediately. You might even want to check them again a week later. Keeping your air quality high is essential for a clean home, as we discuss in our post about how frequent cleaning improves indoor air quality.
- Safety First: Plaster dust can be an irritant to your lungs and eyes. Wear a high-quality N95 mask or a respirator, especially during the dry cleaning phase.

Phase 2: The Dry Cleaning (Top to Bottom)
The "Golden Rule" of cleaning at The Cleaning Ninjas Inc. is always Top to Bottom. Gravity is your friend: or your enemy, depending on how you use it. If you clean the floors first and then wipe the ceiling fans, you’ve just doubled your work.
1. Ceilings and Walls
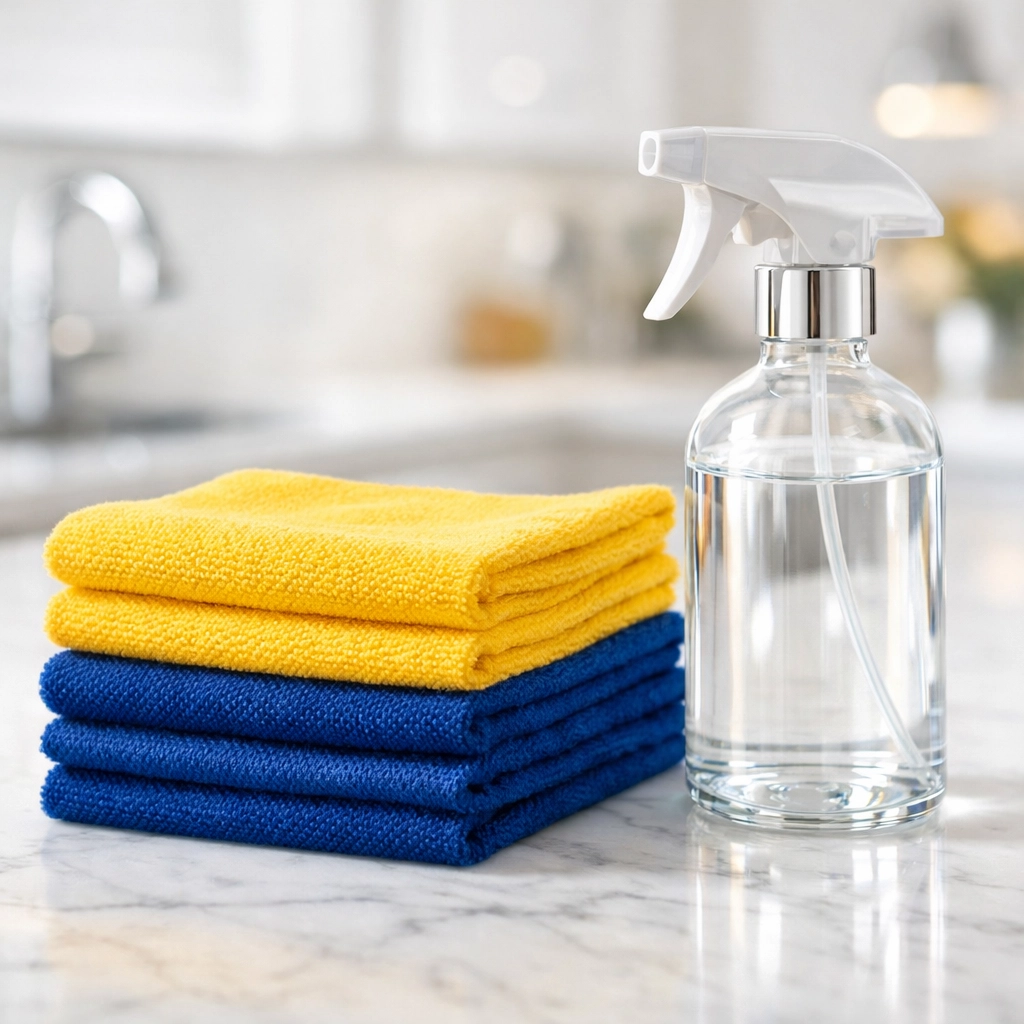
Start at the very top. Use a vacuum with a soft brush attachment or a long-handled microfiber duster. Don't use a feather duster; those just flick the dust into the air. Microfiber is a ninja's best friend because it actually "grabs" the particles. Gently run your vacuum or duster over the tops of door frames, window moldings, and light fixtures.
2. The Vacuum Factor
Do not use a standard household vacuum unless it has a HEPA filter. Plaster dust is so fine that it will pass right through a cheap filter and blow out the back of the exhaust, essentially turning your vacuum into a dust-spreading machine. Use a shop vac with a fine-dust bag or a high-end vacuum designed for allergens.
3. Hidden Ledges
Check the places you usually ignore: the tops of kitchen cabinets, the hidden rim of the ceiling fan blades, and even the tops of your picture frames. Vacuum these areas thoroughly before moving on to the wet phase.
Phase 3: The Wet Wipe (The Vinegar Secret)
Now that you’ve removed the bulk of the "loose" dust, it’s time for the wet cleaning phase. This is where most people get frustrated because the dust seems to "ghost" back as soon as the surface dries.
The Magic Solution:
Plain water often isn't enough to cut through the alkaline nature of plaster and drywall mud. The secret weapon? Distilled white vinegar.
Mix a bucket of warm water with about one to two cups of white vinegar. The acidity of the vinegar helps break down the minerals in the plaster, preventing that annoying white haze from forming as it dries.
The Double-Wipe Method:
- The First Wipe: Use a damp (not dripping wet) microfiber cloth dipped in your vinegar solution. Wipe the surface to pick up the remaining residue.
- The Second Wipe: Immediately follow up with a fresh, dry microfiber cloth. By drying the surface manually rather than letting it air-dry, you catch those last few microscopic particles before they can settle back down and form a film.
Phase 4: Tackling Hard Floors and Baseboards
Your floors are usually the hardest hit. Even if you covered them with plastic during the renovation, dust finds a way.
- The Mop Routine: Just like the furniture, your floors need the double-wipe treatment. Use a microfiber mop with your vinegar solution. Change the water frequently! If the water in your bucket looks like milk, you’re just spreading mud.
- Baseboard Hack: Baseboards are magnets for construction dust. For a quick ninja trick, after you’ve cleaned them with the vinegar solution and they are dry, run a used dryer sheet over them. The anti-static properties of the dryer sheet will help repel future dust, keeping them cleaner for longer.
Phase 5: Don't Forget the Details
If you still feel like the room is "dusty" after a deep clean, check these three common culprits:
- Air Vents: Take the grates off your floor or ceiling vents. Vacuum inside the duct as far as you can reach. If the grates are metal, wash them in the sink with warm soapy water to get all the grit out of the slats.
- Electronics: Dust loves static electricity. Your TV screen and computer monitors are probably covered. Use a specialized electronic wipe or a very lightly dampened (with water only) microfiber cloth.
- Light Bulbs: Construction dust can actually settle on light bulbs. When the bulbs heat up, they can "cook" the dust, leading to a weird smell or just a dimmed light. Wipe them down (when they are cool!) to brighten up the room.
When the Dust Wins (Call in the Ninjas)
We’ll be honest: post-construction cleaning is exhausting. It often takes two or even three full rounds of cleaning to truly eliminate every trace of plaster dust. It’s a labor-intensive process that requires the right equipment and a lot of patience.
If you’ve just finished a big project and you’d rather spend your weekend enjoying your new space instead of fighting a losing battle against white powder, that’s what we’re here for. At The Cleaning Ninjas Inc., we specialize in Post-Construction Cleaning. We have the heavy-duty HEPA vacuums, the right solutions, and the "ninja" focus to get into every corner, ledge, and crevice.
Whether you need a one-time deep clean or you're considering a regular weekly house cleaning service to keep your home's air quality at its peak, we’ve got your back.
Final Thoughts
Banning plaster dust isn't impossible: it just requires a little bit of science and a lot of microfiber. Remember to start dry, work top-to-bottom, use your vinegar solution, and always do that second dry-wipe to prevent the haze.
Enjoy your newly renovated space! You worked hard for it, and you deserve a home that sparkles without the "ghostly" reminders of the construction crew. If you want to learn more about our team and how we can help keep your home in tip-top shape, feel free to check out about us or see our full range of cleaning services in Massachusetts.
Happy cleaning, and stay ninja!


