

You’ve finally done it. The contractors have packed up their tools, the new backsplash is sparkling, and that wall you hated is officially a thing of the past. You’re ready to kick back, relax, and enjoy your newly renovated space. But then, you go to crack a window to let in some fresh air, and instead of a smooth glide, you hear it: crunch, grind, scrape.
That’s the sound of renovation grit. Even if your contractors were great about hanging plastic sheets, construction dust is like a stealthy intruder: it finds its way into every nook, cranny, and especially into your window tracks. At The Cleaning Ninjas Inc, we see this all the time. Window tracks are often the "forgotten" zone during a DIY cleanup, but they are essential for the longevity of your home’s hardware.
Cleaning window tracks after a major reno isn't just about making things look pretty; it's about ninja-level maintenance. If you leave that grit in there, it acts like sandpaper, wearing down the rollers and the track itself every time you open the window. Here is our expert guide on how to tackle this grimy task with efficiency and precision.
Why Construction Dust is a Different Beast
Normal household dust is mostly skin cells and lint (gross, we know, but easy to clean). Construction dust, however, is comprised of pulverized drywall, sawdust, stone particles, and sometimes even metal shavings. This stuff is abrasive. If you just grab a wet rag and start wiping, you’re basically creating a grinding paste that can scratch your window frames.
To handle this like a pro, you need to change your mindset. We aren't just cleaning; we are performing a tactical extraction of debris.
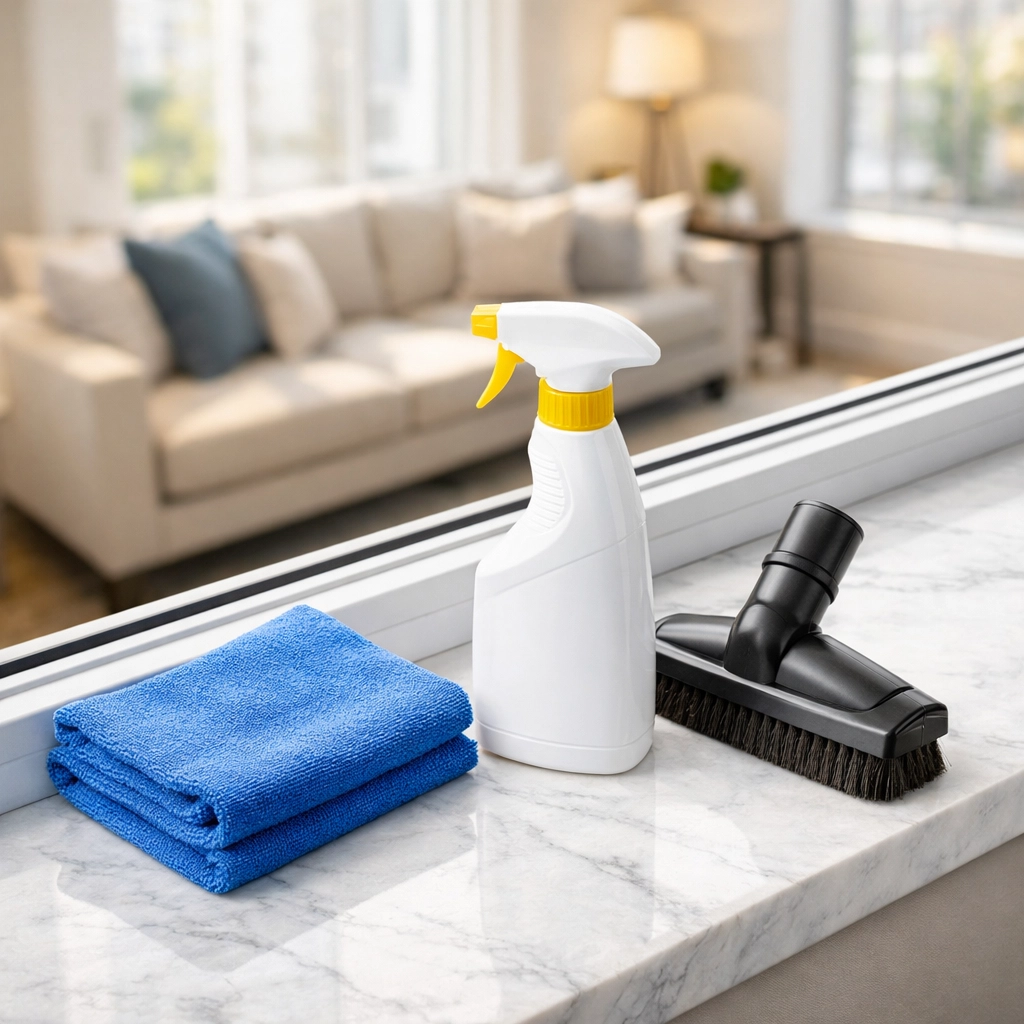
The Ninja Toolkit: What You’ll Need
Before you start, gather your gear. You don’t want to be halfway through a messy track and realize you’ve run out of paper towels.
- Vacuum cleaner with a crevice tool and brush attachment: Your most important weapon.
- Stiff-bristled small brush: An old toothbrush works, but a dedicated grout brush or a small paintbrush is even better.
- Microfiber cloths: These are better than paper towels for grabbing fine dust.
- Cleaning solution: A mix of warm water and a few drops of dish soap, or a 50/50 water and white vinegar solution.
- Baking soda: For the heavy-duty gunk.
- Q-tips or cotton swabs: For those impossible-to-reach corners.
- Silicone-based lubricant: To ensure everything glides like a ninja in the night once you’re done.
Step 1: The Initial Recon (Vacuuming)
The biggest mistake people make is adding liquid too early. If you pour water onto drywall dust, it turns into a thick, chalky mud that sets like concrete in the corners of your tracks.
Start by using your vacuum’s crevice tool to suck up the big chunks. Once the visible pebbles and sawdust piles are gone, switch to the brush attachment. Agitate the dust in the corners with your small handheld brush while holding the vacuum nozzle right next to it. This "loosen and lift" technique ensures that the majority of the grit is removed while it's still dry.
Don't forget the vertical tracks! Dust often clings to the sides and the top of the window frame. Give those a quick once-over with the brush attachment before moving to the bottom tracks.
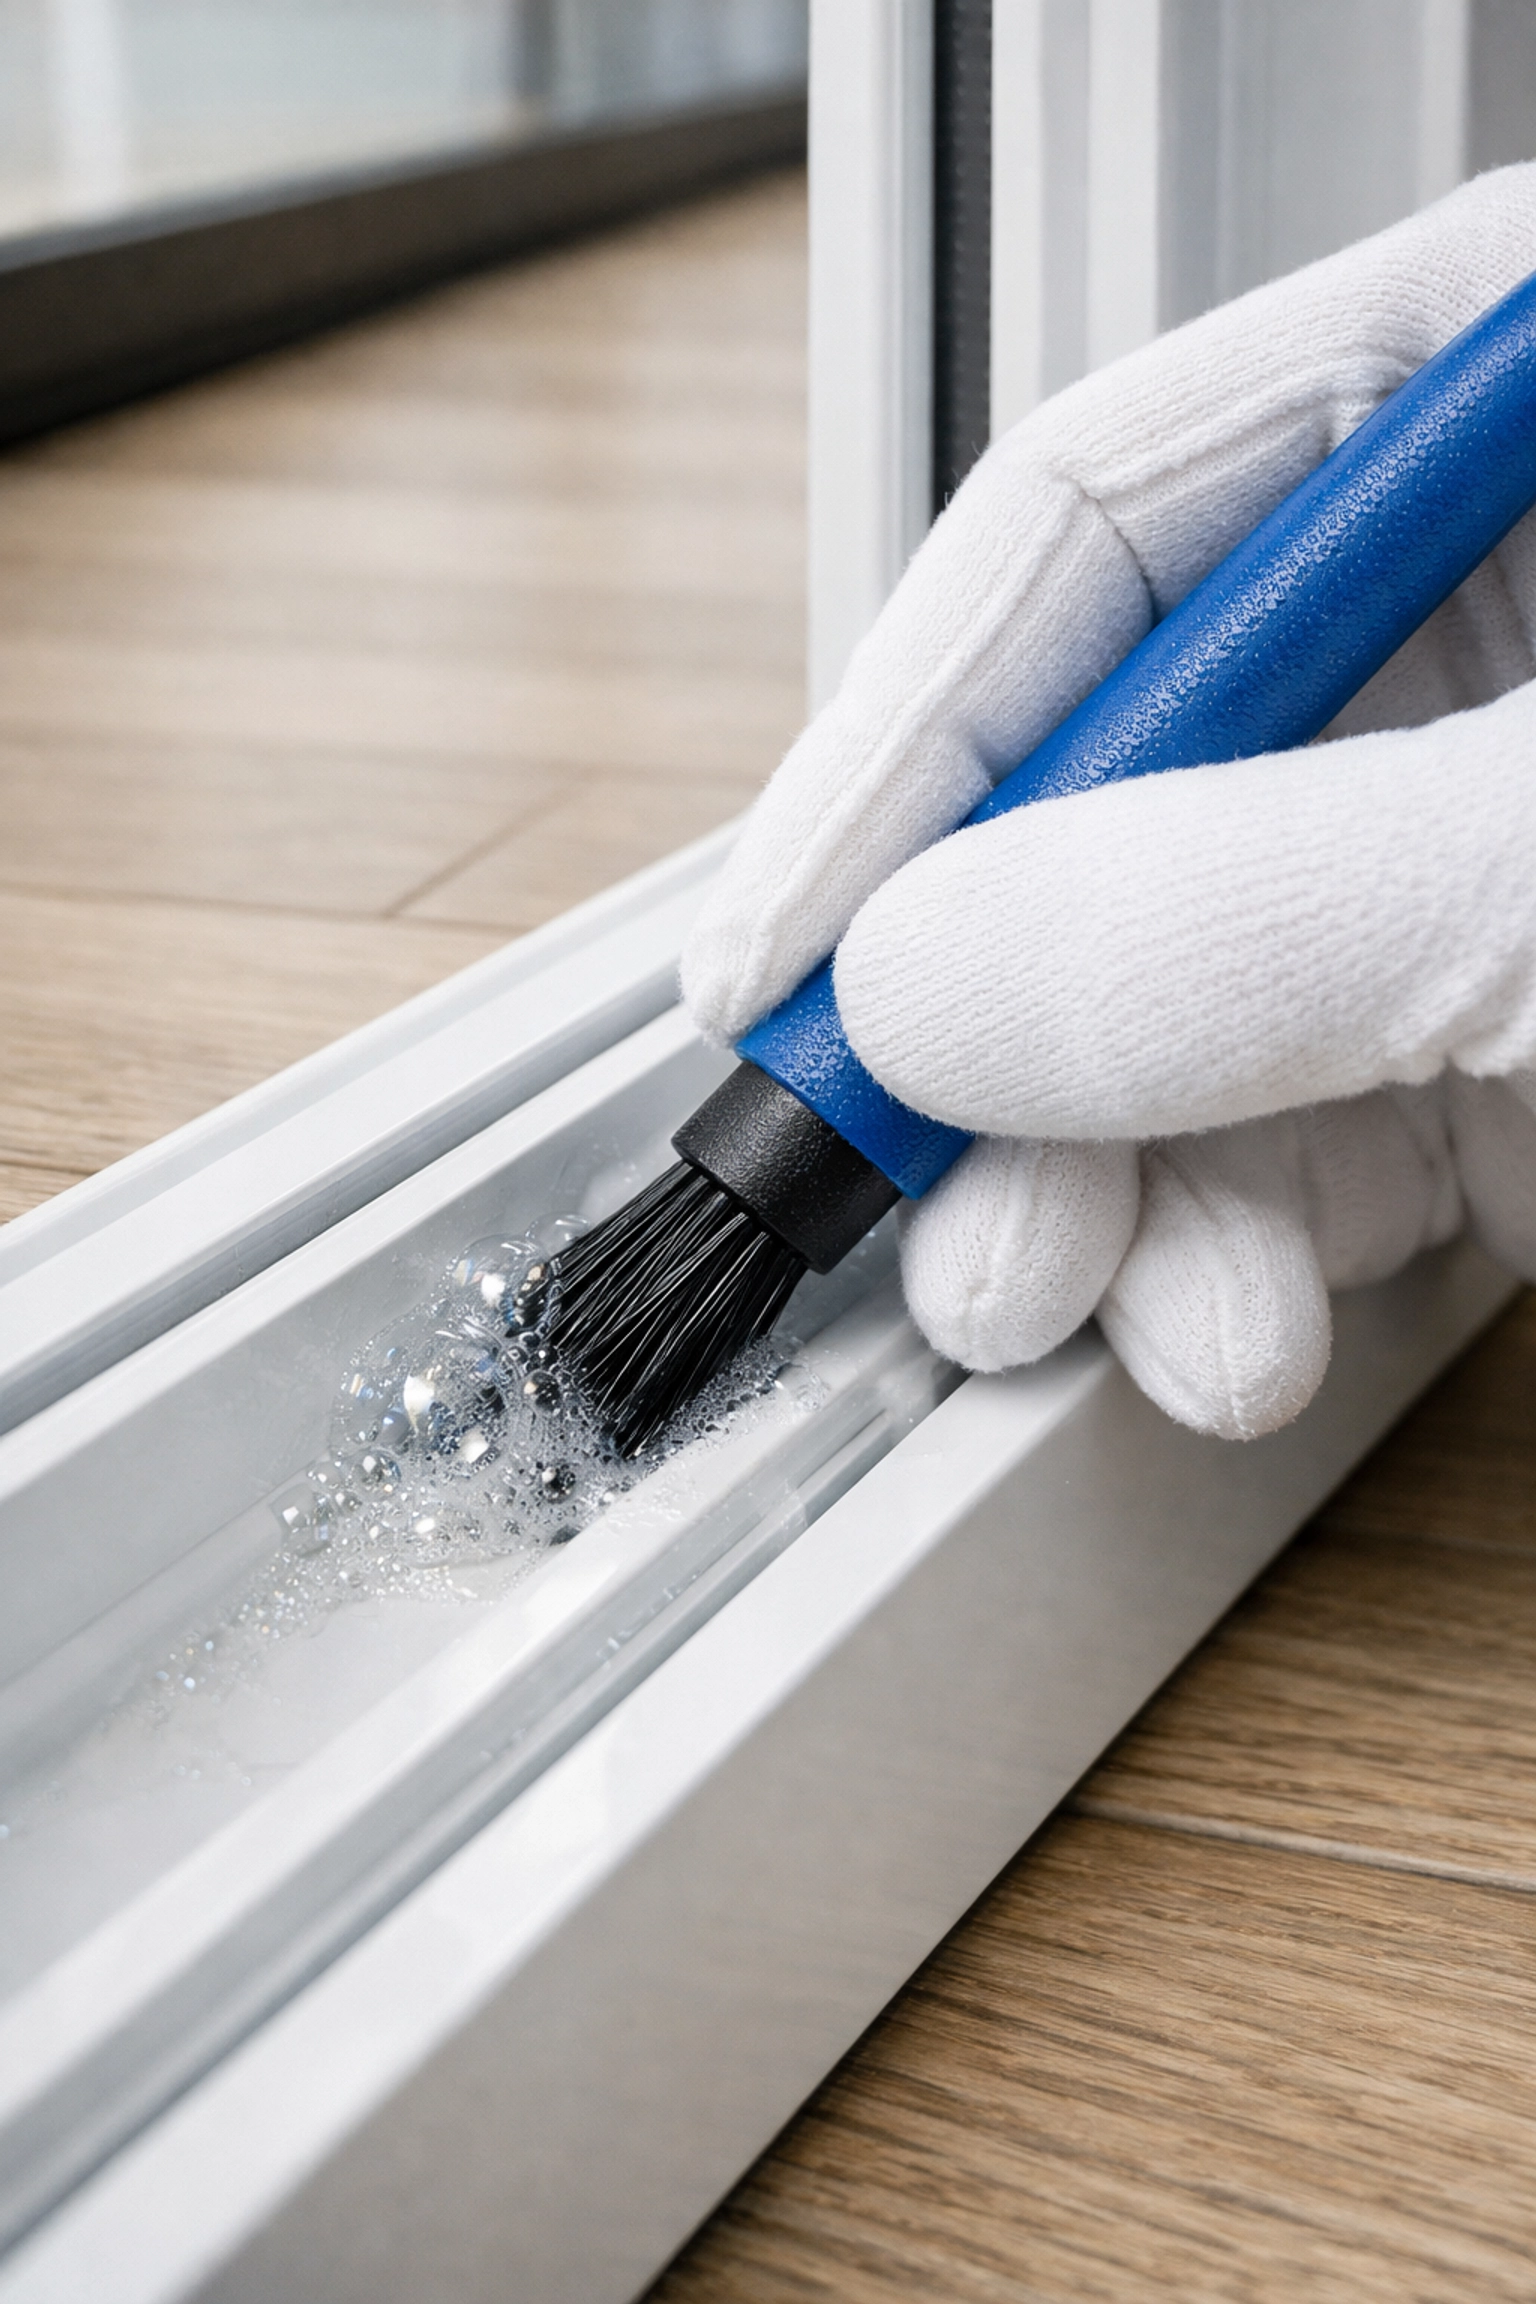
Step 2: The Deep Scrub
Now that the loose stuff is gone, it’s time to deal with the stubborn grime that’s bonded to the track.
If the tracks are particularly gross, sprinkle a light layer of baking soda over the remaining dirt. Then, spray your vinegar or soapy water solution over it. Let it sit for about 5 to 10 minutes. This creates a fizzing action that helps lift the dirt away from the metal or vinyl surface.
Use your small brush to scrub the tracks. Focus on the grooves where the window rollers sit. You’ll see the white baking soda turn grey as it absorbs the renovation residue. This is where the ninja efficiency comes in: work from one end to the other, ensuring you don't miss a single inch.
Step 3: Tactical Detail Work
Even with a brush, there are always those tiny corners where the track meets the frame that seem impossible to reach. This is where your Q-tips come into play.
Dip a Q-tip into your cleaning solution and run it through the tightest spots. You’d be surprised how much hidden gunk comes out on a cotton swab. If you’re dealing with sliding glass doors (which have much deeper tracks), you might even need to wrap a thin microfiber cloth around a flat-head screwdriver to get deep into the recessed areas. Just be careful not to scratch the finish!
Step 4: The Final Wipe and Dry
Once you’ve scrubbed and detailed, use a damp microfiber cloth to wipe away the remaining cleaning solution and loosened grime. You may need to rinse the cloth several times during this process.
Crucial Ninja Tip: Dry the tracks thoroughly. Moisture left in the tracks can lead to mold growth or, if you have wooden window frames, can cause the wood to swell or rot over time. Use a fresh, dry microfiber cloth to soak up every last drop of water.
Step 5: Restoring Smooth Operation
Now that your tracks are sparkling, it's time for the finishing touch. If the window still feels a bit stiff, it might need a little lubrication.
Avoid using oil-based lubricants like WD-40, as these can actually attract more dust and turn into a sticky mess. Instead, use a dry silicone spray. Spray a small amount onto a cloth and wipe it along the track, or spray it directly into the mechanism if the manufacturer recommends it. Open and close the window a few times to distribute the lubricant. It should now glide silently and effortlessly.

Why Post-Construction Cleaning is Different
We know that after a big project, you’re tired. Renovations are exhausting, and the thought of scrubbing thirty window tracks might be the last thing you want to do. However, skipping this step can lead to expensive repairs down the line.
Post-construction cleaning requires a level of detail that goes beyond your weekly "quick wipe." It involves removing materials that shouldn't be in a living environment: fine silica dust, chemical residues, and abrasive grit. That’s why many homeowners choose to bring in the professionals. At The Cleaning Ninjas Inc, we specialize in post-construction cleaning, ensuring that every surface, from the ceiling fans to those pesky window tracks, is safe and spotless.
Maintaining the Win
Now that your tracks are clean, how do you keep them that way?
- The Monthly Check: Once a month, run the vacuum nozzle through your window tracks when you're doing your regular cleaning.
- The Rain Wipe: After a heavy rainstorm, check your tracks. Sometimes rain can wash exterior dirt into the tracks, creating a muddy sludge. A quick wipe-down prevents it from hardening.
- Screen Care: Make sure your window screens are clean. A dusty screen will drop debris right into your freshly cleaned tracks every time the wind blows.
For more helpful guides on keeping your home in top shape, check out our cleaning tips section on the blog.
Let the Ninjas Handle the Grit
If you’ve just finished a renovation and the thought of tackling the dust is overwhelming, don’t stress. You’ve done the hard work of designing and managing your renovation: let us do the hard work of the cleanup. Our team is trained in the "stealth and precision" methods required to remove construction debris without damaging your new finishes.
Whether you need a full top-to-bottom scrub or just want to make sure your home is truly dust-free, we’re here to help. You can learn more about us and our commitment to making your home a sanctuary.
Renovating your home is a huge milestone. Don’t let a little (or a lot) of dust dampen the excitement. With the right tools, a little patience, and a ninja-inspired strategy, your window tracks: and the rest of your home: will be looking better than ever.
Ready to see your home shine? Contact us today to schedule your post-construction deep clean!


