

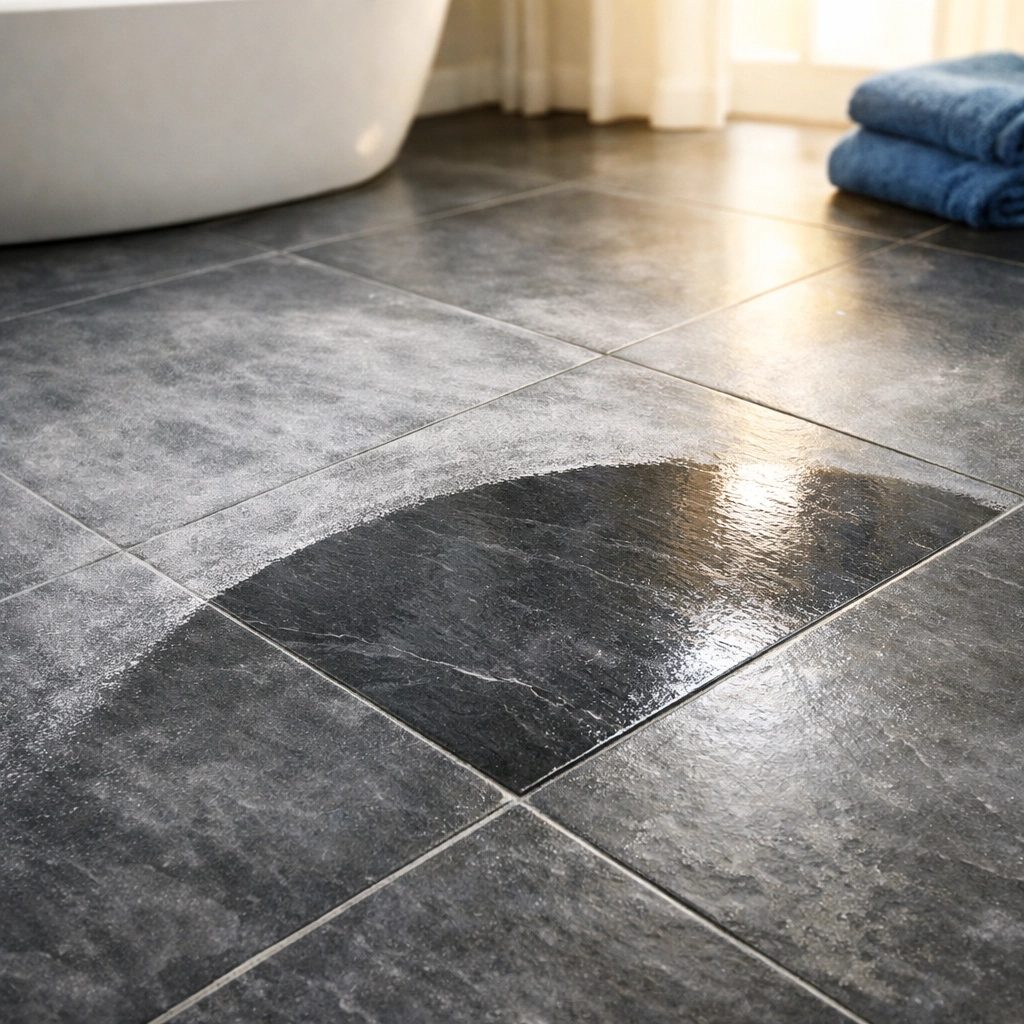
You’ve finally done it. The old, cracked linoleum is gone, and in its place sits a stunning spread of brand-new ceramic, porcelain, or natural stone tile. It’s a moment of triumph for any homeowner or renovator. But as the excitement settles and the grout begins to dry, you might notice something annoying: a cloudy, dull film covering your beautiful new floor or backsplash.
That, friends, is grout haze. It’s the ghost of your construction project, and if you don’t handle it with a bit of Ninja-level precision, it can turn your high-end renovation into a "matte-finish" nightmare.
At The Cleaning Ninjas Inc, we specialize in post-construction cleaning, and we know that the final 5% of a project is often the hardest. De-griming the grout and clearing that haze is essential to making your space truly shine. Today, we’re pulling back the curtain on how to handle this like a pro using safe, non-toxic methods that won't leave you gasping for air.
What Exactly Is Grout Haze?
Before we jump into the "how," let’s talk about the "what." Grout is essentially a mixture of water, cement, and pigments (and sometimes polymers). When your installer (or you!) spreads that grout across the tiles to fill the joints, a thin layer of those minerals and minerals stays behind on the surface of the tile.
As the water evaporates, those minerals harden. If you wipe it away too early, you’ll pull the grout right out of the joints. If you wait too long, it turns into a stubborn, stony crust that feels impossible to remove.
The Golden Rule: Timing is Everything
In the world of post-construction cleaning, timing is your best friend or your worst enemy. You want to hit the "Sweet Spot."
- The First 24 Hours: Most of the heavy lifting should have been done by the installer with a damp sponge during the actual grouting process. However, a light haze almost always remains.
- The 48 to 72-Hour Window: This is the Ninja Sweet Spot. The grout in the joints has hardened enough that you won't damage it, but the haze on the surface hasn't fully "cured" into a permanent bond.
- After 7 Days: If you wait a week or more, the polymers in modern grouts become extremely difficult to break down without harsh, acidic chemicals. We prefer to keep things friendly and non-toxic, so aim for that 2-3 day mark!
Your Non-Toxic Ninja Toolkit
You don't need a hazmat suit or industrial-strength strippers to get a clean finish. In fact, we recommend staying away from heavy chemicals: especially bleach: which can actually damage the color of your new grout and eat away at the sealer.
Here is what you’ll need:
- Distilled White Vinegar: The ultimate eco-friendly cleaner (but read our warning below about natural stone!).
- Warm Water: Simple is best.
- Microfiber Cloths: These are essential for grabbing those tiny particles rather than just pushing them around.
- Nylon Scrubbing Pads: Great for stubborn spots without scratching the tile.
- A Soft-Bristle Toothbrush: For that specialized "Ninja Detail" in the corners.
- A Large Bucket: For clean rinsing.
Step 1: The Dry Buff
Before you get anything wet, try a dry buff. Take a clean, dry microfiber cloth and rub a small section of the tile in a circular motion. If the haze is very light and the project was finished recently, a dry buff might be all you need to lift the dust. If the cloth comes away white and the tile looks shiny, keep going! If it’s just smearing the cloudiness around, it’s time to move to Step 2.
Step 2: The Damp Wipe (Water Only)
Fill your bucket with warm water. Dip your microfiber cloth or a sponge into the water and wring it out until it’s just damp: not dripping. You want to avoid getting the grout joints too wet, as they are still technically "curing."
Wipe the tiles in a consistent direction. Immediately follow up with a dry terrycloth towel or another microfiber cloth to buff the surface dry. If you leave the water to air dry, the minerals you just "lifted" will simply settle right back down, and the haze will return.
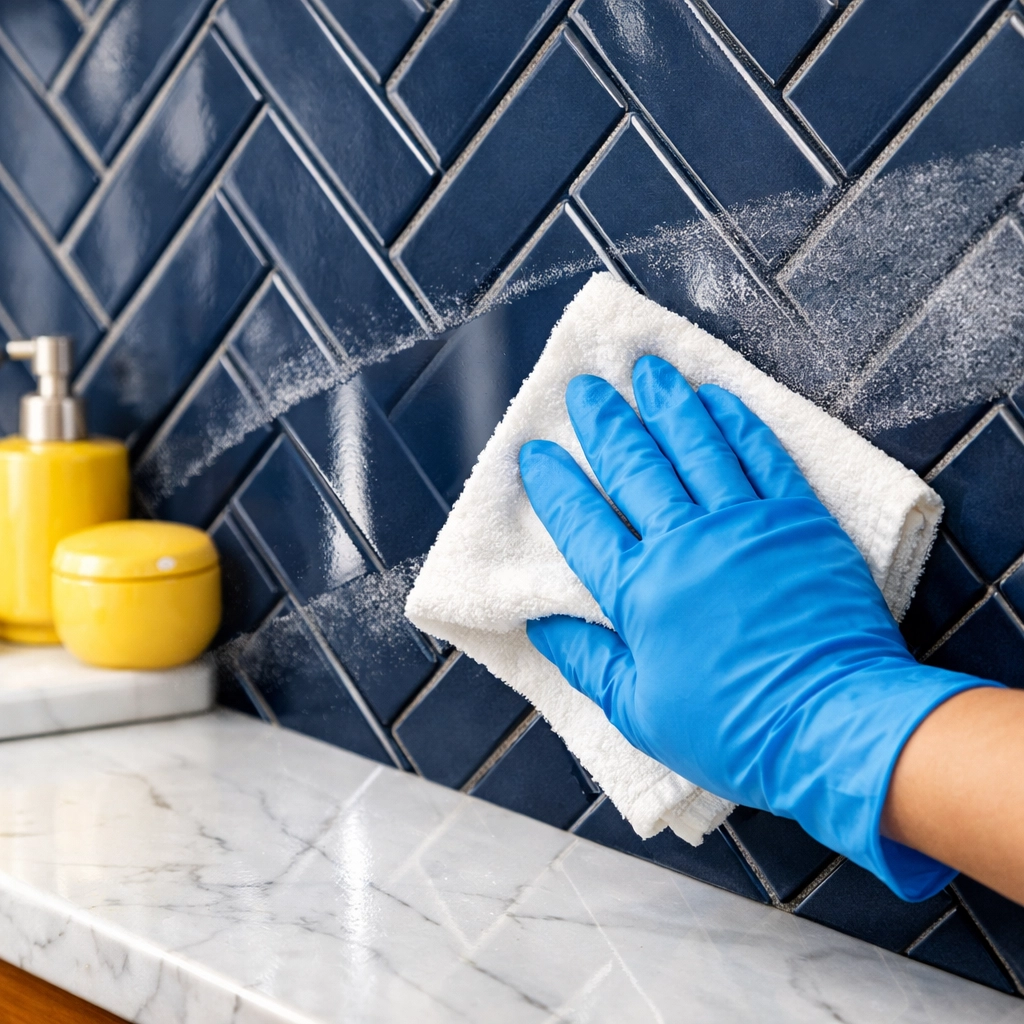
Step 3: The Vinegar Solution (For Stubborn Haze)
If water isn't doing the trick, it’s time to bring in the vinegar.
Pro Tip: Mix 1 part white vinegar with 4 parts warm water.
CRITICAL WARNING: Do NOT use vinegar on natural stone tiles like marble, travertine, or limestone. Vinegar is acidic and will "etch" (chemically burn) the surface of natural stone, leaving permanent dull spots. For natural stone, stick to water and a pH-neutral stone cleaner or a drop of mild dish soap.
For porcelain or ceramic tile, the vinegar solution works wonders. The acidity breaks down the cement minerals in the grout haze. Spray the solution on the tile, let it sit for about 1-2 minutes (don't let it dry!), scrub gently with a nylon pad, and then rinse with clean water and buff dry.
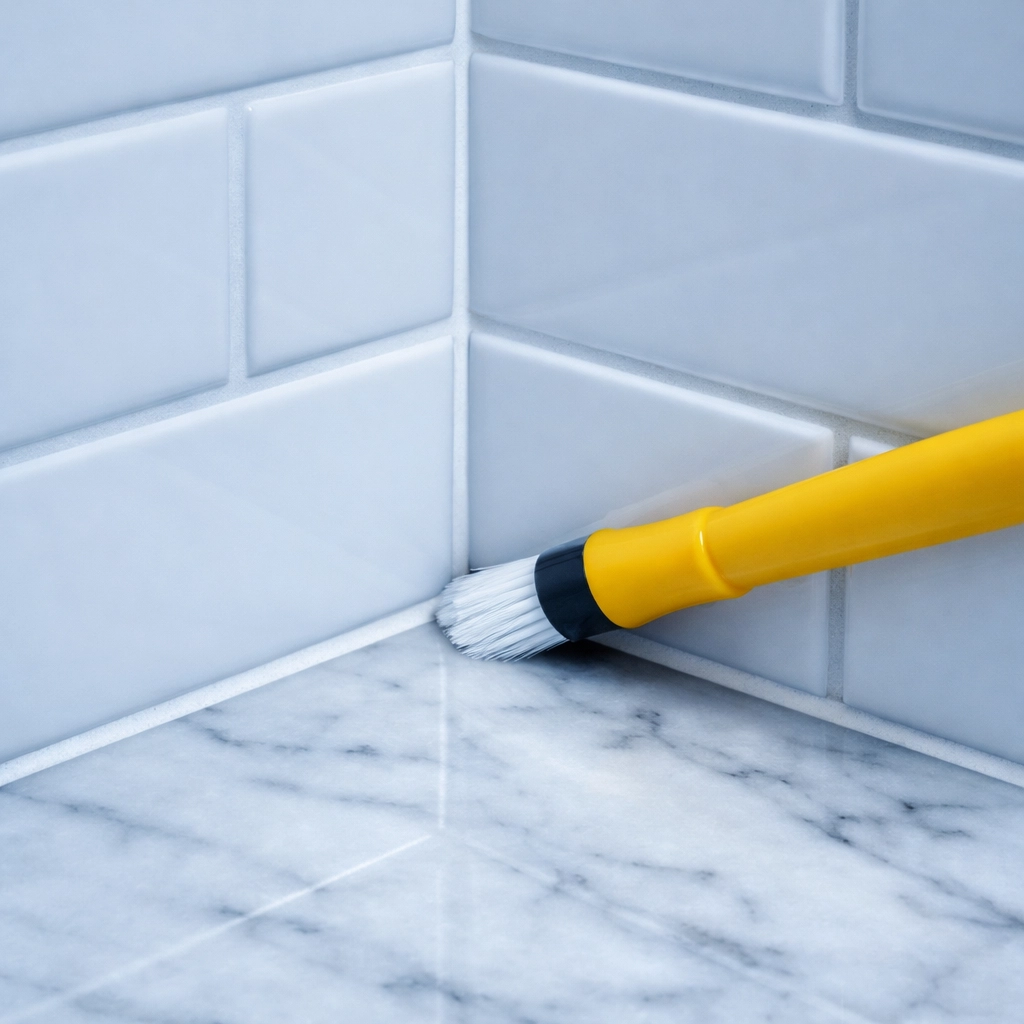
Ninja-Like Detail: Mastering the Corners
This is where we separate the amateurs from the Ninjas. Most people clean the centers of the tiles but leave a "halo" of grout haze around the edges and in the 90-degree corners.
When you get to the corners, use your finger wrapped in a thin microfiber cloth. This allows you to apply targeted pressure right into the crease where the tile meets the wall or the tub. For even tighter spots, use that soft-bristle toothbrush dipped in your cleaning solution.
Pay special attention to where the tile meets the trim or the ceiling. These are the spots where grout likes to hide, and they are the first things a professional eye will notice. If you want more cleaning tips on how to handle detailed spaces, our blog is full of them!
Dealing with Epoxy Grout
If your installer used epoxy grout, the rules change a bit. Epoxy grout is incredibly durable and stain-resistant, but once it hardens on the surface of a tile, it’s basically like trying to remove dried plastic.
If you suspect you have epoxy haze, you might need a specialized epoxy remover. However, check your manufacturer’s instructions first. Most of the time, the warm water and a nylon scrub pad method still works if you catch it within the first 24 hours.
What to Avoid: The "Don'ts" of Grout Cleaning
- Don't Use Bleach: We mentioned this, but it bears repeating. Bleach can weaken the grout structure and cause it to crumble over time. It also doesn't actually remove grout haze; it just sanitizes it.
- Don't Use Steel Wool: You might think you're being tough, but steel wool can leave tiny metal fibers behind that will rust in your grout lines. Plus, it’ll scratch most tile surfaces.
- Don't Leave the Surface Wet: Buffing is the most important part of the process. If you don't buff it dry, the haze stays.
The Final Step: Sealing the Deal
Once your tiles are sparkling and the haze is a distant memory, you need to wait about 48-72 more hours for the grout to fully cure before applying a sealer.
Sealing your grout is the best way to ensure that your "de-griming" efforts weren't in vain. A good sealer prevents future stains, mold, and mildew from penetrating the porous grout lines. It makes your weekly cleaning much easier!
Why Post-Construction Cleaning is Different
Cleaning a house after a renovation isn't like your standard Saturday morning tidy-up. Construction dust is finer, more abrasive, and gets into places you wouldn't believe: inside light fixtures, behind baseboards, and deep into the pores of new tile.
If you’ve just finished a major renovation and the thought of scrubbing every tile corner makes you want to go back to the "before" picture, we’re here to help. Our team at The Cleaning Ninjas Inc handles everything from fine dust removal to that final "white-glove" polish. You can learn more about us and our passion for perfection on our website.
Ready for a Sparkling Finish?
Taking the time to properly remove grout haze is the difference between a project that looks "okay" and one that looks spectacular. By using non-toxic solutions like vinegar and water, and focusing on those "Ninja" details in the corners, you’re protecting your investment and your health.
If you're feeling overwhelmed by the post-construction mess, don't sweat it. Check out our full range of services to see how we can take the stress out of your home improvement journey.
Happy cleaning, and enjoy that beautiful new tile! For more insights and professional advice, be sure to visit our blog.


