

You’ve finally reached the end of your home renovation or construction project. The walls are painted, the new floors are shining, and the space looks exactly like you imagined. But then, you go to step out onto your patio or balcony, and: crunch. The sliding door doesn't glide; it stutters. It sounds like you’re dragging a piece of metal over a gravel pit.
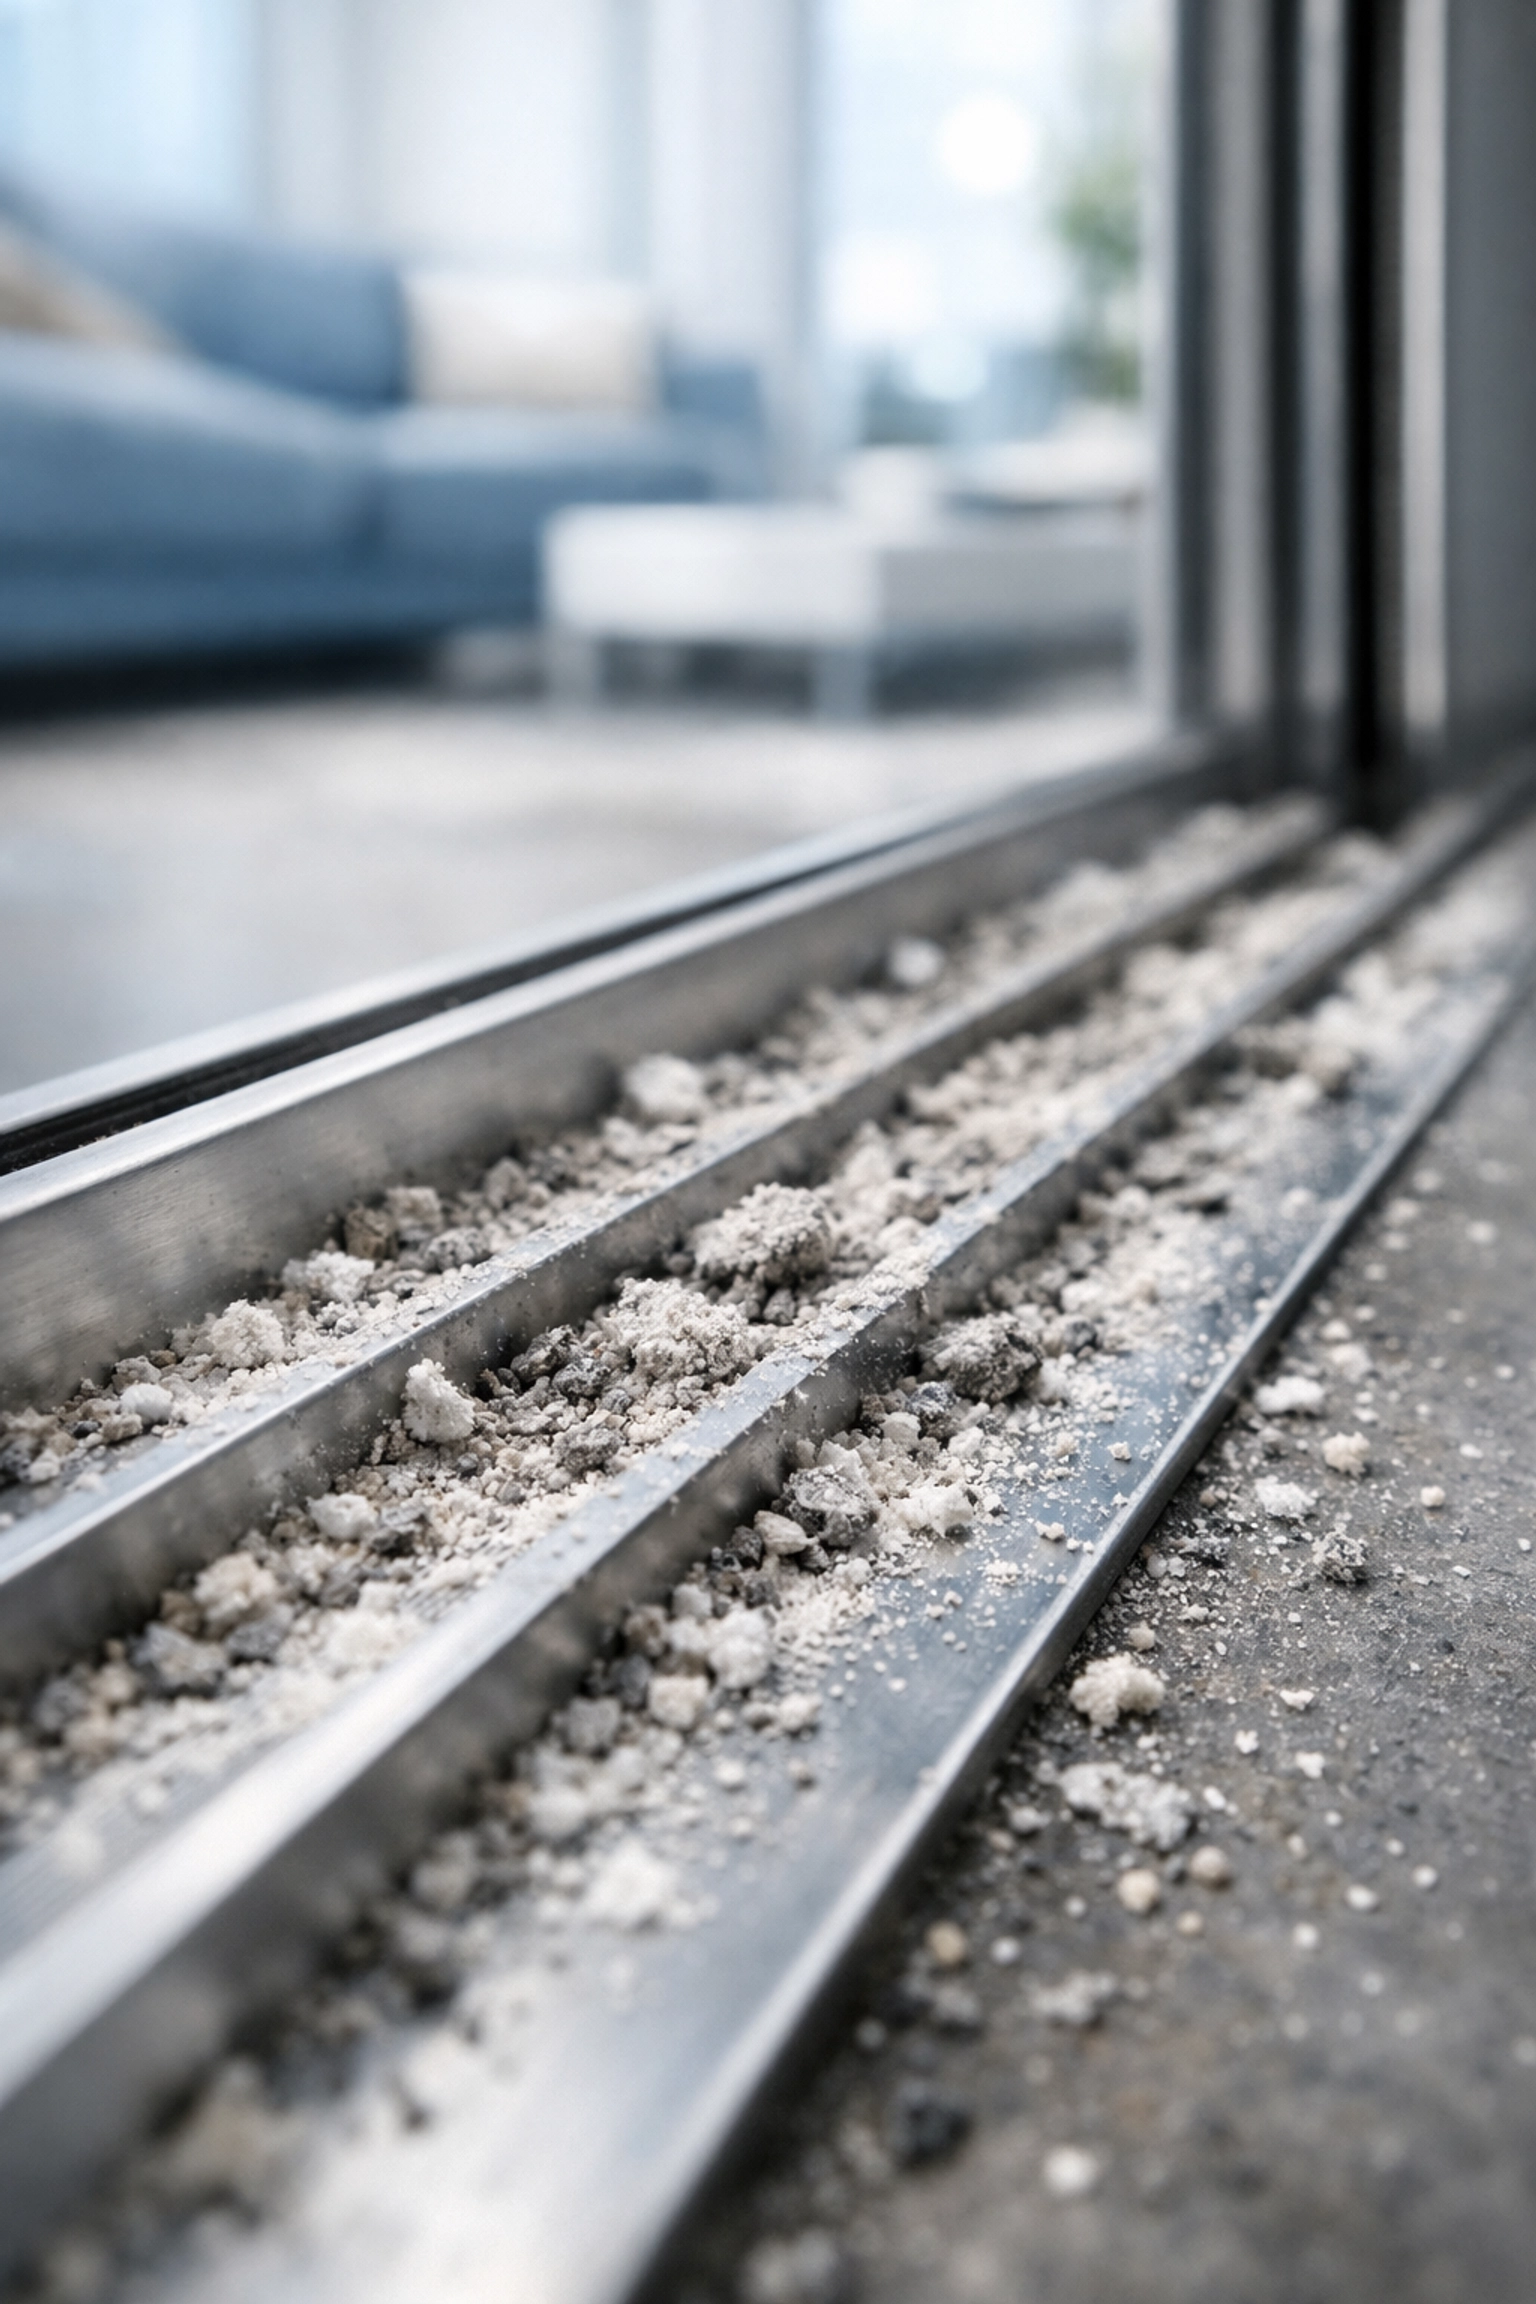
Welcome to the hidden world of post-construction debris. At The Cleaning Ninjas Inc, we see this all the time. While most people focus on the dust on the countertops or the smudge on the windows, the sliding door tracks are often the most neglected part of a post-construction cleanup. They are absolute magnets for sawdust, drywall grit, metal shavings, and even stray bits of hardware.
Left unchecked, this debris doesn't just make an annoying noise; it can actually destroy your door’s rollers and scratch the tracks beyond repair. Today, we’re sharing our Ninja-approved secrets for managing heavy debris in sliding door tracks so you can get back to enjoying your home with a door that glides as smooth as silk.
Why Post-Construction Debris is a Different Beast
Most homeowners are used to a little bit of "normal" household dust: the kind made of pet hair and lint. You can usually just run a vacuum over it and call it a day. Post-construction debris is a whole different animal.
Drywall dust is incredibly fine and alkaline; when it mixes with the natural lubrication or moisture in your door tracks, it turns into a paste that hardens like concrete. Sawdust is bulky and gets trapped in the rollers. Then you have "grit": tiny pebbles or sand from masonry work: that acts like sandpaper every time you move the door. If you don't handle this with "Ninja efficiency," you might end up needing a costly repair.
Signs Your Tracks are Crying for Help
Before we dive into the "how-to," let's look at the "when." If you’ve recently had work done on your home, or even if you just live in a high-traffic area, keep an eye out for these red flags:
- The Grind: You hear a distinct grinding or scratching sound when opening the door.
- The Stick: The door feels like it's hitting "speed bumps" or requires extra muscle to move.
- Visible Gunk: You can see piles of gray dust or dark, greasy buildup in the corners.
- The Whistle: Sometimes, debris buildup can prevent the door from sealing fully, leading to air leaks or whistling sounds during high winds.
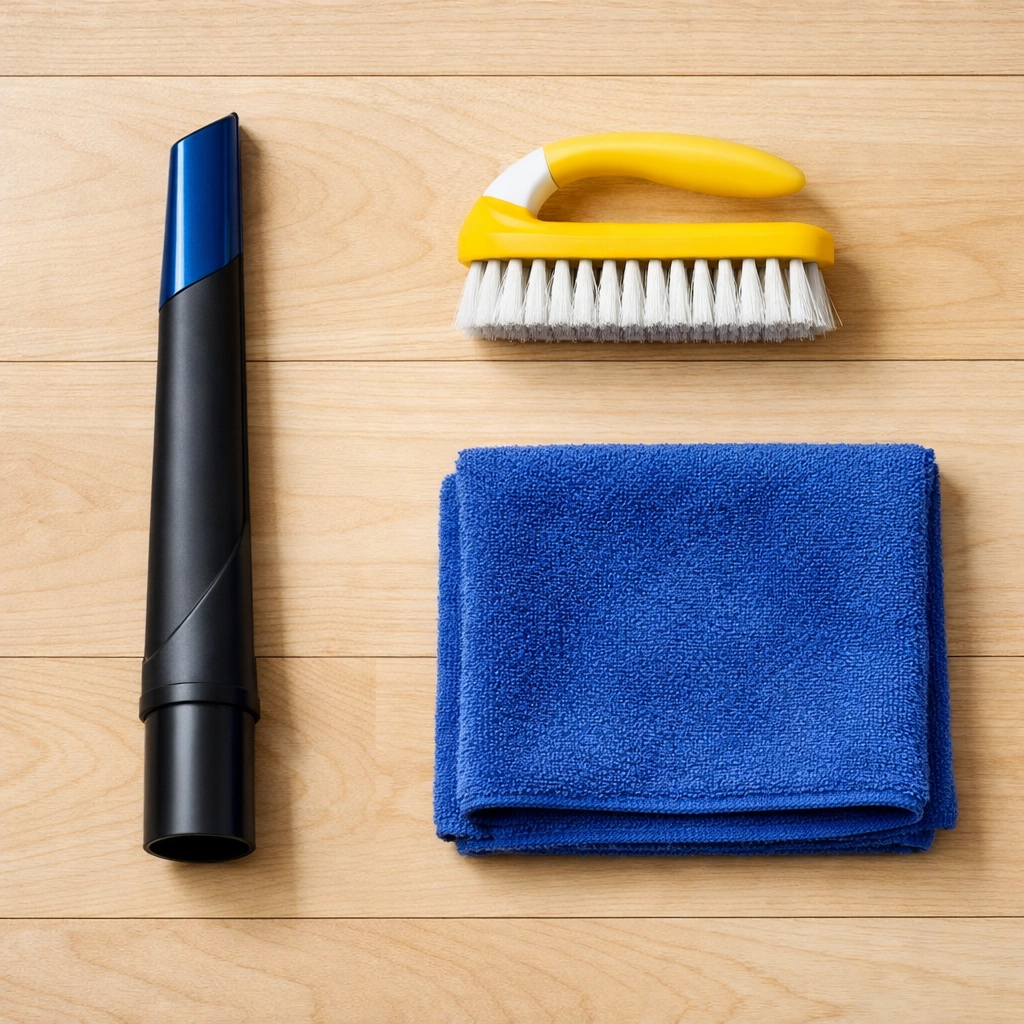
The Ninja’s Essential Toolkit
To tackle this job properly, you need more than just a damp paper towel. You need the right gear. Here is what we recommend having on hand before you start:
- A Shop Vac or High-Power Vacuum: A standard upright vacuum usually won’t cut it. You need a vacuum with a hose and a narrow crevice attachment.
- Stiff-Bristled Brushes: An old toothbrush is great, but a specialized track cleaning brush or a small grout brush is even better for digging into those tight corners.
- Microfiber Cloths: These are essential for picking up the fine dust that brushes leave behind.
- Cleaning Solution: Warm water mixed with a few drops of mild dish soap works wonders. For the tough stuff, keep some white vinegar and baking soda nearby.
- Lubricant: Silicon-based spray is usually the safest bet for sliding doors (avoid oil-based lubricants like WD-40, as they actually attract more dust over time).
Step 1: The Initial Inspection and Dry Sweep
First things first: open that door as wide as it goes. You want to see the entire length of the track. Before you introduce any liquids, you want to get rid of the "dry" mess. Introducing water to drywall dust too early creates a muddy disaster.
Start by using a dry, stiff brush to loosen the caked-on dirt. Focus on the corners and the "valleys" of the track. Use short, flicking motions to bring the debris toward the center of the track where it’s easier to reach. If there are large chunks of wood or metal, pick them out by hand or use a pair of pliers.
Step 2: Vacuuming with Precision
Now it’s time for the vacuum. This is where "Ninja efficiency" comes into play. Don’t just wave the nozzle over the track. Use a crevice tool to get right into the grooves.
If you have a brush attachment, use it to agitate the dust while the vacuum is running. This ensures you’re sucking up the fine particles that are stuck to the sides. Pay special attention to the areas where the door sits when it's closed, as that’s usually where the most debris gets compressed.
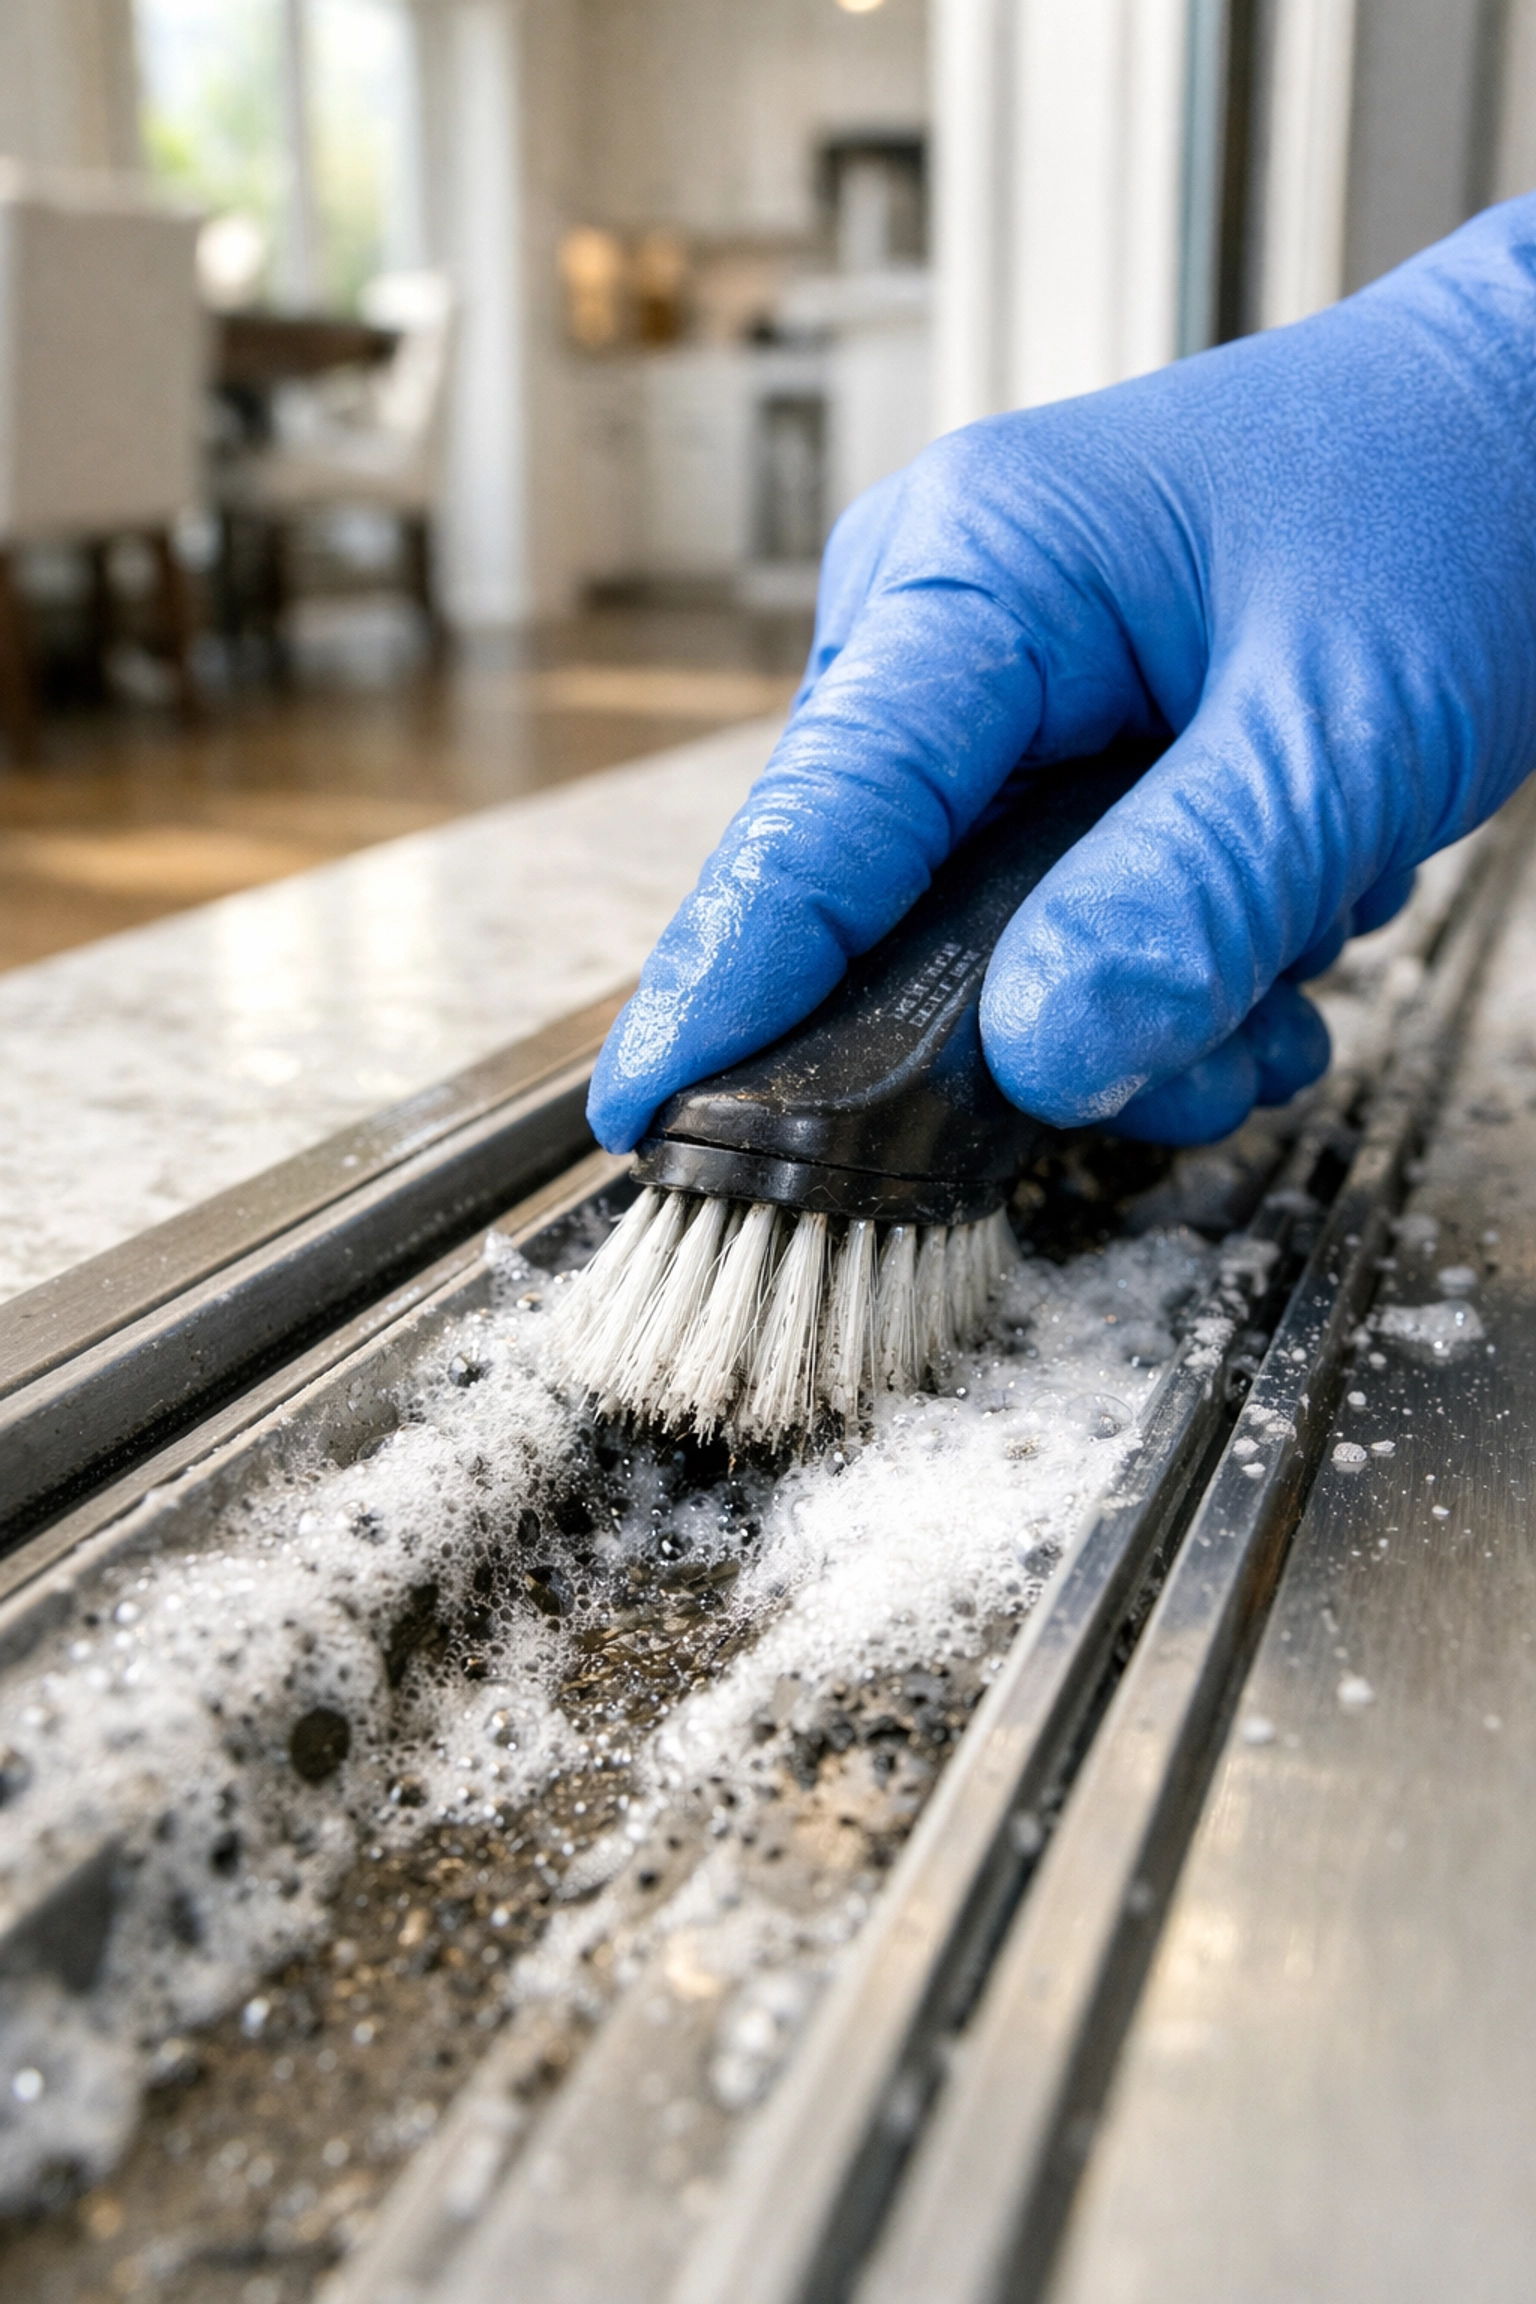
Step 3: The Scrub-Down
Once the loose stuff is gone, it’s time to deal with the grime. Dip your brush into your soapy water solution. Scrub the tracks using back-and-forth motions. You’ll likely see the water turn gray or black almost immediately: that’s a good sign! It means you’re lifting the deep-seated dirt.
If you encounter stubborn spots where construction gunk has literally bonded to the metal, don’t force it with a metal scraper (you’ll scratch the track). Instead, use the Baking Soda Trick.
The Baking Soda & Vinegar Power Move:
- Sprinkle a thin layer of baking soda over the stubborn area.
- Spray a 50/50 mix of water and white vinegar over it.
- Watch it fizz! Let it sit for about 5-10 minutes. The chemical reaction helps break the bond between the debris and the track.
- Scrub again with your brush. The "concrete" should now be soft enough to wipe away.
Step 4: The Deep Wipe and Dry
After scrubbing, use your microfiber cloths to wipe the tracks dry. This is a crucial step because any leftover moisture will just act as a magnet for the next round of dust. Make sure you get into the very edges. We often use a flat-head screwdriver wrapped in a microfiber cloth to get into the tiniest crevices that even a toothbrush can’t reach.
Step 5: Don't Forget the Rollers
The track is only half the battle. The rollers: the little wheels under the door: are often packed with the same debris. If the track is clean but the door still sticks, the rollers are the culprit.
If you’re feeling handy, you can sometimes access the roller adjustment screws to lift the door slightly, allowing you to vacuum underneath the rollers themselves. If the debris is really bad, you might see a "hairball" of construction fibers and grease. Clearing this out will make a world of difference.
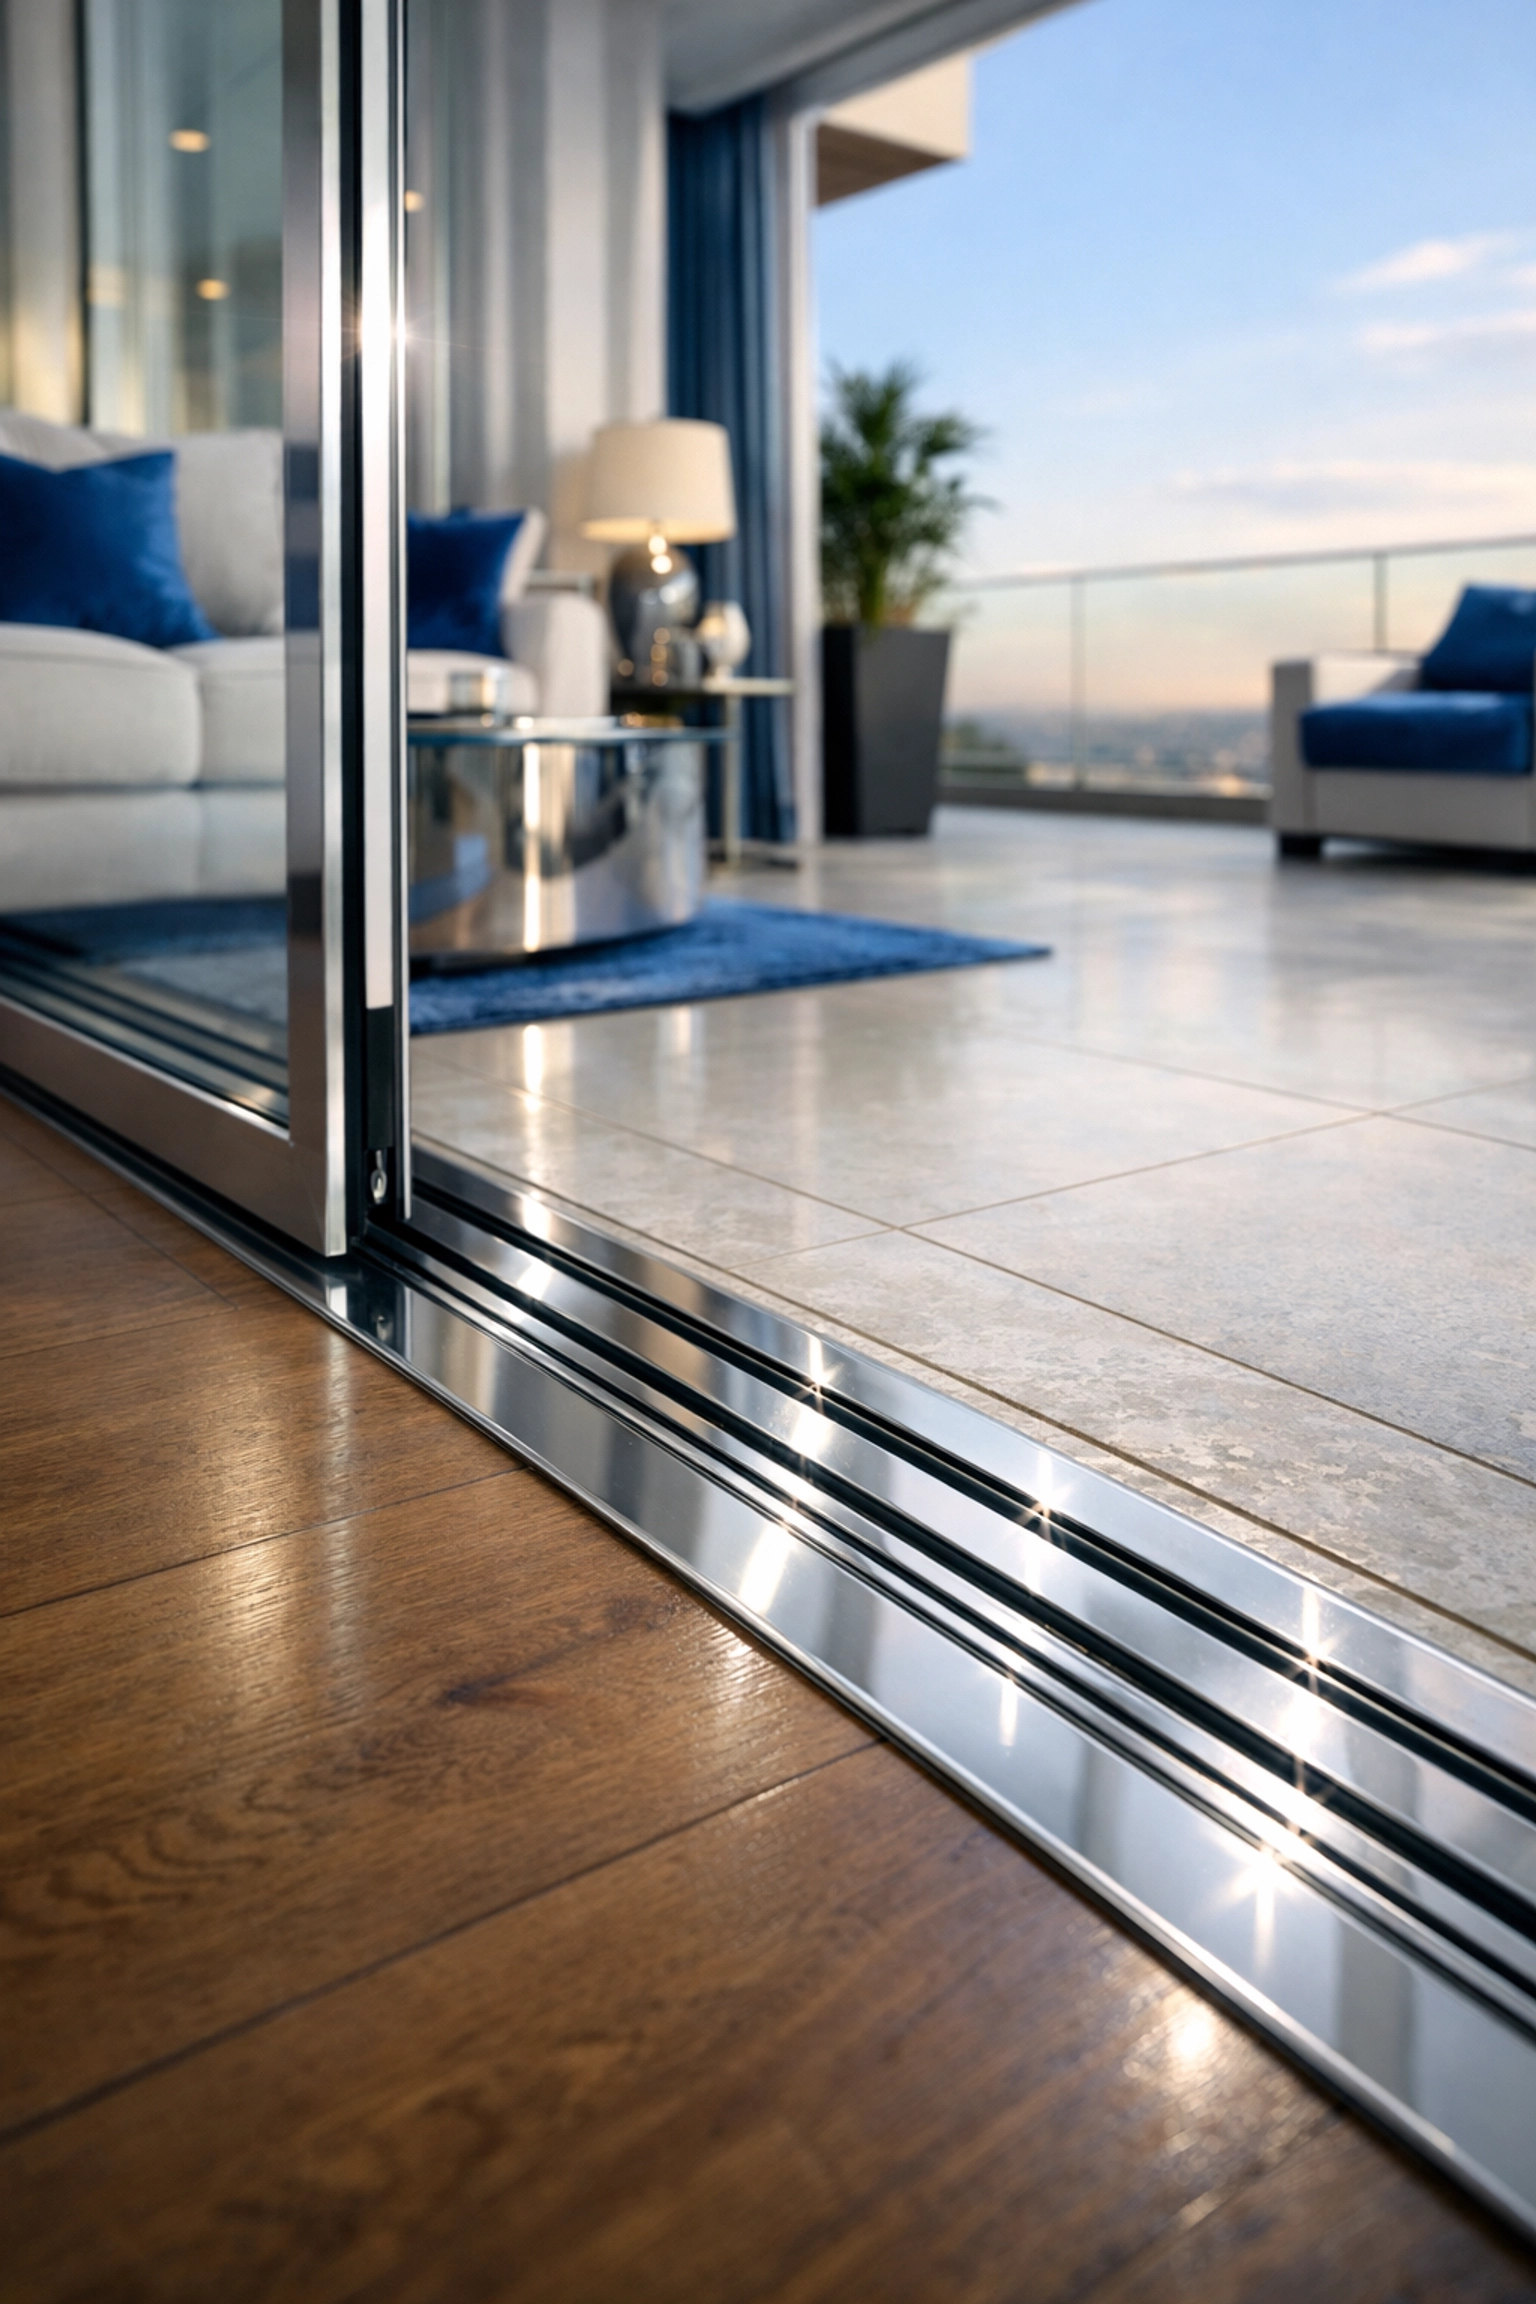
Step 6: Proper Lubrication
Once everything is sparkling clean and completely dry, apply a small amount of silicone-based lubricant to the tracks. Do not overdo it! A light mist is all you need. Slide the door back and forth several times to distribute the lubricant evenly. You should notice an immediate difference in how the door feels.
Maintenance: How to Keep it "Ninja Clean"
In a post-construction environment, dust can settle for weeks after the project is finished. We recommend doing a "quick check" of your tracks once a week for the first month after construction. A 30-second vacuum session once a week can prevent you from having to do a 30-minute deep clean later.
For regular homes not under construction, a deep clean twice a year is usually sufficient. However, if you have pets or live near a beach or a dusty road, you might want to bump that up to once a quarter.
Why Call the Professionals?
We get it: cleaning sliding door tracks isn't exactly how most people want to spend their Saturday. And when you're dealing with the massive cleanup required after a home build or renovation, it can feel overwhelming.
That’s where we come in. At The Cleaning Ninjas Inc, our post-construction cleaning services are designed to handle every nook and cranny, from the top of your ceiling fans to the very bottom of those tricky sliding door tracks. We bring the specialized tools and the "Ninja" mindset to ensure your new space isn't just "surface clean," but truly deep-cleaned and ready to live in.
If you’re tired of the crunching sound and want your home to feel truly finished, learn more about us and how we can help you reclaim your space.
Final Thoughts
Managing debris in your sliding door tracks might seem like a small detail, but it’s one that significantly impacts the longevity of your home’s hardware and your overall peace of mind. By following these steps: Inspect, Vacuum, Scrub, and Lubricate: you’ll ensure your doors stay on track (literally).
Ready to leave the heavy lifting to the pros? Reach out to The Cleaning Ninjas Inc today, and let us show you what a truly professional clean looks like!


