

You’ve finally finished that home renovation. The new walls are up, the "mud" is dry, and the sanding is done. You take a look around and think, "Wow, it looks great!" But then, the afternoon sun hits the living room at just the right angle, and suddenly, you realize you’re living inside a giant powdered donut.
Drywall dust is the ultimate uninvited guest. It’s fine, it’s invasive, and it has a magical ability to travel through closed doors and settle on surfaces you haven’t even touched in weeks. At The Cleaning Ninjas Inc, we specialize in the art of post-construction cleaning, and we know that drywall dust is the sneakiest enemy of all. It doesn’t just sit on the floor; it clings to your walls like a ghostly film.
If you’re ready to reclaim your home from the white haze, grab your gear. Here is the Ninja-approved guide to spotting and destroying drywall dust on your walls.
Why Drywall Dust is a Total Nightmare
Before we dive into the "how," let’s talk about the "what." Drywall dust isn’t like the regular dust that gathers on your bookshelf. It’s composed of gypsum, silica, and calcium carbonate. When drywall is sanded, these materials are ground into microscopic particles.
Because these particles are so light and jagged, they stay airborne for a long time and "hook" onto vertical surfaces. If you simply try to wipe them away with a wet rag, you’ll end up creating a smeary, chalky paste that is even harder to remove. To get a truly clean finish, you need precision, the right tools, and a bit of patience.
Phase 1: The Art of the Reveal (How to Spot the Dust)
The biggest challenge with drywall dust is that it’s often invisible until you’ve already moved your furniture back in. To clean like a Ninja, you first have to see like one.
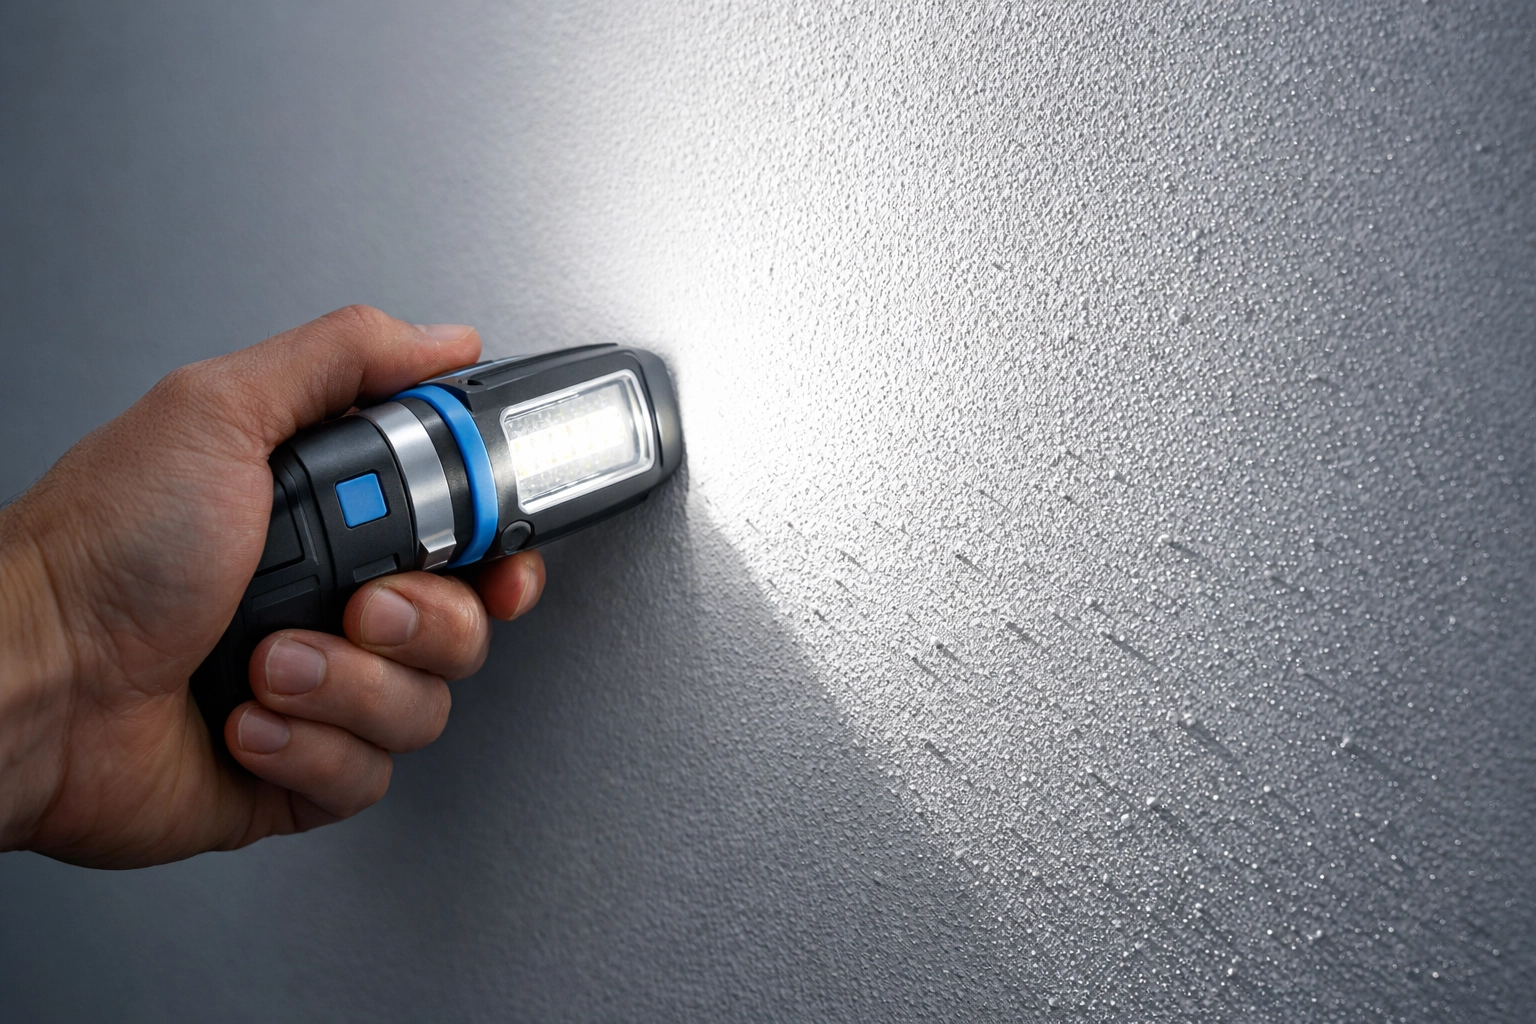
The "Raking Light" Technique
Don't trust your overhead lights. They fill the room with diffused light that hides imperfections. Instead, grab a high-powered LED flashlight or a work lamp. Hold the light flush against the wall and shine it sideways across the surface. This is called "raking the light."
Any dust, bumps, or ridges will cast a long shadow, making them stand out against the flat surface of the wall. Move the light slowly from top to bottom. You’ll be shocked at how much "fuzz" is actually clinging to your beautiful new paint or primer.
The "Glove Test"
If you aren't sure if a section is clean, put on a dark-colored latex or nitrile glove. Run your hand firmly down the wall. If the glove comes back looking like you just touched a chalkboard, you’ve got work to do. This is a great way to check high corners and areas near the ceiling where dust likes to congregate.
Phase 2: The Ninja Toolkit
You can’t fight this battle with a standard broom and a bucket of water. To remove drywall dust without just moving it around, you need specific tools:
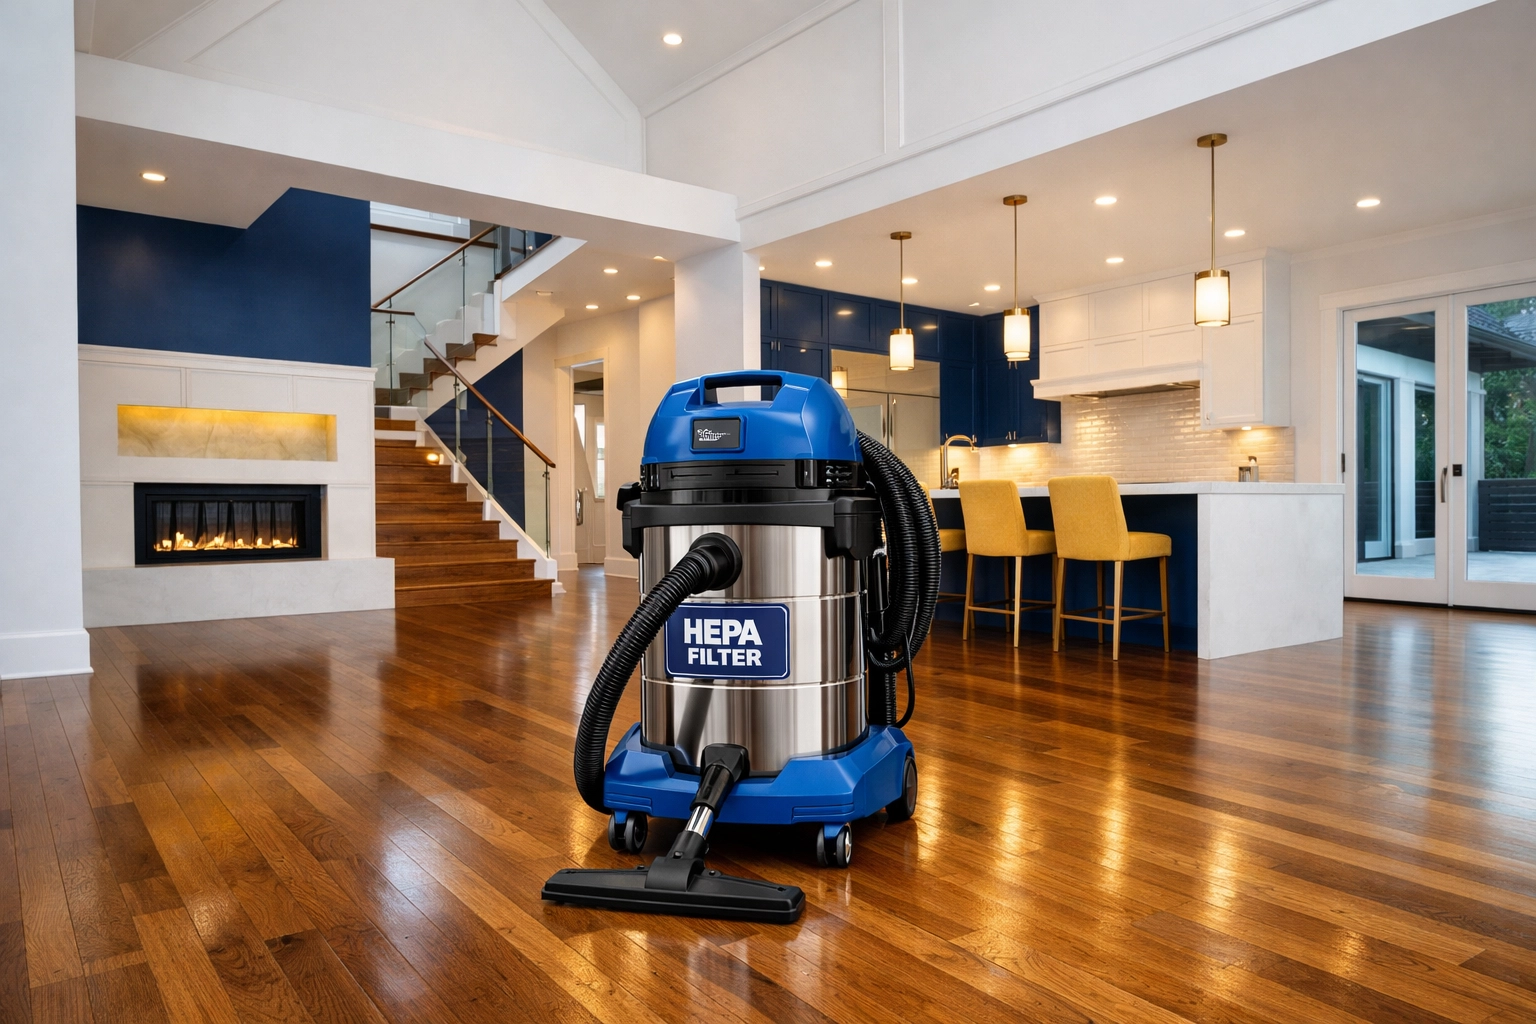
- HEPA-Filtered Vacuum: This is non-negotiable. Standard household vacuums often have filters that aren't fine enough to catch drywall dust. They’ll suck it in the front and blow it right back out the exhaust. A HEPA filter captures 99.97% of particles, ensuring the dust stays in the machine.
- Microfiber Cloths: These are the Ninja’s primary weapon. The tiny fibers are electrostatically charged, which means they literally grab and hold onto the dust rather than pushing it.
- A Soft-Bristled Brush: A clean paintbrush or a soft-bristled floor brush is perfect for knocking dust out of corners and off baseboard ledges.
- Tack Cloths: These are sticky cheesecloths used by woodworkers. They are fantastic for that "final pass" to ensure every single microscopic grain is gone.
- A Long-Reach Duster: For those high-up spots near the crown molding.
Phase 3: The Top-Down Takedown
In the world of professional cleaning, we always work from top to bottom. If you clean the baseboards first and then wipe the ceiling, you’re just going to drop dust onto your clean work.
Step 1: The Dry Brush
Start at the very top of the wall. Use your soft-bristled brush or a dry microfiber mop to gently "sweep" the wall. The goal here is to knock the heavy accumulation of dust off the vertical surface and onto the floor. Don't be aggressive: you want the dust to fall, not become a massive airborne cloud.
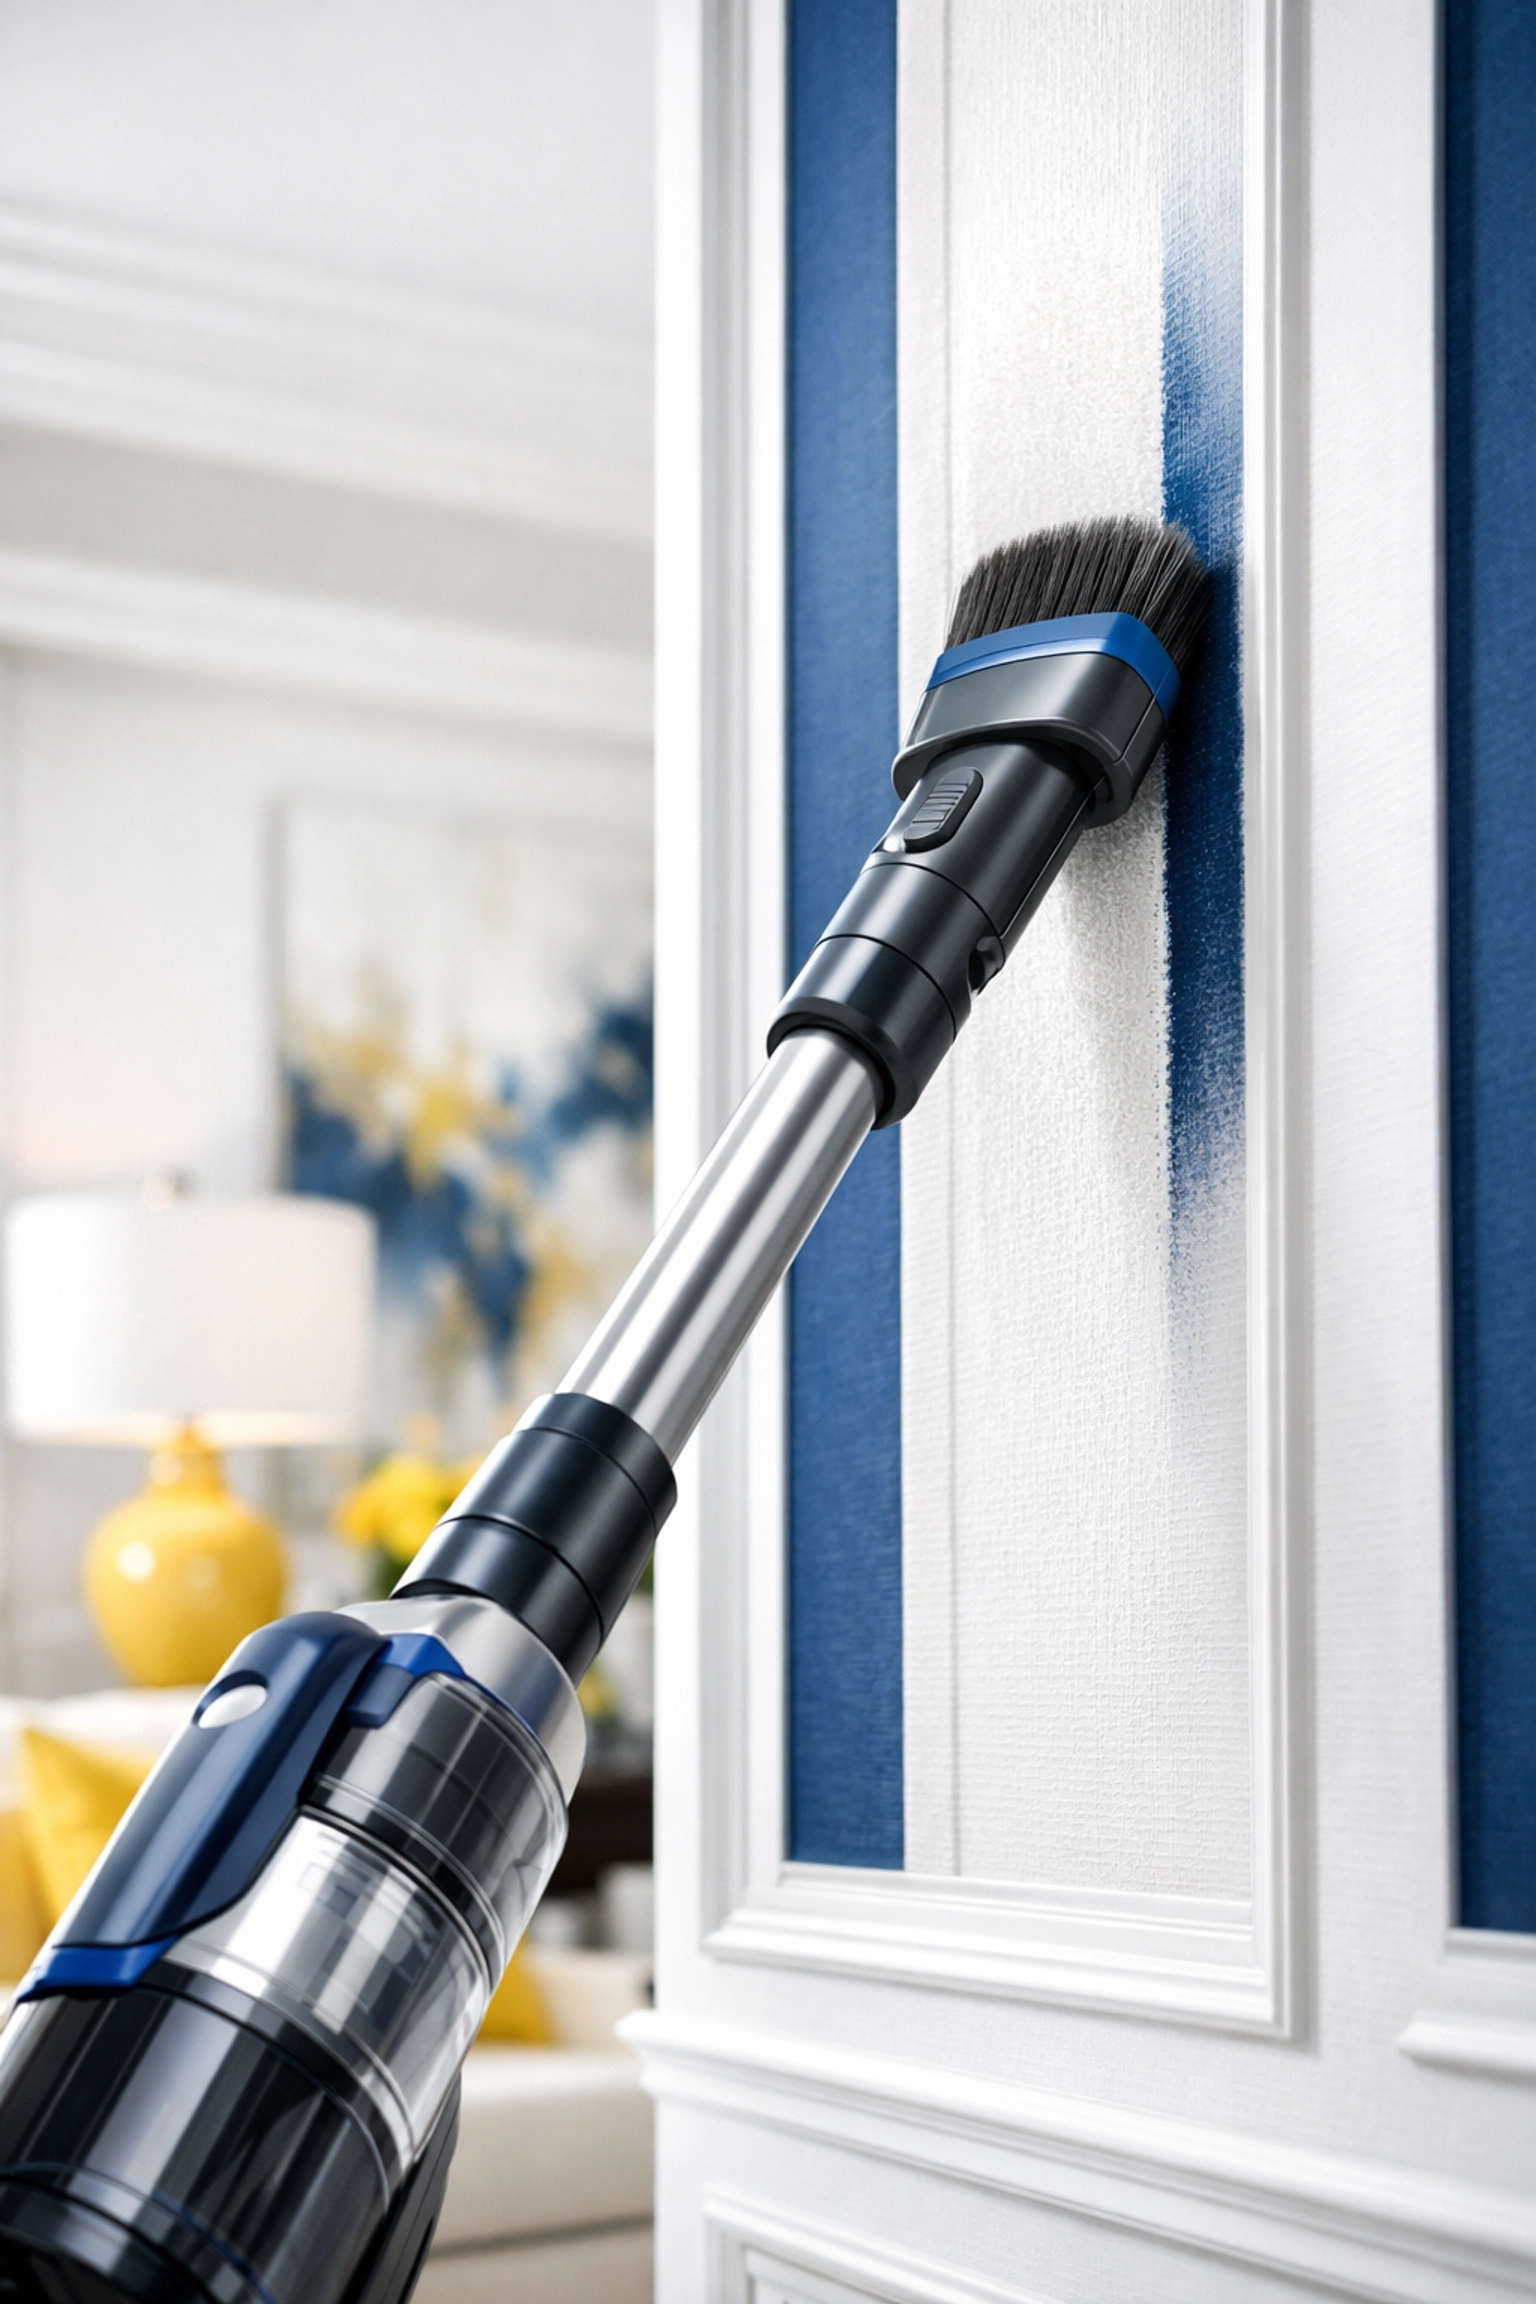
Step 2: The HEPA Vacuuming
Once the loose stuff is on the floor (or settled slightly), use your vacuum with the brush attachment. Work in vertical strips. Gently run the brush head over the wall. The suction will pull the fine particles out of the texture of the drywall or paint. Pay extra attention to the corners where walls meet and the areas around electrical outlets.
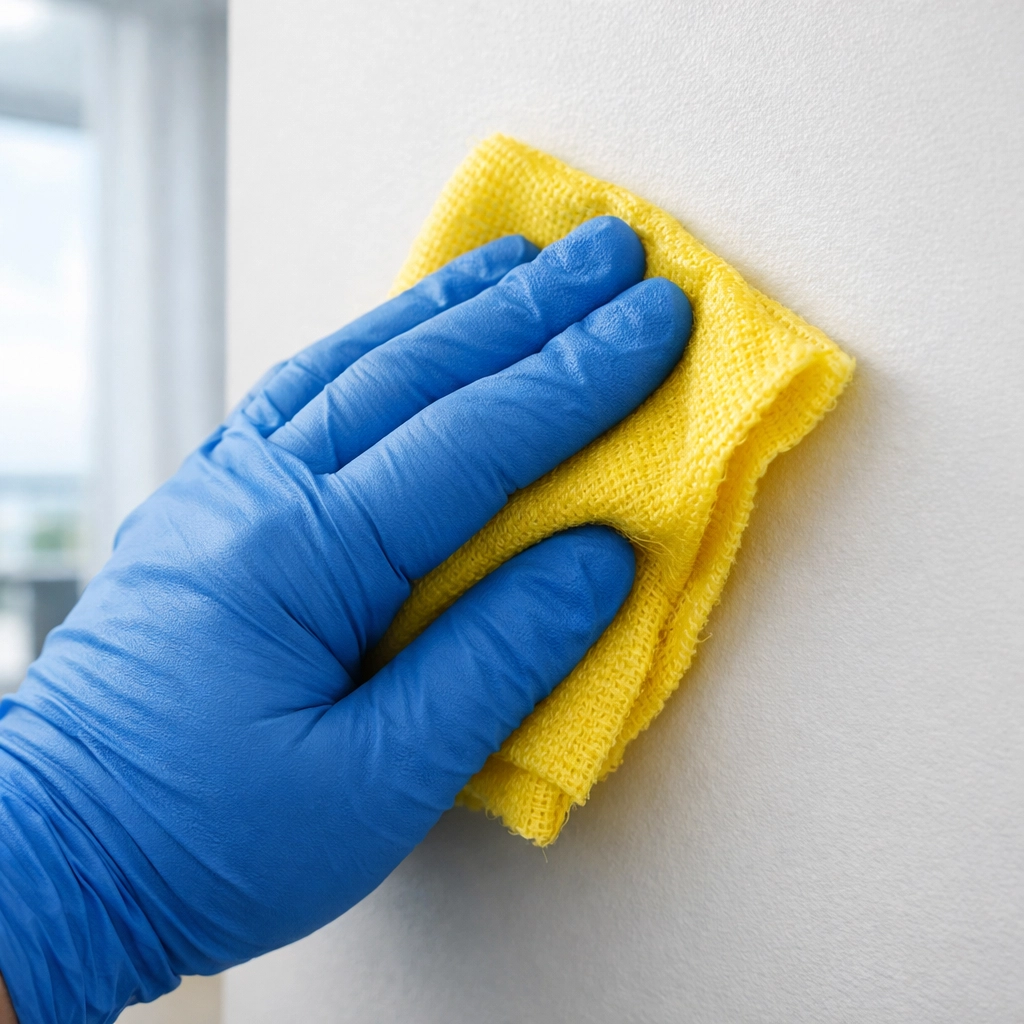
Step 3: The Damp Wipe (The Secret Sauce)
Now that the bulk of the dust is gone, it’s time for the damp wipe. Crucial Rule: Your cloth should be damp, not wet. If you see water beads on the wall, it’s too wet.
Fill a bucket with warm water and a tiny drop of dish soap (optional). Submerge your microfiber cloth, then wring it out until it feels almost dry to the touch. Use circular motions to wipe the wall. The dampness will trap the remaining film of dust.
Pro Tip: Rinse your cloth frequently! If you keep wiping with a dirty cloth, you’re just painting the wall with gray mud. Change your water as soon as it looks cloudy.
Phase 4: Advanced Techniques
If you’re dealing with a massive amount of dust: perhaps after a full-house sanding: you might need to level up your tactics.
The Misting Method
Some pros use a very fine misting bottle to lightly spray the air and the walls with water. This weighs down the dust particles, making them clump together and fall to the ground. However, you have to be careful not to over-saturate the drywall, especially if it hasn't been primed yet. If you're interested in more specialized cleaning tips, checking our blog for construction-specific advice is a great move.
The Tack Cloth Finish
Once the walls have air-dried from your damp wipe, do one final "Shadow Test" with your flashlight. If you still see a slight haze, use a tack cloth. Lightly wipe the surface. The sticky resin on the cloth will pick up the absolute last of the residue, leaving your walls ready for that final coat of high-gloss or satin paint.
Cleaning the "Support Systems"
Drywall dust doesn't just stay on the flat parts of the wall. To truly get that Ninja-clean finish, you have to hit the details:
- Baseboards: These are dust magnets. Use a vacuum brush, then a damp cloth.
- Door Frames and Casings: Dust loves to sit on the tiny ledge at the top of the door frame.
- Outlets and Switches: Use a dry paintbrush to flick dust out of the crevices of your light switches.
- Light Fixtures: Don't forget to wipe the tops of any wall-mounted lights.
Common Mistakes to Avoid
We've seen it all at The Cleaning Ninjas Inc. Here are the blunders that will double your workload:
- Using a Shop Vac Without a Bag: Most shop vacs come with a standard pleated filter. Drywall dust will clog that filter in about thirty seconds, causing the motor to overheat and the vacuum to lose suction. Always use a high-efficiency drywall dust bag inside your shop vac.
- Using a Regular Broom: Brooms are too coarse. They just launch the dust into the air, where it will float for three hours and then land right back where you just cleaned.
- Skipping the Ceiling: You might think the ceiling is fine, but gravity is a thing. Dust on the ceiling will slowly "rain" down onto your walls and floors for weeks. Always wipe the ceiling first!
When to Call in the Ninjas
Cleaning up after construction is an exhausting process. It’s not just about the walls; it’s the vents, the windows, the insides of cabinets, and the floors. Sometimes, the dust is so overwhelming that you just want to move into a hotel.
If you find yourself staring at a white-coated house and feeling defeated, remember that you don't have to do it alone. Our team at The Cleaning Ninjas Inc has the industrial-grade HEPA equipment and the "Ninja-precision" to handle post-construction messes of any size. Check out our services to see how we can turn your construction zone back into a home.
Final Thoughts
Removing drywall dust is a marathon, not a sprint. You might need to do a "final wipe" two or three times over the course of a week as the airborne particles finally settle. But if you use the "raking light" technique and stick to your HEPA vacuum and microfiber cloths, you’ll win the war.
For more deep-cleaning hacks and professional advice, keep an eye on our blog. Now, go get that flashlight and see what’s really hiding on your walls!


