Let’s talk about one of the most underrated heroes in the kitchen: the trash compactor. It’s the ultimate space-saver, turning a mountain of trash into a neat little cube of garbage. But, as any owner knows, with great power comes great… smell. If you’ve ever opened your compactor drawer only to be hit with a scent that could knock a vulture off a gut-wagon, you know exactly why maintenance is key.
At The Cleaning Ninjas Inc, we’re all about making home maintenance feel less like a chore and more like a strategy. Keeping your trash compactor fresh and functional isn't just about avoiding bad odors; it’s about making sure the machine lasts for years and doesn't become a breeding ground for bacteria. Here is our comprehensive guide to mastering trash compactor care.
Why Maintenance Matters
It’s easy to treat a trash compactor like a "set it and forget it" appliance. You toss the trash in, hit the button, and the problem literally disappears: or so it seems. In reality, bits of food, sticky liquids, and tiny debris can get squeezed out of bags during the compaction process. Over time, these remnants accumulate in the tracks, on the ram, and in the bottom of the cabinet.
Without regular cleaning, this buildup can cause:
- Mechanical Strain: Sticky residues can make the ram work harder, leading to motor burnout.
- Pest Problems: Ants and roaches love the sugary spills hiding in the corners of a compactor.
- Odors: This is the big one. Compacted trash is dense, and trapped moisture leads to rapid bacterial growth.
Step 1: Safety First (The Golden Rule)
Before you even think about sticking a cloth or a hand inside that machine, you must disconnect the power. Trash compactors use a powerful motor and a screw-drive system that exerts thousands of pounds of pressure.
- Unplug the unit: If it’s a plug-in model, pull it out and unplug it.
- Check the breaker: If your unit is hard-wired, flip the circuit breaker to the "off" position.
- Wear gloves: Trash is gross, but it can also be sharp. Always wear heavy-duty rubber or nitrile gloves to protect yourself from glass shards or metal edges that might have escaped the bag.
Step 2: The Deep Cleaning Process
We recommend a deep clean at least once every three to six months, depending on how much your household uses it. If you’re a family of six, you might want to do this monthly.
Clearing the Debris
Start by removing the trash bag. Once the bin is empty, use a vacuum attachment to suck up any loose crumbs or debris at the bottom of the cabinet. This prevents those small bits from getting stuck in the tracks or the drawer rollers.
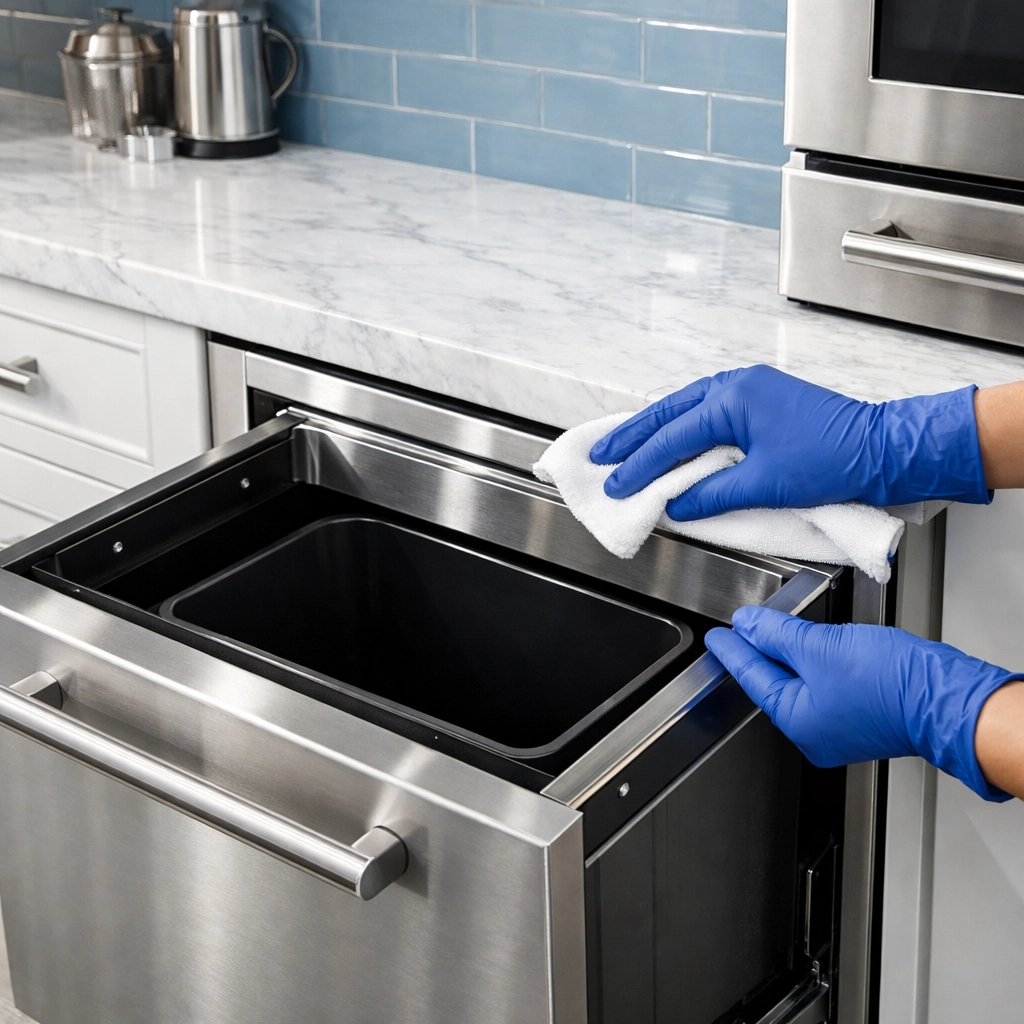
Scrubbing the Bin
The bin (the part that holds the bag) is usually removable. Take it to the sink or outside to the patio. Use a mixture of warm water and a mild dish soap. Avoid using harsh abrasive cleaners or bleach, as these can damage the finish of the bin or degrade the seals.
- Ninja Tip: If there is stuck-on grime, let the soapy water sit in the bin for ten minutes before scrubbing with a soft nylon brush.
Wiping the Ram
The "ram" is the heavy plate that comes down to squish the trash. It’s the most likely place for "trash juice" to splatter. Wipe the bottom and the sides of the ram with a disinfectant wipe or a cloth dipped in soapy water. Be sure to dry it thoroughly afterward to prevent rust or corrosion.
Cleaning the Drawer Front and Tracks
The tracks that the drawer slides on can get gummy. Use a damp cloth to wipe them down. If you notice the drawer isn't sliding smoothly, this is usually where the problem lies. While you’re at it, wipe down the exterior handle and the control panel. These are high-touch areas that harbor plenty of germs.
Step 3: Banishing the Funk (Odor Control)
Even a clean compactor can smell if it isn't managed correctly. The secret to a fresh-smelling kitchen is a multi-layered approach to odor control.
The Power of Baking Soda
Baking soda is a natural deodorizer. Sprinkle a little bit at the bottom of every new trash bag you put in. You can also keep an open box of baking soda in the back of the cabinet (the area behind the drawer) to soak up ambient smells.
Charcoal Filters
Most modern trash compactors come equipped with an integrated charcoal filter. These filters are designed to trap odors before they escape into your kitchen. However, they aren't permanent.
- Check the manual: Most manufacturers recommend replacing the charcoal filter every 6 to 12 months. If you start smelling the trash even when the drawer is closed, it’s time for a new filter.
Deodorizing Sprays and Disks
There are many commercial deodorizing disks that you can stick to the inside of the compactor lid or drawer. If you prefer a more natural route, a quick spray of a 50/50 water and white vinegar solution can kill odor-causing bacteria without using heavy synthetic fragrances.

Step 4: Mechanical Maintenance
Your trash compactor is a machine, and like any machine, it needs a little "mechanical love" to keep running smoothly.
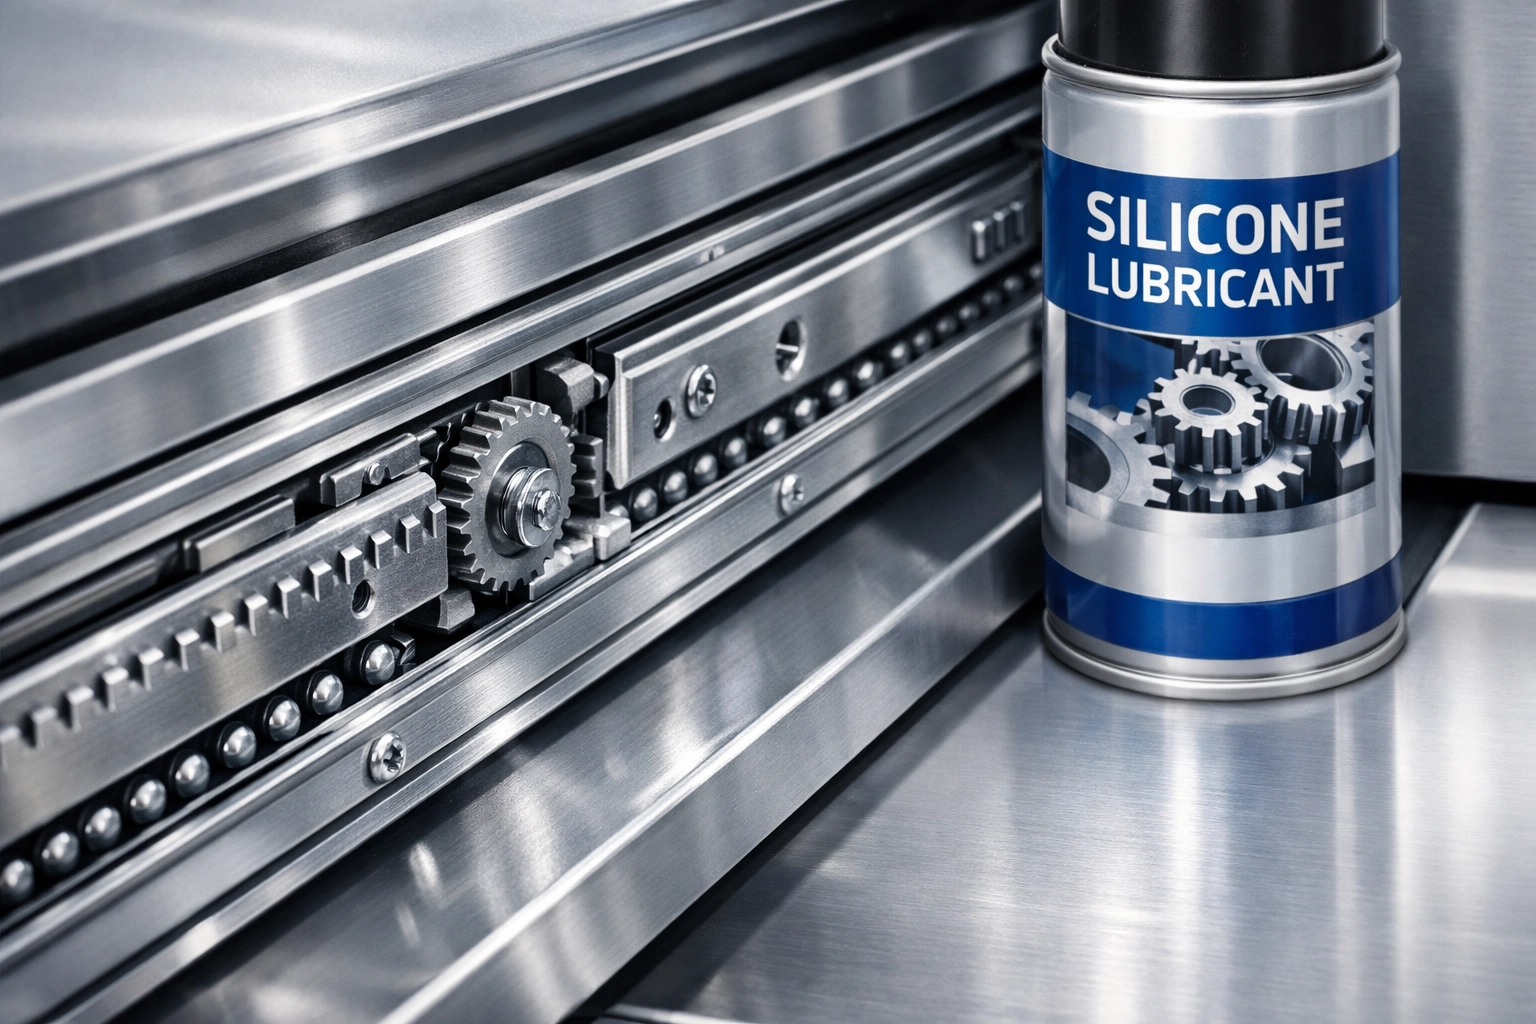
Lubrication
The moving parts, like the drawer slides and the ram power screws, need lubrication. Use a food-grade silicone spray or the specific lubricant recommended by your manufacturer. Avoid using heavy grease or WD-40, as these can actually attract more dust and hair, creating a "sludge" that jams the gears.
Inspect the Belt and Gears
If your compactor starts making a high-pitched squeal or a grinding noise, it’s likely a belt or gear issue. Periodically open the access panel (while the power is off!) to check for frayed belts or cracked plastic gears. Catching a fraying belt early is much cheaper than replacing a blown motor.
Safety Switch Testing
Every compactor has a safety switch that prevents it from operating while the drawer is open. Periodically test this. With the drawer slightly ajar, try to start the cycle. It should not engage. If it does, you have a faulty safety switch that needs to be replaced immediately for the safety of everyone in the house.
Step 5: Best Practices (The "Ninja Way" to Compact)
How you use the machine on a daily basis determines how much maintenance you’ll have to do in the long run.
- Avoid Wet Scraps: If you have a garbage disposal, use it for food scraps. Wet, organic waste is the primary cause of odors and mold in a compactor.
- Don’t Compact Glass: While the machine can crush glass, the resulting shards often pierce the bag, leading to leaks and potential injuries when you go to take the trash out.
- Balance the Load: Try to distribute the trash evenly in the bin. If all the heavy stuff is on one side, the ram can become misaligned over time, leading to mechanical failure.
- Use the Right Bags: Don’t try to use standard kitchen bags. Trash compactor bags are reinforced to handle the extreme pressure. Using the wrong bag is a recipe for a mess that will take hours to clean up.
When to Call in the Professionals
Sometimes, a trash compactor issue goes beyond a simple wipe-down. If you’re noticing electrical smells, the motor is humming but not moving, or the ram is stuck in the "down" position, it’s time to call an appliance repair specialist.
For the general cleanliness and hygiene of your home, including those tricky kitchen appliances, Our Services are designed to take the weight off your shoulders. We know that life gets busy, and sometimes the deep cleaning of a trash compactor is the last thing on your mind.
Final Thoughts
A well-maintained trash compactor is a dream to have in the kitchen. It reduces the number of trips to the curb and keeps your kitchen looking tidy. By following these simple steps: regular cleaning, changing filters, and watching what you toss inside: you can ensure your unit stays fresh and functional for years to come.
Want to learn more about keeping your home in tip-top shape? Check out our other Cleaning Tips or head over to our About Us page to see how we’ve been helping homeowners keep their spaces ninja-clean!

Happy compacting, and stay fresh!