

Let’s be real for a second: the kitchen trash can is the unsung hero of the home, but it’s also the most neglected. We ask it to hold everything from onion peels and coffee grounds to that container of leftovers we forgot about for three weeks. We tie up the bag, toss it in the bin, and call it a day. But eventually, a certain… aroma starts to linger. You check the fridge, you check the sink, and then you realize, it’s the bin itself.
Even if you use heavy-duty bags, leaks happen. Tiny punctures, spills over the rim, or just general "trash juice" (yeah, we went there) can accumulate at the bottom, creating a breeding ground for bacteria, mold, and fruit flies. At The Cleaning Ninjas Inc, we’re all about those cleaning tips that make your life easier and your home smell like a sanctuary instead of a landfill.
Deep cleaning your garbage can doesn’t have to be a gross, day-long chore. With a few eco-friendly ingredients and a little "ninja" strategy, you can get it sparkling and fresh in no time.
Why You Can’t Just Ignore the Stink
It’s tempting to just spray a little air freshener and walk away, but a smelly bin is often a sign of a bigger issue. Bacteria like Salmonella, E. coli, and Listeria love the damp, dark environment at the bottom of a trash can. If you have pets or small children, those germs can easily migrate from the bin to other surfaces in your kitchen.
Beyond the health stuff, a dirty bin attracts pests. If you’ve ever dealt with an infestation of fruit flies or: heaven forbid: maggots, you know that prevention is worth a pound of cure. A deep clean every few months (or more often if something leaks) keeps the "uninvited guests" away.
Gathering Your Ninja Gear
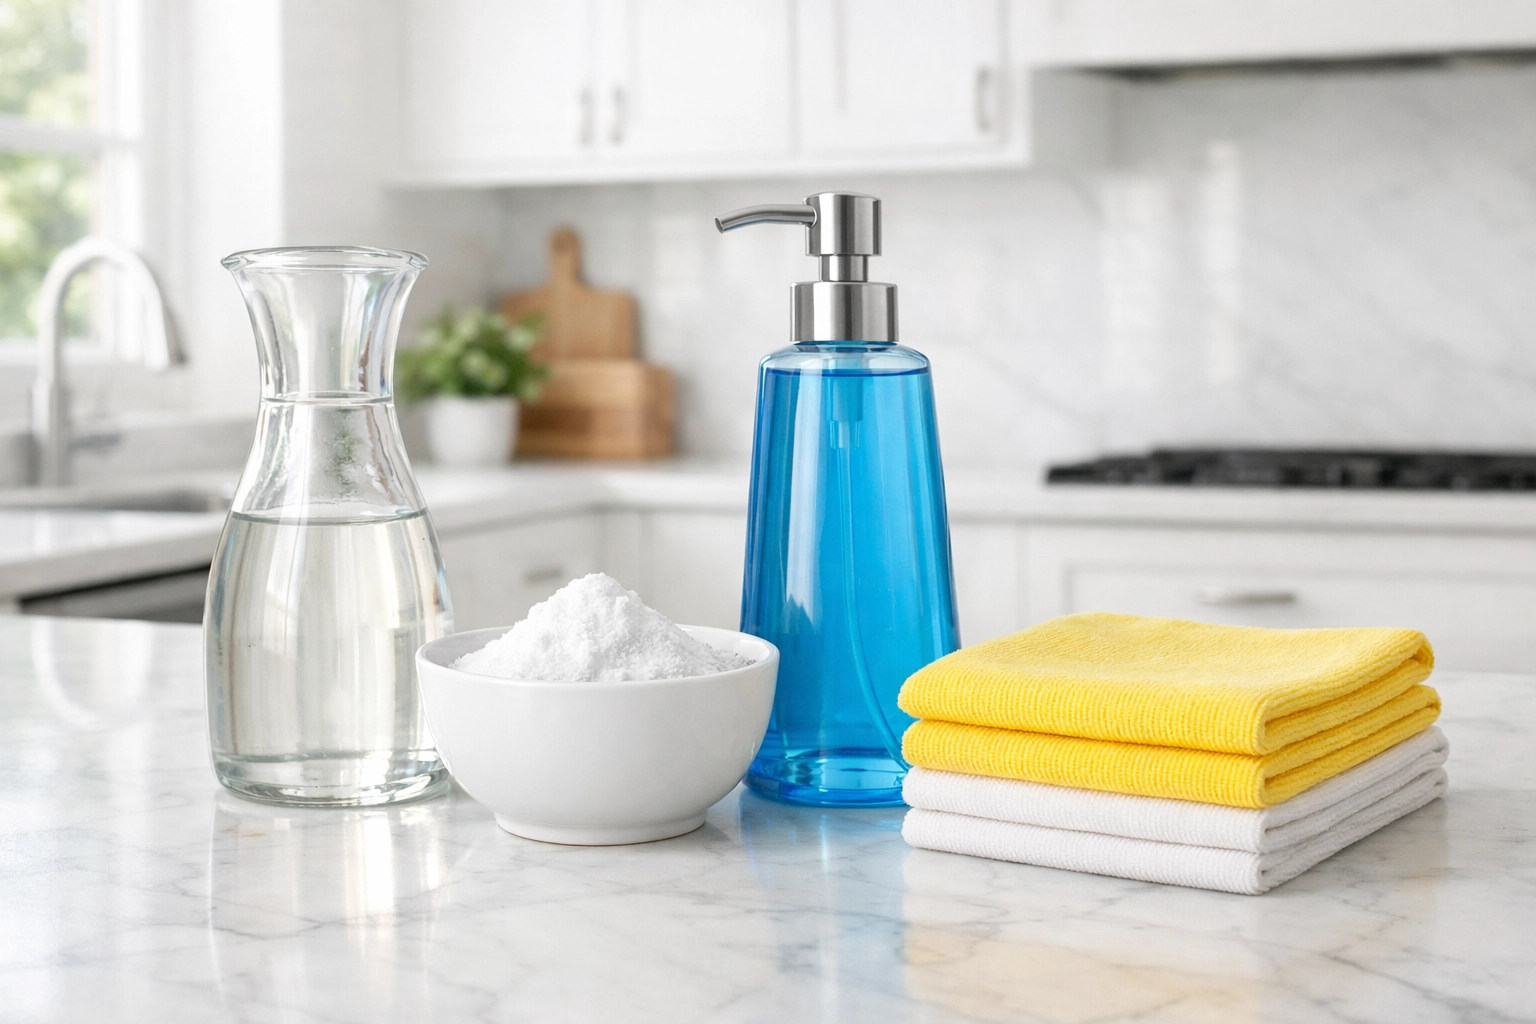
Before we dive in, let’s grab the supplies. Since we’re working in the kitchen where food is prepared, we like to stick to eco-friendly, non-toxic cleaners whenever possible.
Here is what you’ll need:
- Dish Soap: A good degreaser (like Dawn) is essential for breaking down sticky residue.
- Distilled White Vinegar: The ultimate natural sanitizer and deodorizer.
- Baking Soda: To scrub away stains and neutralize odors.
- A Long-Handled Brush: A deck brush or even a dedicated toilet brush (new, obviously!) works wonders so you don’t have to stick your head inside the can.
- A Garden Hose or Bathtub: Depending on the weather and your living situation.
- Microfiber Cloths: For the final wipe-down.
Step 1: The Initial Rinse-Out
First things first: take the bin outside or into a large walk-in shower/tub. If you’re doing this outside, tilt the can on its side. Use a garden hose: or better yet, a pressure washer if you have one: to blast out any loose debris. You’d be surprised how much "stuff" gets stuck to the bottom. Research shows that a high-pressure rinse alone can remove up to 80% of the initial mess.
If you’re working indoors, use the showerhead to give it a thorough hot-water rinse. Make sure you get the lid and the hinges, as that’s where a lot of grime tends to hide.
Step 2: The Eco-Friendly Degreasing Soak
Once the loose gunk is gone, it’s time to tackle the "trash glue" that’s stuck to the plastic.
Mix about a gallon of hot water with two tablespoons of dish soap and two cups of white vinegar. Pour this mixture into the bin. If the sides are particularly gross, you can use a spray bottle with a 50/50 vinegar and water mix to coat the interior walls.
Let it sit for 10 to 15 minutes. This "soak time" is the secret to a ninja-level clean; it lets the acetic acid in the vinegar and the surfactants in the soap do the heavy lifting so you don’t have to scrub as hard.
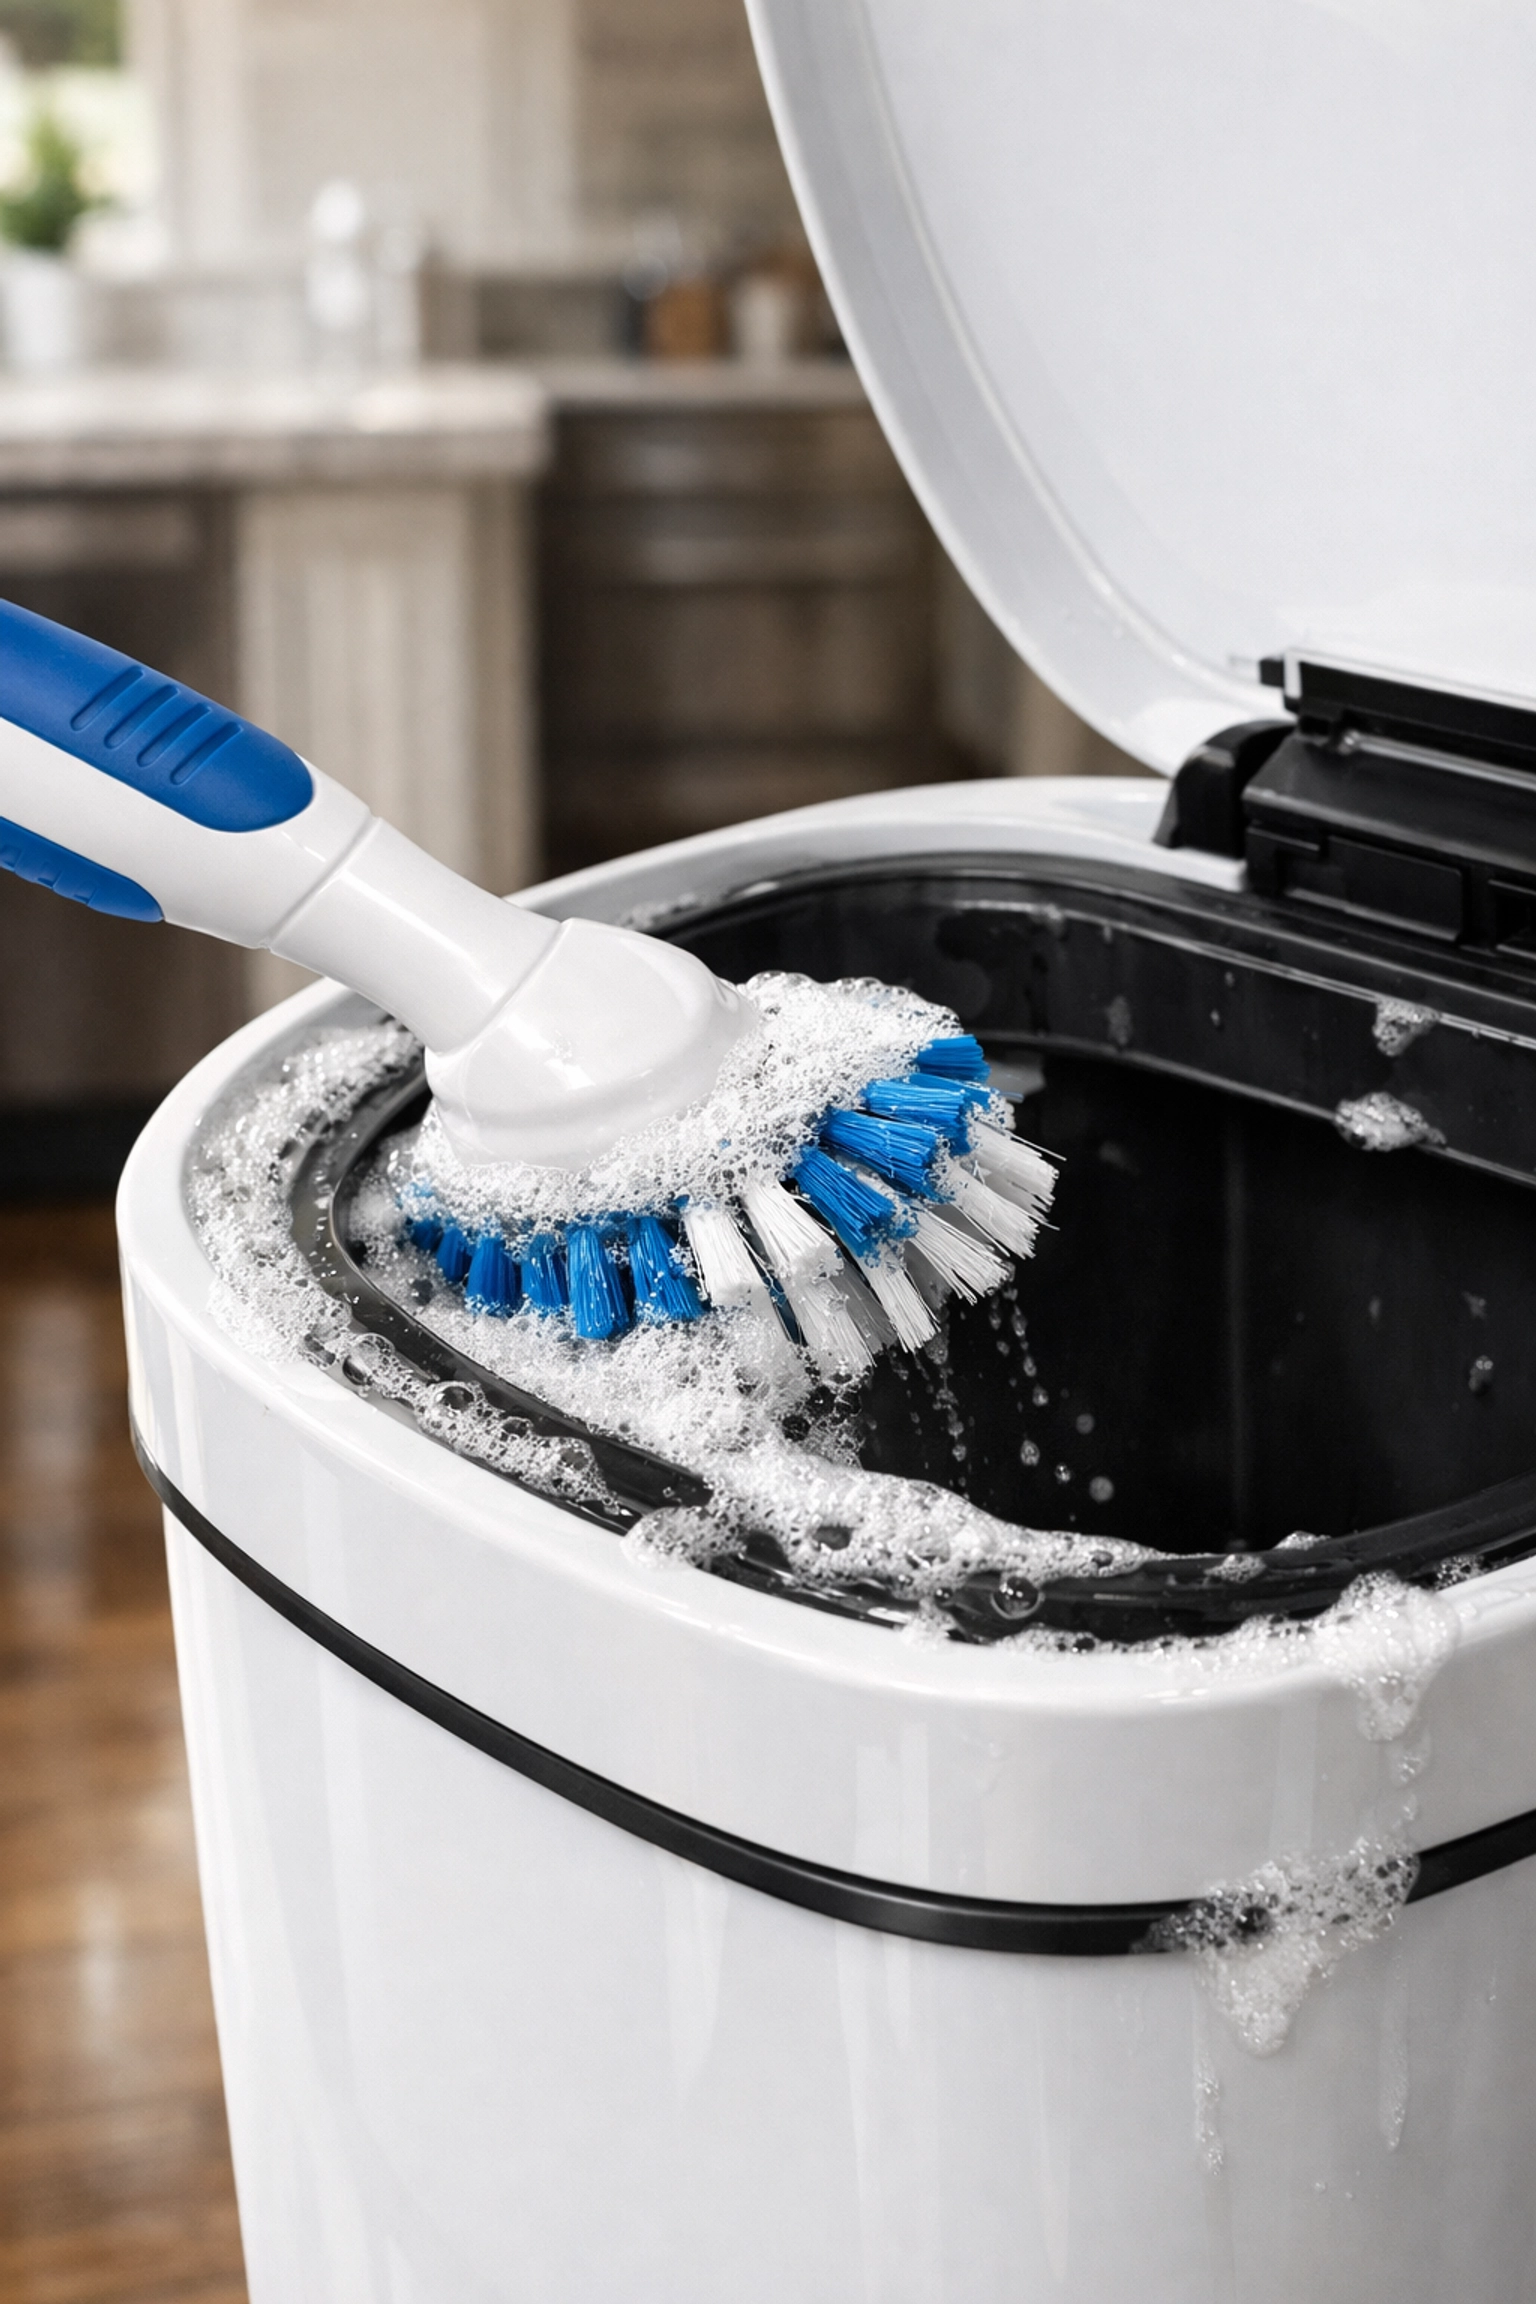
Step 3: Scrub Like a Ninja
Now, grab that long-handled brush. Start from the top and work your way down. Scrub the rim, the outside handle, the foot pedal (if it has one), and finally, the very bottom.
If you encounter a stubborn stain: maybe some dried-on mystery sauce: sprinkle a little baking soda directly onto your brush. The mild abrasiveness of the baking soda combined with the vinegar will create a fizzing action that lifts stains without scratching the plastic or stainless steel.
Step 4: The Final Rinse and Sanitize
Rinse the can thoroughly with clean water. You want to make sure all the soap and vinegar are gone, as any residue can actually attract more dust and grime later on.
If you feel like the bin needs an extra layer of protection against bacteria, you can use an eco-friendly disinfecting spray. However, if you want to go the traditional route with bleach, remember the golden rule: NEVER mix bleach with vinegar or soap. Mixing bleach and vinegar creates toxic chlorine gas. If you choose to use a bleach solution (one cup of bleach to one gallon of water), ensure the bin has been rinsed completely of all vinegar first.
At The Cleaning Ninjas Inc, we usually find that the vinegar-and-soap method is more than enough for residential kitchen bins, but a little extra sanitizing never hurts for those "extra-heavy" situations.
Step 5: The Power of the Sun
This is a step many people skip, but it’s actually one of the most effective. If it’s a sunny day, leave your trash can upside down in the backyard or on a balcony.
The sun’s UV rays are natural disinfectants and help kill off any remaining bacteria. Plus, air-drying is the best way to ensure no moisture is trapped in the corners when you put a new bag in. Trapped moisture = mold, and we’re trying to get away from that!
Pro Tips for Preventing Future Odors
Now that your bin is cleaner than the day you bought it, let’s keep it that way. You don't want to have to do a deep scrub every single week.
- The Baking Soda Base: Sprinkle a light layer of baking soda at the very bottom of the empty bin before you put the bag in. It acts as a continuous deodorizer.
- The Cotton Ball Trick: Take a cotton ball, soak it in a few drops of essential oil (lemon, tea tree, or eucalyptus are great), and drop it into the bottom of the can. It keeps the bin smelling fresh every time you open the lid.
- Newspaper Liner: Place a few sheets of old newspaper or a paper grocery bag at the bottom of the bin. This will soak up any "trash juice" that might leak from a broken bag, making your next deep clean much easier.
- Weekly Wipe-Down: Once a week, when you take the trash out, give the lid and the rim a quick wipe with a disinfectant wipe or a microfiber cloth sprayed with vinegar. It takes 30 seconds and prevents buildup.
When to Call in the Pros
We get it: life is busy. Sometimes the "honey-do" list gets a little too long, or maybe the thought of scrubbing a trash can just isn't how you want to spend your Saturday. That’s where we come in. Whether you need a one-time deep clean or regular maintenance to keep your whole home (bins included!) in tip-top shape, check out our services.
Our team loves turning chaos into clean, and we bring all the specialized tools and eco-friendly products to get the job done right. You can learn more about us and our mission to provide the most reliable cleaning services in the area.

Summary: A Fresh Start for Your Kitchen
Deep cleaning your garbage can is one of those tasks that offers instant gratification. The kitchen smells better, the air feels cleaner, and you’ve eliminated a major source of bacteria in your home.
By using simple, eco-friendly ingredients like vinegar and baking soda, you’re protecting your family and the environment while achieving professional-level results. So, next time you take the trash out and catch a whiff of something funky, don't ignore it: channel your inner ninja and give that bin the deep clean it deserves!
For more home maintenance hacks and professional cleaning advice, be sure to head over to our blog. Happy cleaning!


