

Let’s be honest for a second: when was the last time you actually looked under your refrigerator? If you’re like most of us, it’s probably been a minute, or a year. It’s the ultimate "out of sight, out of mind" zone. You drop a grape, it rolls into the abyss, and you just say a silent prayer for its soul and move on with your day.
But here at The Cleaning Ninjas Inc, we know that those hidden crevices are where the real "dust bunnies" (more like dust monsters) live. Cleaning under and behind your large appliances isn't just about being a perfectionist; it’s about keeping your home healthy and your appliances running longer.
In this guide, we’re going to dive deep into the forgotten zones of your kitchen and laundry room. We’ll show you how to tackle the grime under the fridge, the crumb graveyard under the stove, and the lint-filled cavern behind the dryer.
Why You Can’t Ignore the "Forgotten Zones"
You might think that a little dust under the fridge is harmless, but it actually has a significant impact on your home.
First, there’s the efficiency factor. Most refrigerators have condenser coils located at the bottom or the back. These coils are responsible for releasing heat so the inside stays cold. When they get caked in dust and pet hair, they can’t release that heat efficiently. Your fridge has to work twice as hard to keep your milk cold, which leads to higher electricity bills and a shorter lifespan for the appliance.
Second, there’s the air quality. Every time your fridge’s fan kicks on, it can stir up the dust sitting underneath it, circulating allergens throughout your kitchen. If you have pets or allergies, this is a major "no-go" zone.
Finally, there’s the pest factor. Crumbs and spills that migrate under the stove or fridge are basically an open invitation for ants and other unwanted guests. By clearing out these areas, you're taking away their favorite buffet.
Step 1: Moving the Giants Safely
The biggest hurdle to cleaning under large appliances is, well, moving them. These things are heavy, and if you’re not careful, you can scratch your floors or strain your back.
Before you move anything, make sure you have a clear path. Remove any magnets or loose items from the top of the fridge. For the stove, make sure the oven is empty.
The Pro Technique:
Most modern refrigerators are on rollers. To move them, you usually need to pull them straight out. Avoid moving them side-to-side, as the wheels are designed for forward and backward movement. If your fridge has "leveling legs" that are touching the floor, you’ll need to screw them upward until the weight of the fridge is resting entirely on the wheels.
Floor Protection:
If you have hardwood or linoleum, the wheels can sometimes leave marks or even dents. A great ninja tip is to slide a piece of thin plywood or heavy-duty cardboard in front of the appliance and roll it onto that. This distributes the weight and keeps your floors pristine.

Step 2: The Refrigerator Deep Clean
Once you’ve pulled the fridge out (be careful of the power cord and any water lines for the ice maker!), it’s time to face the music.
- Unplug It: For safety, always unplug the unit before you start poking around the coils or the electrical components.
- The Initial Vacuum: Use your vacuum’s crevice tool or a hose attachment to suck up the big stuff. You’ll likely find dust, long-lost bottle caps, and maybe even a cat toy or two.
- Attack the Coils: This is the most important part. Use a specialized coil brush: these are long, flexible, thin brushes designed to get into the narrow gaps of the condenser coils. Gently knock the dust loose.
- The Second Vacuum: Use the vacuum again to catch everything you just brushed loose.
- The Floor Scrub: Since the fridge is out of the way, mop the floor area thoroughly. Use a degreaser if there are sticky spills.
If your fridge has a "NeverClean Condenser," you don't need to worry about the coils, but you should still vacuum the floor underneath to keep pet hair from clogging the internal fans. You can find more specific advice on our cleaning tips page.
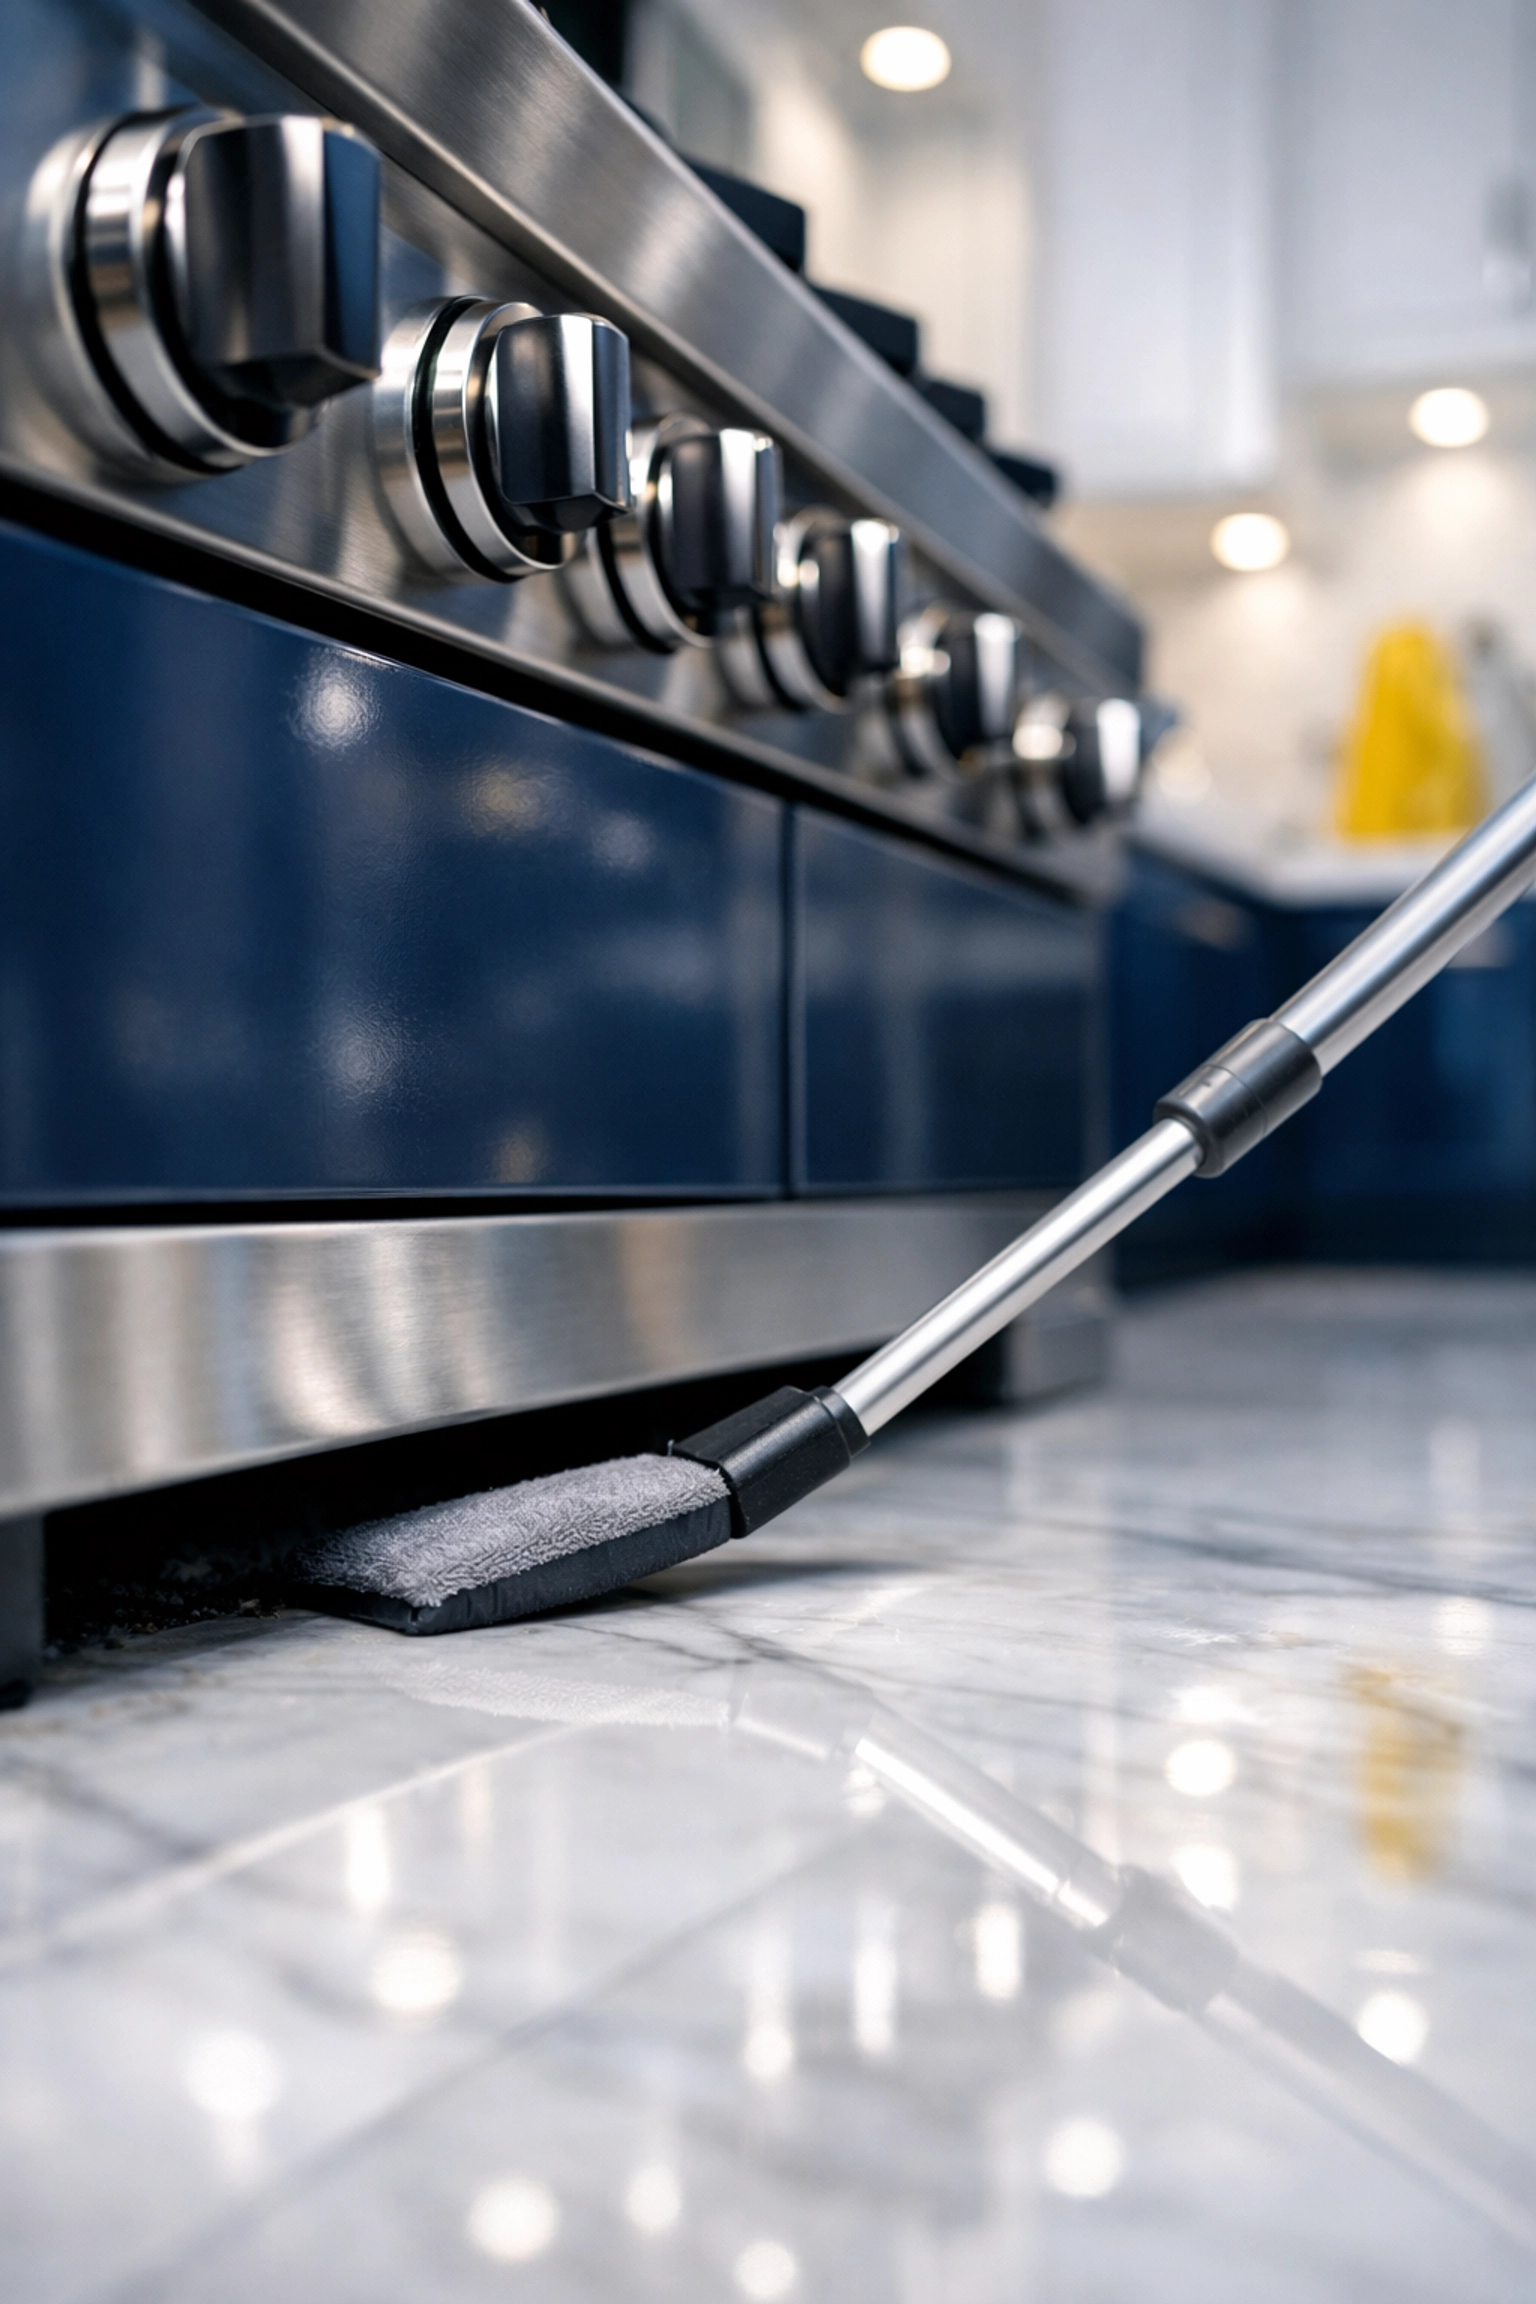
Step 3: The Stove and the "Crumb Graveyard"
If you think the fridge is bad, wait until you see what’s under the stove. Between grease splatters and salt spills, it can get pretty nasty.
Most stoves don't have wheels, so you might need a partner to help you shimmy it out. If it’s a gas stove, be extremely careful with the gas line. You don't want to pull it so far that you put tension on the connection.
Once it’s out, you’ll likely see a layer of "kitchen ": a mix of grease and dust. A standard floor cleaner might not cut it here. We recommend using a heavy-duty degreaser or a mixture of baking soda and vinegar to break down the sticky residue before mopping.
Ninja Tip: Don't forget to clean the sides of the cabinets that were hidden by the stove! Grease often drips down the sides and hardens over time. A quick wipe-down now will save you a headache later.
Step 4: The Laundry Room: Lint and Beyond
The space behind your washer and dryer is another prime candidate for the "forgotten zone" award. In the laundry room, the enemy isn't just dust: it’s lint.
Lint is incredibly flammable. When it builds up behind the dryer or inside the exhaust vent, it creates a serious fire hazard. While you’re back there cleaning the floor, take the time to disconnect the dryer vent hose and vacuum it out.
For the washing machine, check for any signs of slow leaks or moisture. Because these areas are hidden, a small drip can turn into a mold problem before you even notice it. Wipe down the floor and the back of the machine with a disinfecting cleaner to keep everything smelling fresh.
Tools Every Ninja Needs
You don't need a massive arsenal to tackle these areas, but a few specific tools make the job much easier:
- Long-Reach Vacuum Attachment: A flat, flexible crevice tool is a lifesaver for getting under the fridge without moving it every single month.
- Coil Brush: As mentioned, this is essential for fridge maintenance.
- Appliance Sliders: These are small plastic or felt pads you can place under the feet of heavy furniture to make them glide across the floor.
- Microfiber Cloths: For wiping down the back and sides of the appliances once they are pulled out.
At The Cleaning Ninjas Inc, we’re all about using the right tool for the right job. If you’re curious about how we handle the rest of the house, check out our services.

How Often Should You Do This?
You don’t need to pull out your refrigerator every week (unless you really want to!). For most households, a deep clean of these "forgotten zones" every six months is plenty. If you have multiple pets that shed a lot, you might want to bump that up to every three months.
Mark it on your calendar when you change your clocks for Daylight Savings or when you do your deep Spring and Fall cleaning. It only takes about 20 minutes per appliance, but the benefits for your home’s health and your wallet are huge.
When to Call in the Pros
We get it: moving a 300-pound refrigerator isn't everyone’s idea of a fun Saturday afternoon. Sometimes, life gets busy, or you just don’t have the physical strength to safely move large appliances.
That’s where we come in. Our team loves tackling the details that other people miss. We don’t just clean the surfaces; we look for the hidden spots that truly make a home feel "Ninja Clean." Whether you need a one-time deep clean or regular maintenance, we’ve got your back. You can learn more about us and our philosophy on our main site.

Final Thoughts
Cleaning under the fridge and stove might not be the most glamorous part of home maintenance, but it’s one of the most rewarding. There’s a certain peace of mind that comes with knowing that even the hidden corners of your home are spotless. Plus, seeing that pile of dust disappear into the vacuum is strangely satisfying!
So, grab a flashlight, pull out that fridge, and reclaim those forgotten zones. Your appliances (and your lungs) will thank you.
For more deep-cleaning guides and tricks of the trade, feel free to browse the rest of our blog. Stay clean out there!


