

If you’ve ever walked into a professional kitchen or watched a high-end cooking show, you’ve seen it: the heavy, dark, slightly intimidating cast iron skillet. It’s the tool of choice for searing steaks, baking perfect cornbread, and making the best fried eggs of your life. But for many home cooks, the cast iron pan is a source of anxiety. There are so many "rules": don’t use soap, don’t get it wet, don’t look at it the wrong way: that people end up leaving them in the back of the pantry to gather dust.
At The Cleaning Ninjas Inc, we believe that cleaning shouldn’t be a mystery, and it certainly shouldn't involve harsh chemicals. Our mission is to help you master your home environment with "ninja" efficiency. Just like we tackle professional residential cleaning with a strategy, we want to help you master the art of natural cast iron care. It’s easier than you think, and once you get the hang of it, you’ll never go back to those flimsy non-stick pans again.
Why Cast Iron is the Ultimate "Green" Cookware
Before we dive into the cleaning hacks, let’s talk about why we love cast iron in the first place. In an era of "disposable" everything, cast iron is a rebel. It’s built to last for generations. In fact, many of the best pans out there were handed down from grandmothers.
From a natural cleaning perspective, cast iron is a dream. You don't need fancy sprays or specialized degreasers. You just need a few basic ingredients from your pantry and a little bit of technique. Plus, it's a much healthier alternative to non-stick pans that can flake off PFAs and other chemicals into your food over time. When you use cast iron, you’re choosing a sustainable, chemical-free lifestyle.
The Great Soap Myth: Can You Use It?
Let’s address the elephant in the room. You have probably heard someone scream, "Never use soap on cast iron!" This is one of the biggest myths in the cleaning world.
Back in the day, soap was made with lye, which was incredibly harsh and would absolutely eat through the "seasoning" (the layer of carbonized oil) on your pan. Modern dish soaps, however, are much milder. If you’ve just cooked something particularly greasy or smelly, a tiny drop of mild dish soap and some warm water won’t hurt a well-seasoned pan.
However, as The Cleaning Ninjas Inc team will tell you, the best way to keep things natural is to avoid the soap when you can and use the power of abrasives and heat instead.
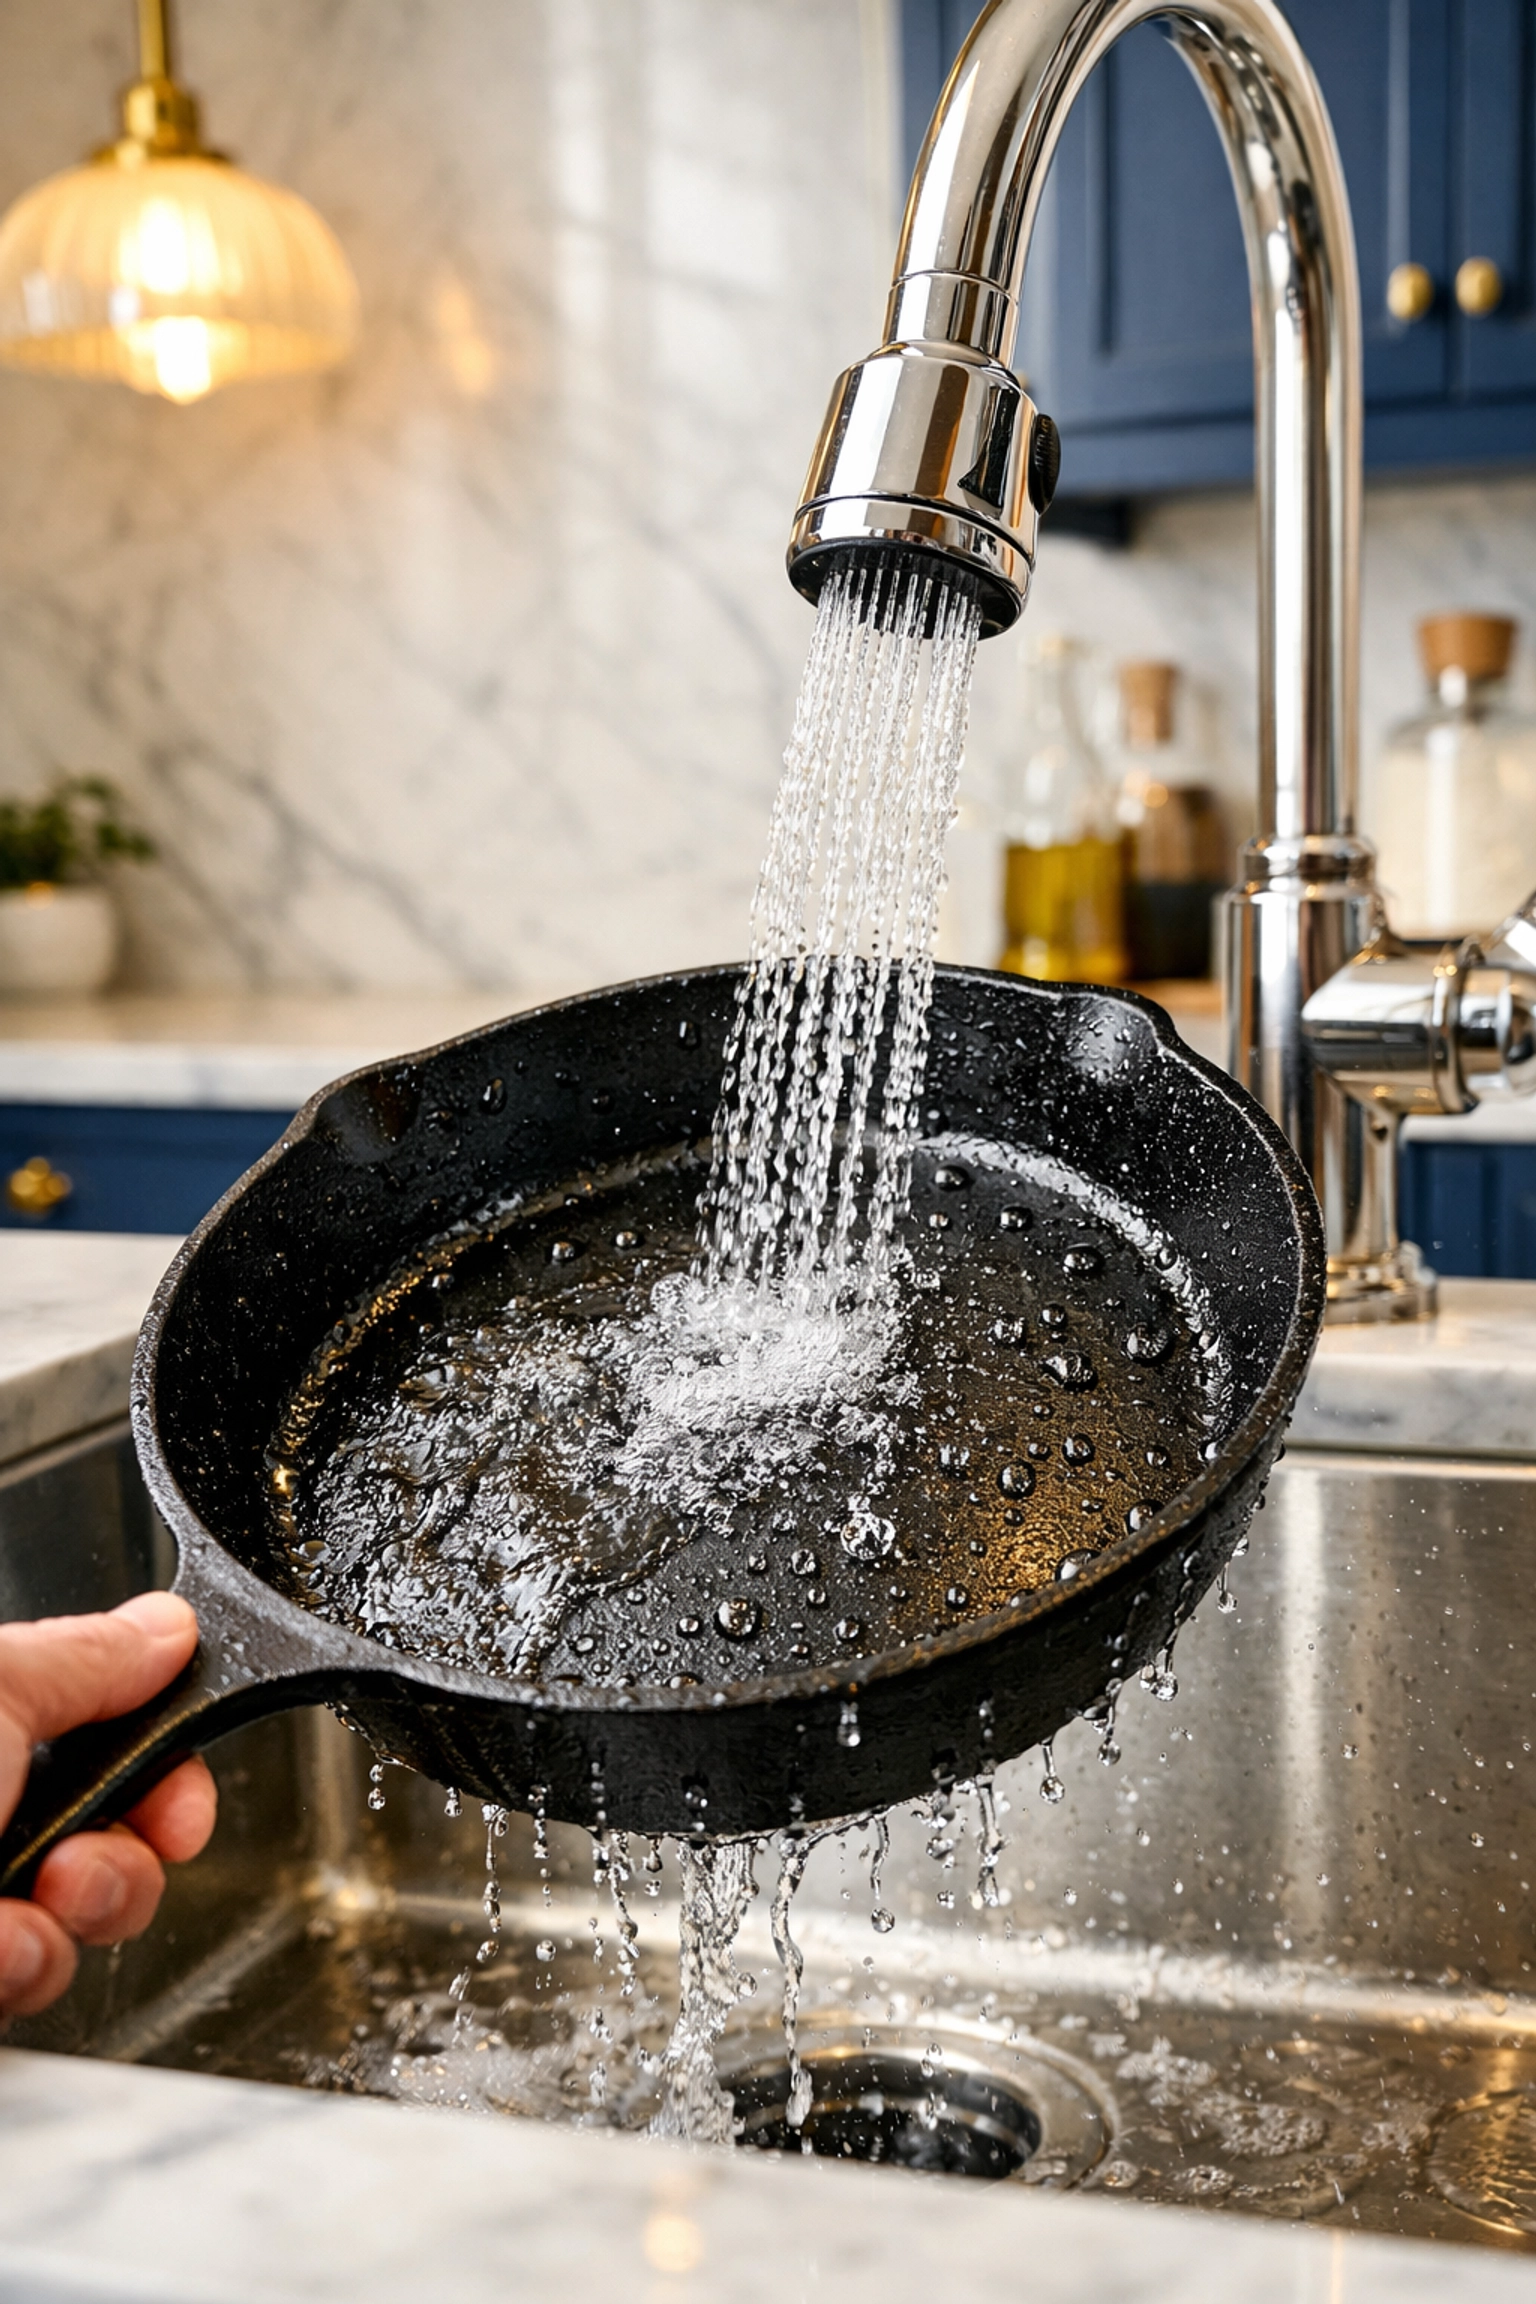
Step 1: The Daily Cleaning Routine
For 90% of your cooking, you don’t need much to get your pan back to its former glory. The key is to clean it while it’s still relatively warm.
- The Warm Rinse: Once the pan has cooled down enough to touch but is still warm, run it under warm water. Use a soft sponge or a nylon brush to wipe away any loose food particles.
- The Drying Phase: This is the most important part of cast iron care. Water is the enemy. If you leave your pan to air dry in the rack, it will rust. After rinsing, wipe it thoroughly with a clean kitchen towel.
- The Heat Treat: To be 100% sure the moisture is gone, pop the skillet back on the stove over low heat for a minute or two. This evaporates any microscopic water droplets hiding in the pores of the iron.
Step 2: Dealing with Stubborn, Burnt-On Food
We’ve all been there. You tried to caramelize onions and ended up with a black crust stuck to the bottom of the pan. Don't panic and don't reach for the steel wool just yet.
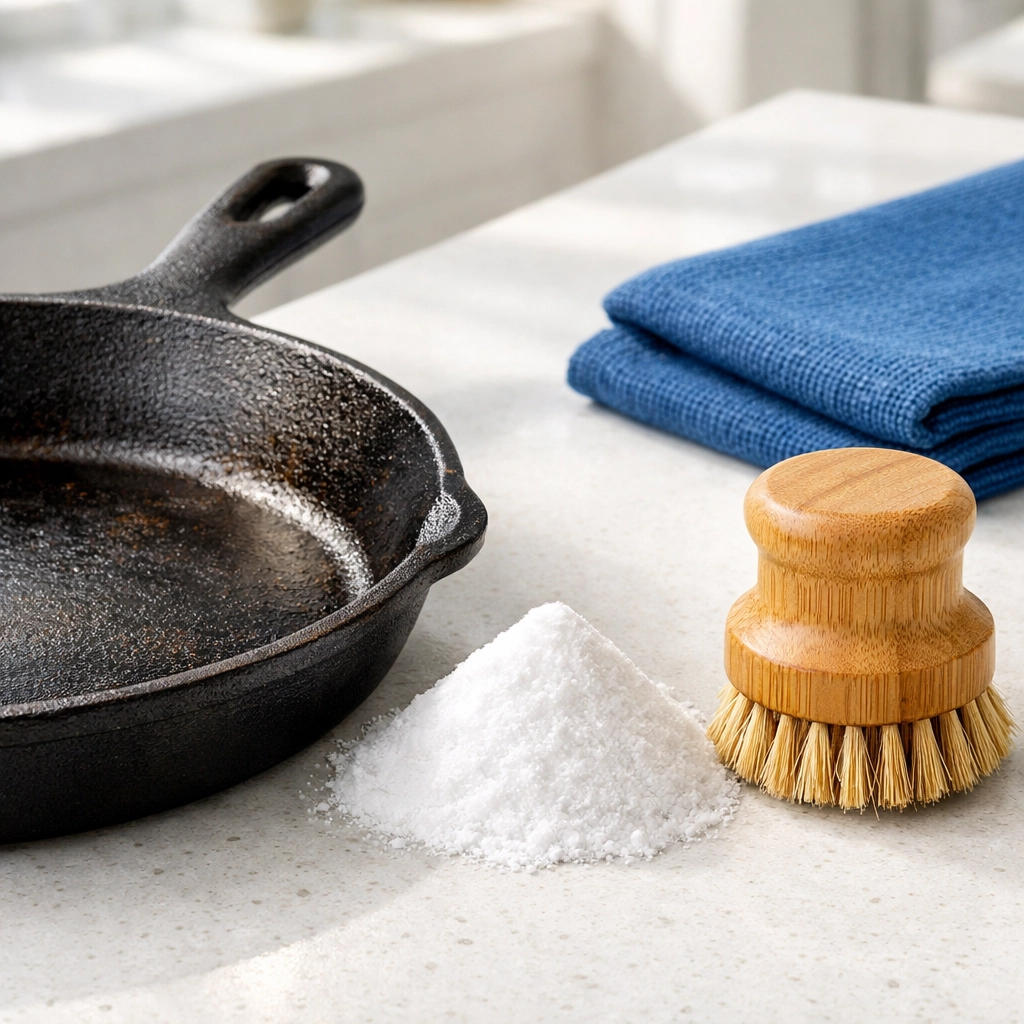
The Salt Scrub Method
Salt is a ninja’s best friend in the kitchen. It’s abrasive enough to lift food but soft enough that it won't scratch away your hard-earned seasoning.
- Pour about half a cup of coarse kosher salt into the dry, warm pan.
- Use a folded kitchen towel or a specialized cast iron scrub brush to rub the salt in circular motions.
- The salt will turn grey or black as it lifts the burnt bits.
- Dump the salt in the trash, give the pan a quick rinse, and follow the drying steps mentioned above.
The Baking Soda Paste
For those truly "stuck" messes, baking soda is your secret weapon. Because it’s alkaline, it helps break down acidic food bonds.
- Mix a little bit of warm water with baking soda to create a thick paste.
- Apply it to the problem areas and let it sit for about 15 to 20 minutes.
- Scrub with a soft sponge. You’ll find the debris lifts away much easier without needing to use force.
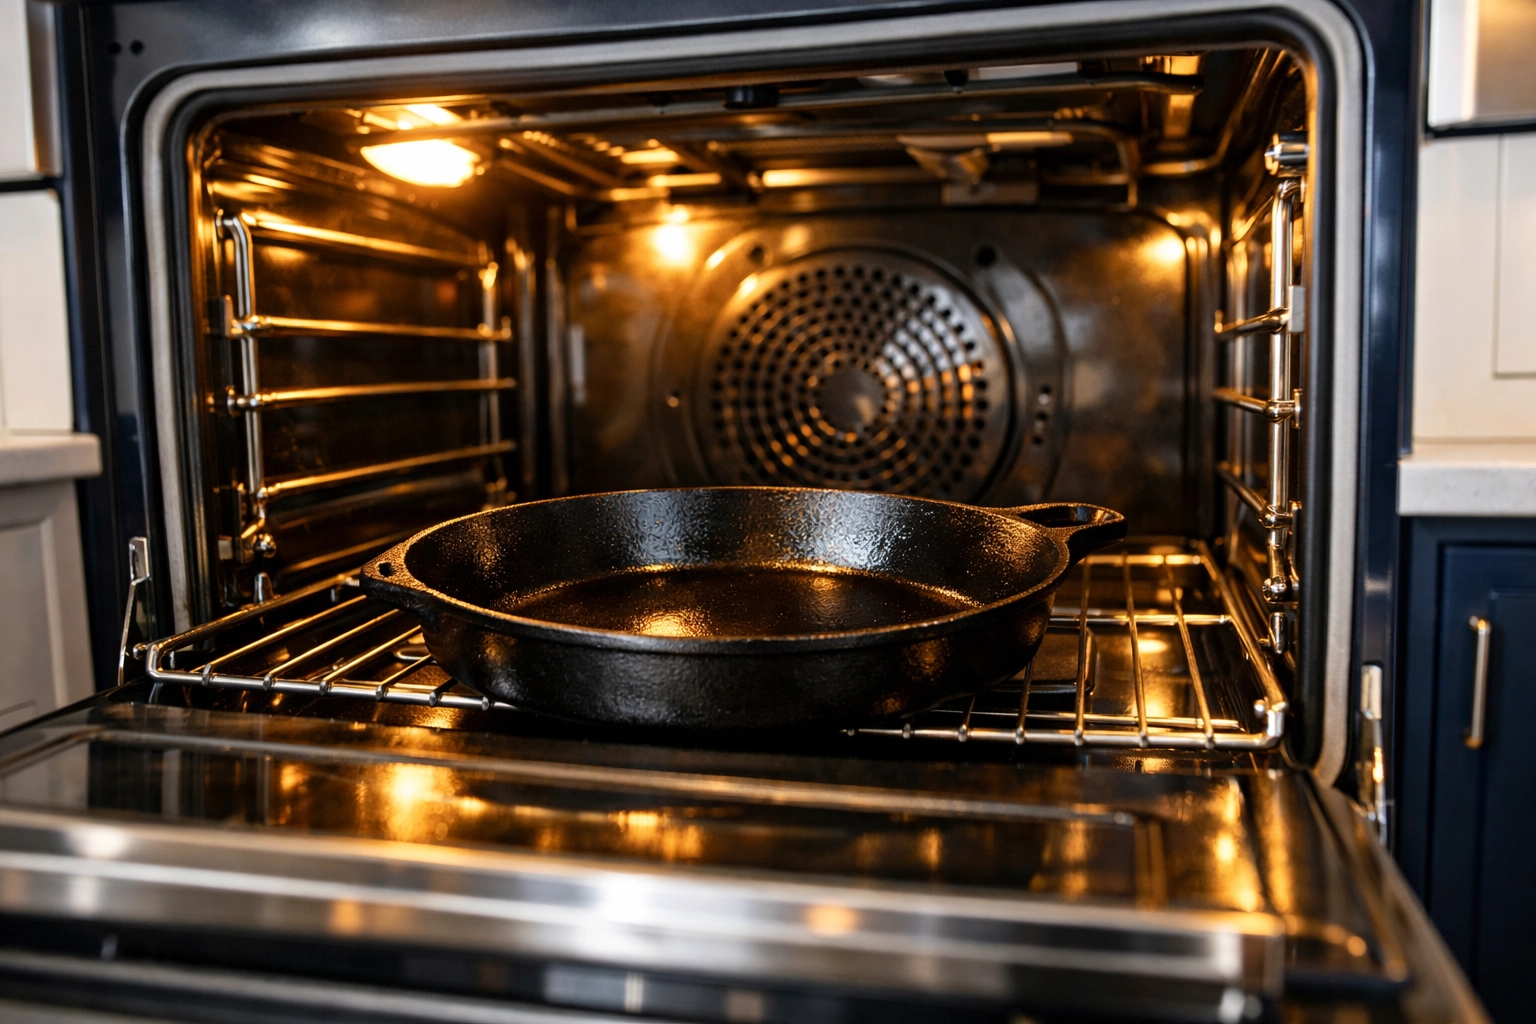
Step 3: The "Ninja Flow" of Seasoning
What exactly is "seasoning"? It sounds like you’re adding salt and pepper to the metal, but it’s actually a process called polymerization. When you heat oil on the iron, it bonds to the surface, creating a natural, plastic-like coating that is non-stick and protects the metal from air and moisture.
Even if your pan came "pre-seasoned" from the factory, you should still give it a quick maintenance season after every few uses.
The Maintenance Seasoning Process:
- Clean and Dry: Ensure the pan is spotless and bone-dry using the heat method.
- Apply Oil: Use a paper towel to apply a very thin layer of oil. You can use vegetable oil, flaxseed oil, or grapeseed oil. Avoid olive oil or butter for this part, as they have low smoke points and can go rancid.
- Buff it Out: This is where people mess up. You don't want the pan to look oily. You want to rub the oil in until the pan looks dry again. If there is too much oil, it will become sticky and gummy when heated.
- Heat it Up: Place the pan on the stove until it starts to smoke slightly, then turn off the heat and let it cool. If you want a deep, professional-grade seasoning, put the oiled pan upside down in a 450°F oven for an hour, then let it cool inside the oven.
Check out more Cleaning Tips on our blog for more ways to keep your home eco-friendly.
Step 4: Rescuing a Rusty Pan
If you found a pan at a yard sale or left yours in the sink overnight (it happens!), you might see some orange rust spots. Do not throw the pan away! Cast iron is nearly indestructible.
- Scrub the Rust: Use a bit of steel wool or a scouring pad to gently buff away the rust until you see the grey metal underneath.
- The Big Clean: Wash it with warm water and a little bit of mild soap (since we are stripping it anyway).
- The Deep Season: Since you’ve exposed the raw iron, you need to do the oven-seasoning method described above. Do it twice to build up a solid base layer.
The "Never" List for Cast Iron
To keep your skillet in "ninja" shape, there are a few things you should absolutely avoid:
- The Dishwasher: Never, ever put cast iron in the dishwasher. The high heat and harsh detergents will strip the seasoning and cause immediate rusting.
- Soaking: Never leave your pan to soak in the sink. Moisture is the fast track to rust.
- Cold Water on a Hot Pan: If you take a piping hot pan and put it under cold water, it can cause "thermal shock," which can actually crack the iron. Let it cool slightly first.
Mastering Your Kitchen Routine
Caring for your cast iron is a lot like our approach to our services at The Cleaning Ninjas Inc. It’s about consistency, using the right natural tools, and having a system. When you integrate these simple habits into your cooking routine, your cast iron skillet becomes the most reliable tool in your house.
Maintaining a clean, healthy home shouldn't be a chore that takes over your life. Whether it's managing your cookware or keeping your entire house in top shape, we’re here to help. If you want to learn more about our philosophy and the team behind the masks, visit our About Us page.
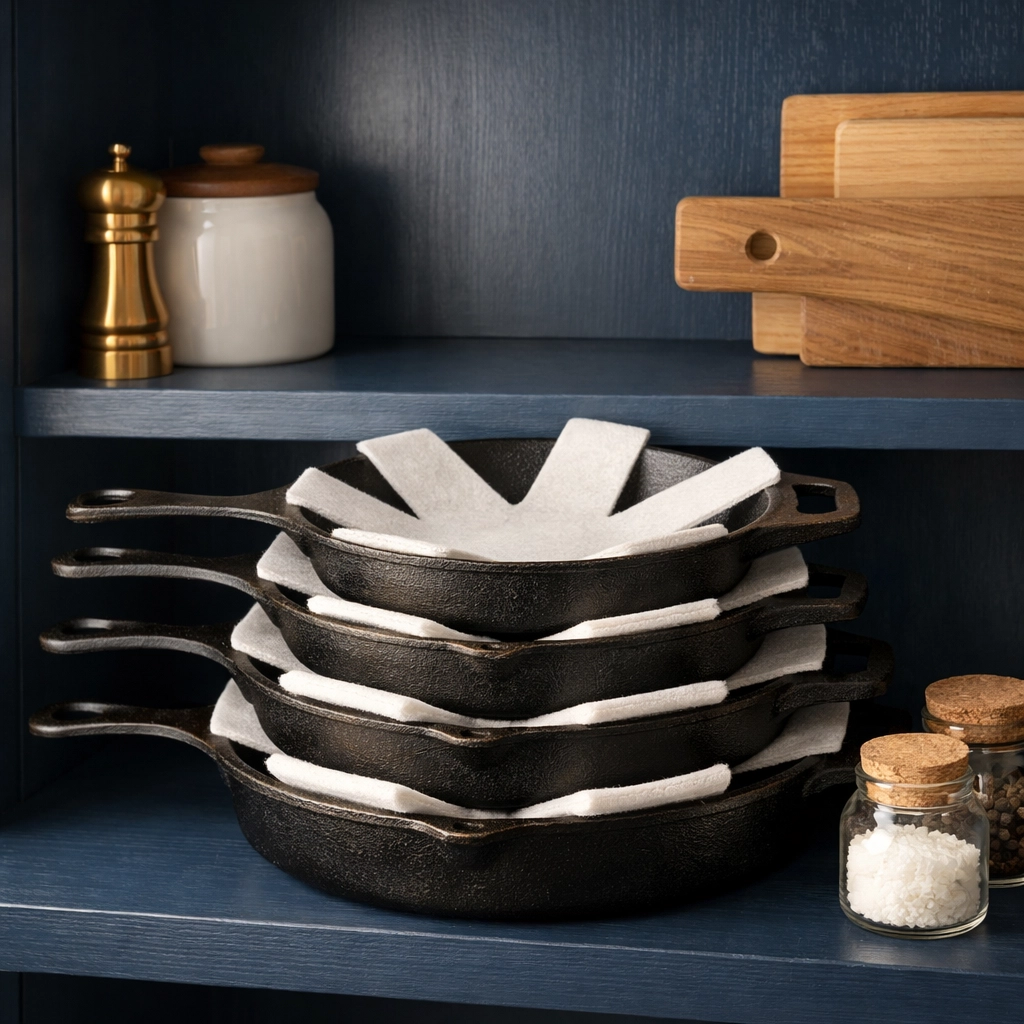
Final Ninja Hack: Storage
Store your cast iron in a dry place. If you stack your pans, place a paper towel or a thin cloth between them. This prevents the bottom of one pan from scratching the seasoning off the one underneath it, and the paper towel will absorb any stray moisture in the air.
For more household hacks and professional advice, keep an eye on our blog. We’re constantly updating it with new strategies to help you spend less time cleaning and more time enjoying your beautiful, clean home!
Ready to get cooking? Grab that skillet, give it a natural salt scrub, and get that seasoning shining. Your future self (and your dinner guests) will thank you! 🥷✨

